Getting Started in Black and White Photography
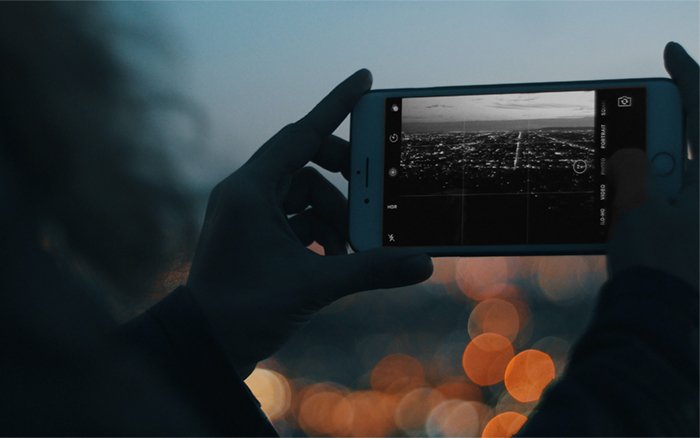
The easiest entry point for black and white photography is with your digital camera or smartphone. It is probably best to shoot with black and white in mind, but you can just as easily convert color images later. Let’s start our discussion by looking at the merits of both color and black and white.
Is Black and White Better Than Color?
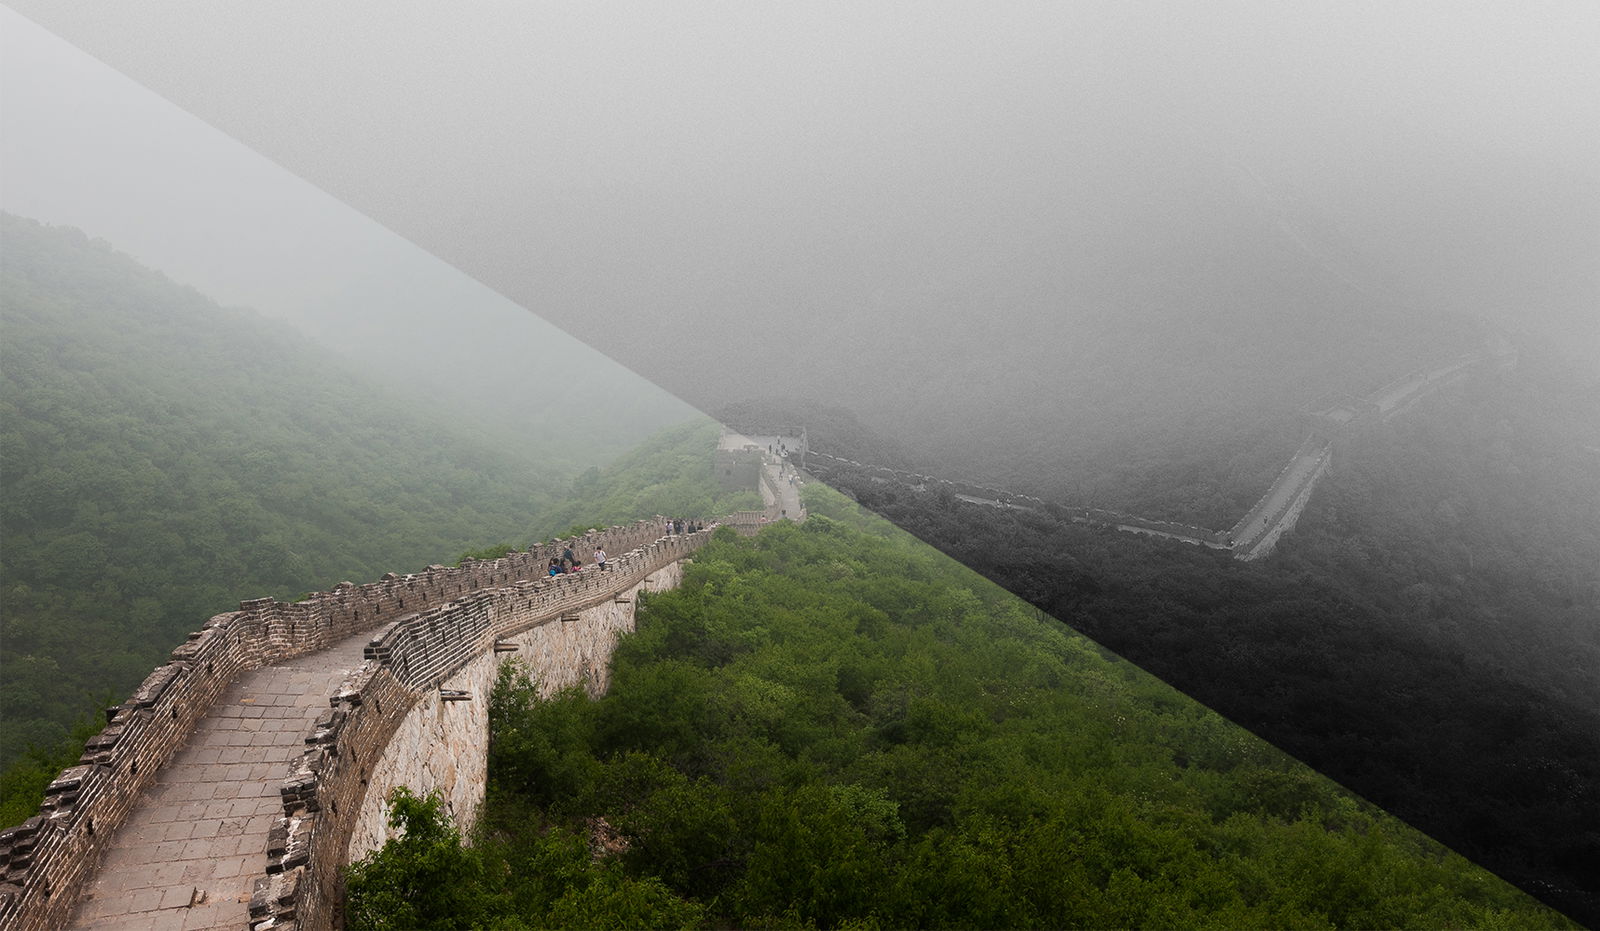
Black and white photography is a classic style that goes back to the roots of the medium. It’s a great way to learn composition and contrast. Color photography offers endless creative options but can be harder to master.
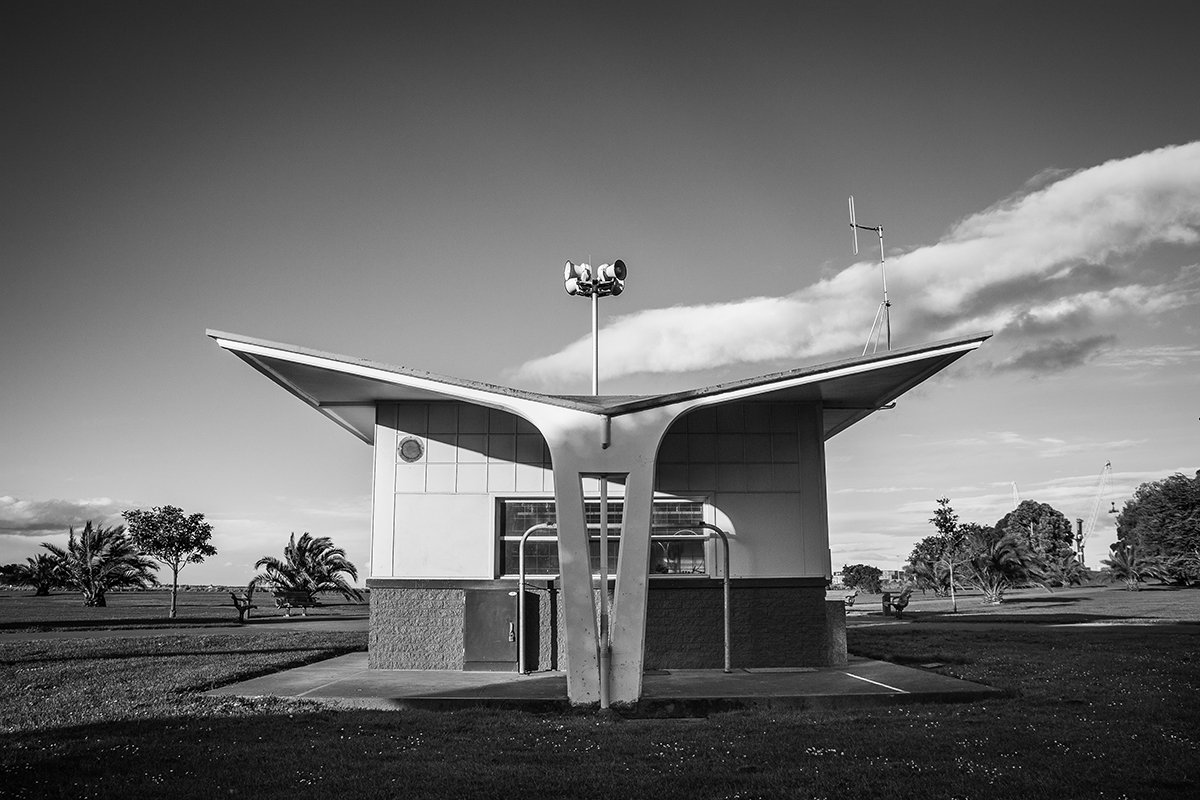
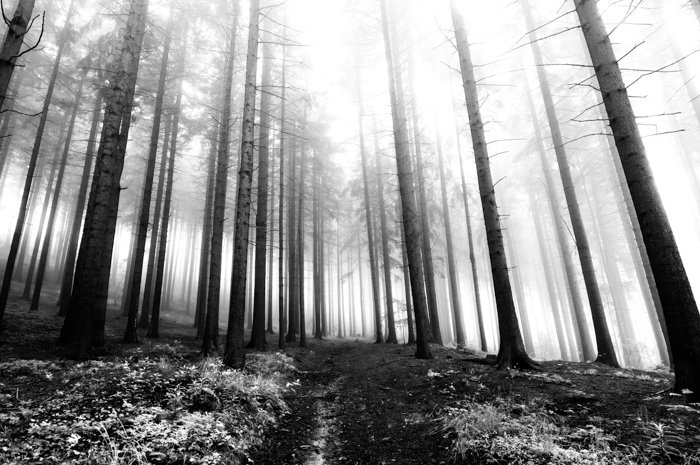
Black and white images are simple and direct. They let you focus on shapes, textures, and composition. Portraits, architecture, and street scenes often look stunning in black and white.
Color adds complexity to photos. There are many more variables to consider when shooting and editing. But color also lets you develop a signature style. To learn more about the differences between black and white vs color, check out our in-depth guide.
Film Vs Digital
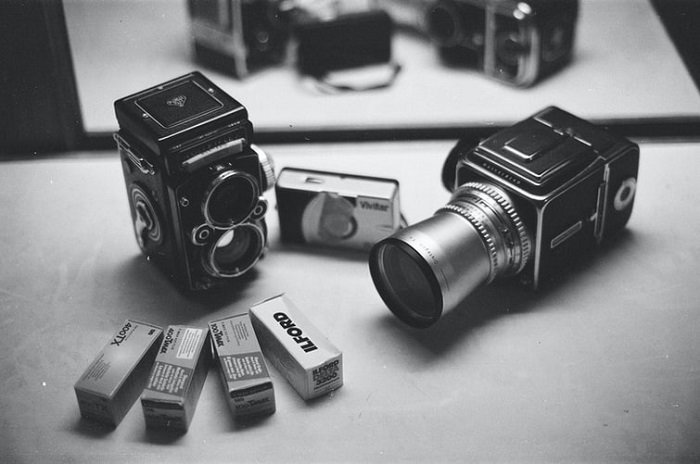
Black and white film photography is alive and well. Ilford, Foma, and Rollei are producing a variety of excellent film stocks. The best all-around option is Ilford HP5 Plus 400. It has a fine grain structure and works well in low light.
Fomapan 100 is a top choice for 100 ISO film. It delivers outstanding image quality with dramatic contrasts and deep blacks. Ilford FP4 Plus is the go-to for pro-grade results. The unusual 125 ISO gives you more options for smooth or textured finishes.
Finding the best black and white film depends on your needs. Low ISO films need more light but give you the highest quality. High ISO films work in darker conditions but have more grain. 400 ISO film is the most versatile, balancing quality and flexibility. You can read our in-depth guide to learn more about black and white film.
How to Improve Your Black and White Photography
There are plenty of things you can do to improve your black and white photography. One of the best things is to think in black and white. Try to picture the scene as it will appear. This can help you to avoid errors. I once took a picture of a black and white dog against a green hedge, which looked superb in the viewfinder. When I had the film developed, though, the dog was almost invisible against the background!
Camera Settings
You can set your camera to shoot in black and white. This lets you see a black and white preview on your camera’s display right after taking the photo. The best part is, you don’t lose any color data if you shoot in RAW + JPEG.
Shooting in black and white helps you focus more on composition. Look for leading lines, patterns, framing, and negative space. Critique your black and white photo in the camera display to learn during the photographic process.
Experiment with your camera’s black and white settings to find the look you like. Increase sharpness and contrast on flat, dull days. Use color filters to darken or lighten specific colors in your frame. Look for a balance of highlights, shadows and textures to give your black and white photos definition. It is worth taking some time to learn more about settings for black and white photography to improve your results.
Black and White Contrast
To create black and white photos with impact, you need contrast. Look for scenes with both dark and bright areas. Pay attention to shadows and highlights to separate your subject from the background.
You can also use color contrast to improve your black and white images. Colors convert to different shades of grey. Red, violet, and blue become dark tones while orange, yellow, and green turn into bright tones. Capture complementary colors in your frame for the best results.
Adobe Lightroom makes it easy to adjust how colors convert to black and white. Use the Black & White Mix sliders to make specific colors brighter or darker. This lets you fine-tune the contrast in your black and white images even after you take the shot.

Using Tone
Tone in photography refers to the difference between the lightest and darkest parts of an image. Adjusting the tonal range can help you tell stories through your photos.
In post-production, use tools like exposure, temperature, dehaze, and contrast sliders to improve tonal range. The tone curve tool is also useful for balancing tones and emphasizing highlights or shadows. Converting images to black and white is a great way to practice using tonal range.
Set the mood of your photos by considering factors like weather, light, and subject matter. Use cool tones to suggest isolation or tranquility, and warm tones for happiness and nostalgia. Make tonal changes gradually in post-production and keep the integrity of your photograph. There is a lot to learn more about tone in photography, but if you take the time, you’ll appreciate the results it gives you.
Advanced Black and White Photography
Here are some advanced black and white photo ideas to take your photography to the next level. Point your camera towards the light source to capture interesting shadows and silhouettes. This emphasizes important lines and shapes in your composition.
When editing, avoid over-processing which can be distracting. Aim for true blacks, whites and a full range of gray tones. Look for lines everywhere to draw the viewer’s eye around the frame.
Get creative by making abstract black and white nature photos. Use Photoshop to create unique compositions with repeated lines, shapes and mirror effects. Avoid banding in areas like skies by shooting in RAW, working in 16-bit mode and adding a small amount of noise. Most importantly, photograph stories that are meaningful to you. Black and white has the power to convey narratives with clarity and emotion that color often can’t. Take a look at our article to learn more black and white photo ideas.
Create Compelling Black and White Texture
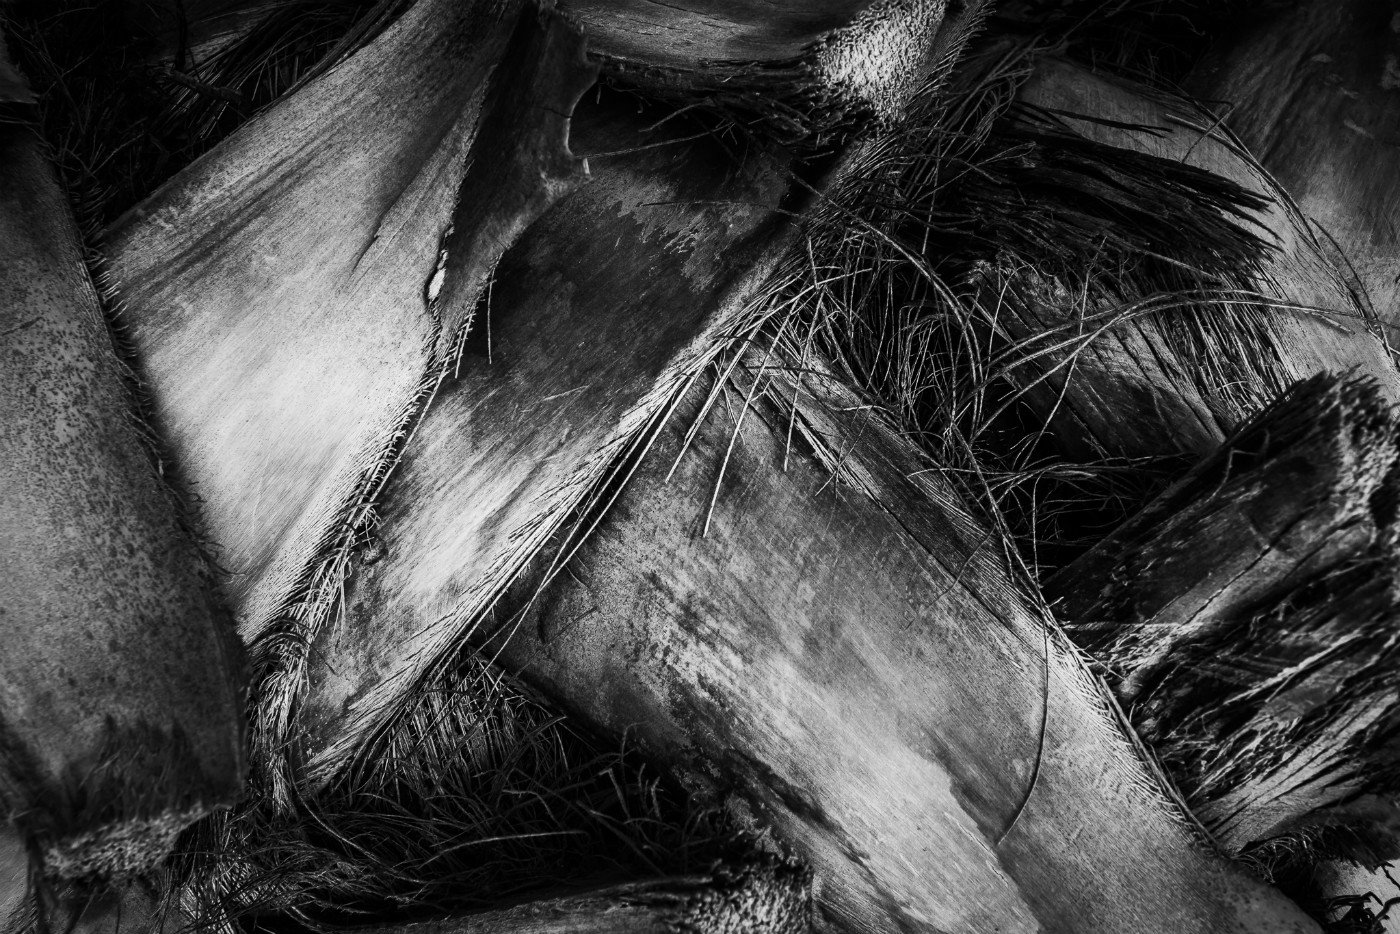
Black and white texture photography can produce stunning results. Textures add interest to photos by providing tonal variance and detail. Being able to see surface details enables the viewer to get a better feel for your subject and location.
To capture compelling black and white textures, avoid direct light and shoot during the golden hour when the sun is low in the sky. This will create tiny shadows that exaggerate the texture. Get close to your subject and don’t be afraid to let the texture dominate the image.
Use a depth of field that covers the entire texture without losing detail, typically around f/8. Keep in mind that colors with similar luminosity will convert to similar grayscale tones, resulting in a flat image. Experiment with these techniques to create striking black and white texture photos. We have put together this guide to black and white texture, so check it out!
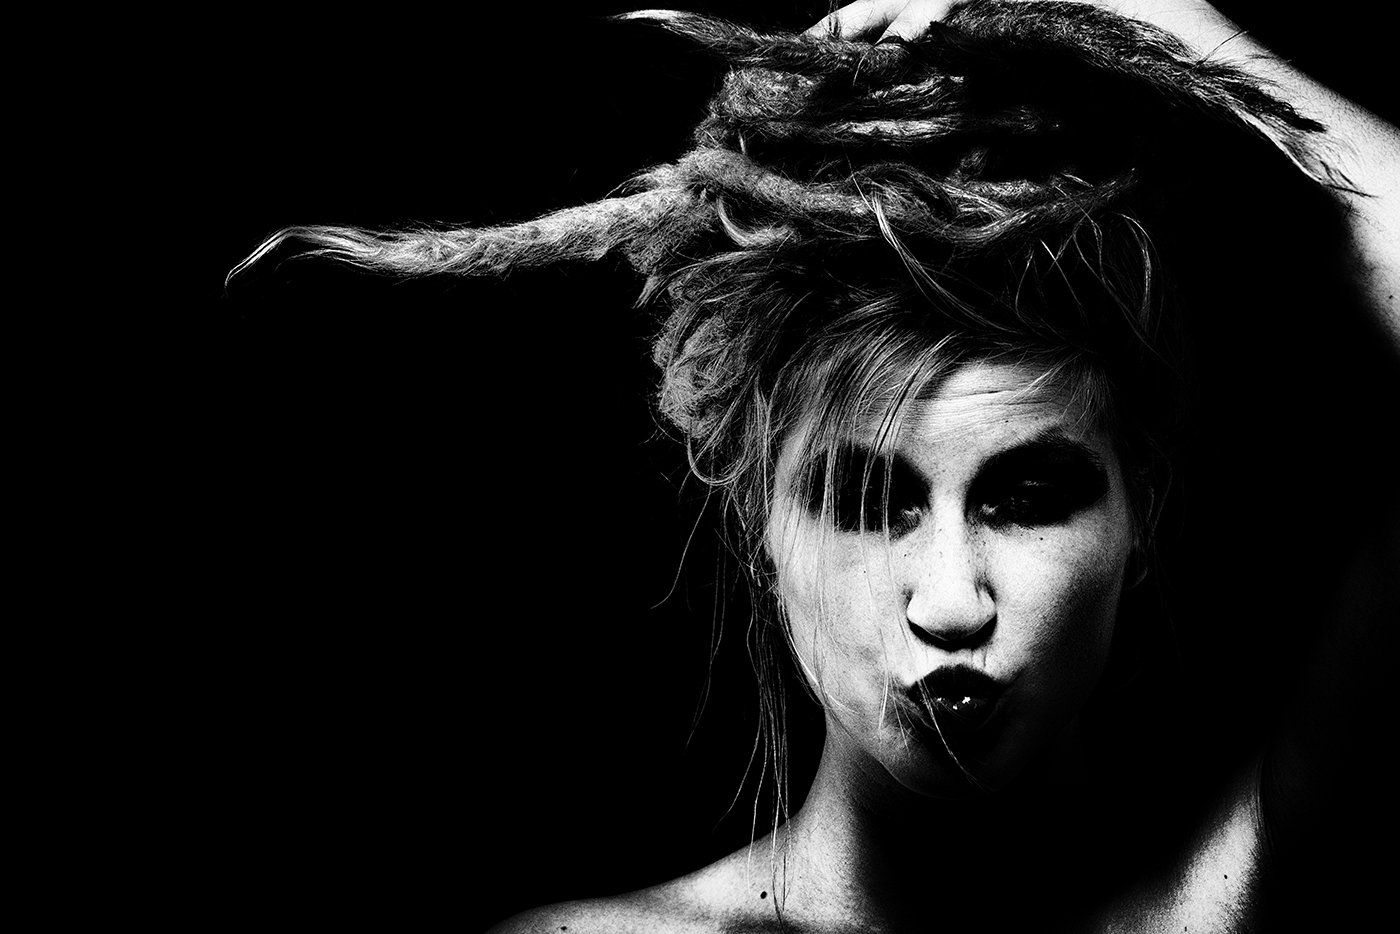
Low Key Black and White Photography
Low key black and white photography creates moody, atmospheric images. It’s often used for portraits and fine art nudes. The key is to control the light in your scene.
Use a single main light that’s much brighter than the ambient light. Position your light and subject to reveal more or less detail. Remember, your camera captures a narrower dynamic range than your eyes can see.
Expose for the highlights and let the shadows fall to black. Post-processing is essential to eliminate unwanted shadow detail and achieve the low key look. Low key black and white photography involves careful consideration of light, exposure, and editing to create.
How to Shoot Black and White Film
There’s no denying it, shooting black and white film is a bigger challenge than digital. First of all there is the wait before you see the result. And then there are the limitations of film, and the expense. However, it’s still hard to beat film as a medium, when done well.
Tips for Black and White Film
Shooting black and white film photography requires a different approach than digital or color film. The dynamic range is more limited, so you need to carefully consider the lighting and composition before taking the shot. This can be used to your advantage, creating dramatic images with high contrast and emphasised details.
Black and white film also renders skin tones beautifully, with the natural grain adding texture and the lack of color emphasising the skin’s tone. However, finding places to develop black and white film is becoming increasingly difficult and expensive.
If you want to learn more about the unique challenges and rewards of black and white film photography, takes look at our guide.
Using Filters
Black and white filters can have a big impact on your photos. They affect contrast, which is important in black and white photography. Different color filters will change how colors are shown in the final black and white image.
Red filters lighten reds and pinks while darkening greens and blues. They’re great for adding mood to landscape scenes with foliage. Orange filters add contrast and depth. Yellow filters darken blue skies to make clouds stand out. Green filters lighten foliage for pleasing results in landscape shots.
Using the right black and white filter can take your photography to the next level. Experiment with different options to find what works best for each scene. To dive deeper into black and white filters, check out our detailed guide.
Black and White Photography on Your Phone
I have probably taken some of the best black and white photos of my life on my iPhone. So if you have a fairly modern phone, there’s no excuse for not getting great B&W images.
Phone Apps for Black and White Photography
The best apps for black and white photos can transform your B&W images. Some apps turn your phone into a black and white camera, while others let you convert color photos to monochrome.
Camera1 is a favorite black and white photography app that gives you manual control over exposure and focus. You can shoot in RAW formats and apply color filters to see their effect in real-time.
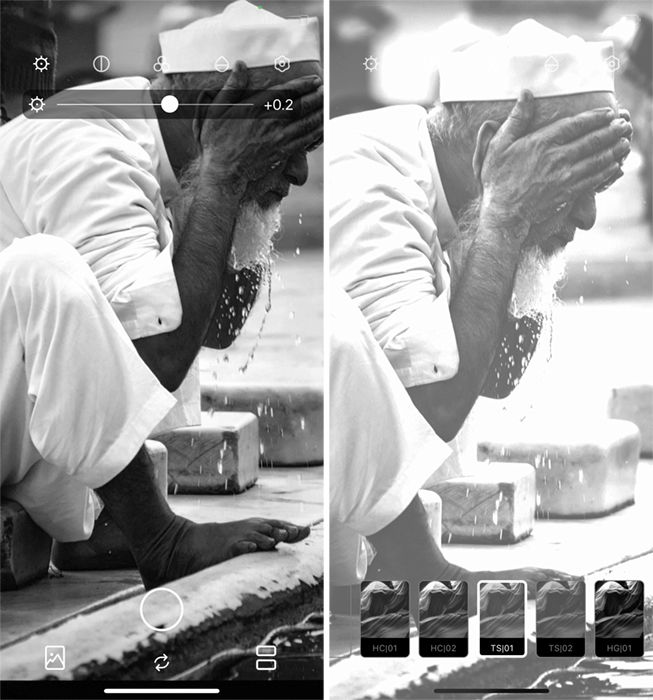
Snapseed is a popular photo editing app and one of the best for converting color images to black and white. It offers a wide range of editing tools, including filters like Vintage, Retrolux, Noir, and Grainy Film to give your images an old-fashioned look. Apps for black and white photos can help you create stunning monochrome images on your smartphone.
Black and White for Different Photography Niches
I love black and white, and I think there is a place for it in almost every photography niche. But there are certain fields where it excels, and they are well worth your attention.
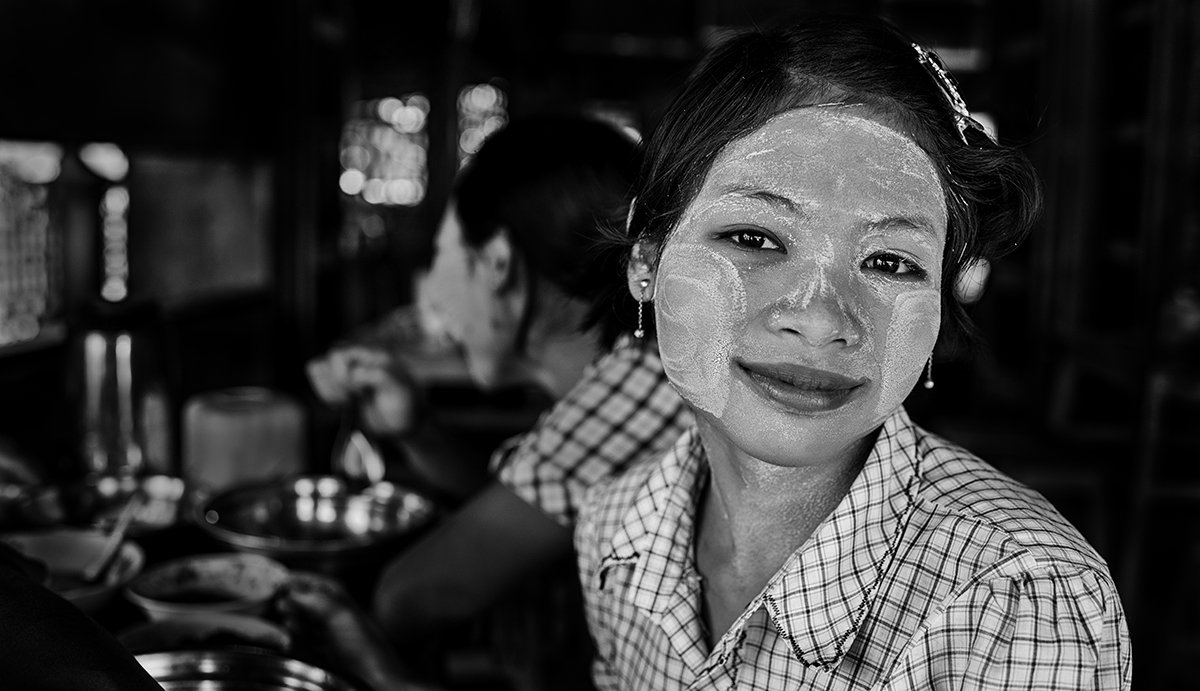
Portraits
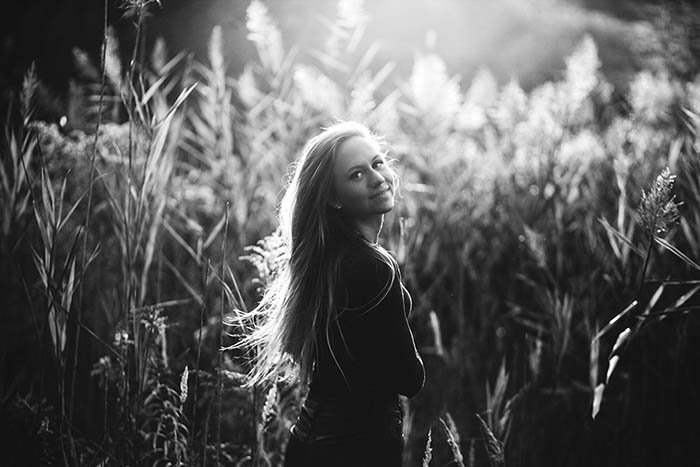
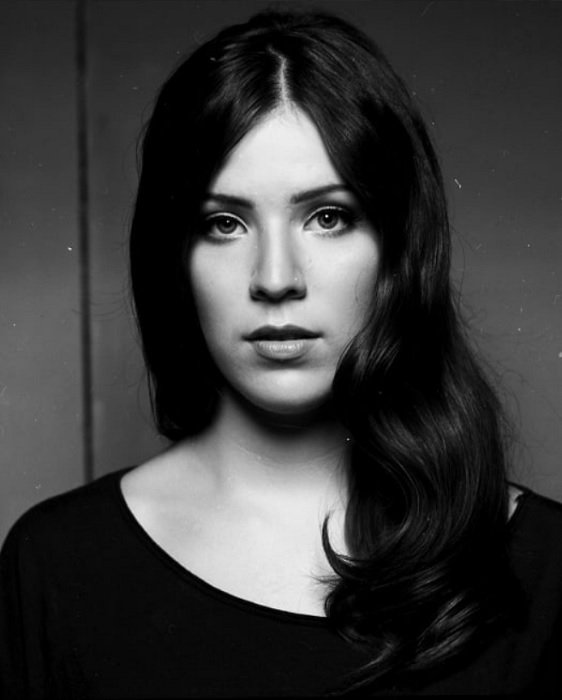
Black and white portrait photography is a timeless art form that can create striking and emotive images. By removing color, the photographer can focus on the subject’s expressions, textures, and the interplay of light and shadow. This creates a raw and honest perspective that draws the viewer into the photograph.
To capture the best black and white portraits, it’s important to plan your shoot carefully. Consider the lighting, location, and your model’s posing to tell the story you want to convey. Experiment with different apertures and ISOs to create separation between your subject and the background, and to add dramatic grain to your images.
When editing your black and white portraits, you can use tools like filters, curves, and clarity to deepen shadows, brighten highlights, and add contrast. Subtle grain or dust textures can also enhance the film-like quality of your photographs. With practice and experimentation, you can learn to master the art of black and white portrait photography and create stunning, emotive images.
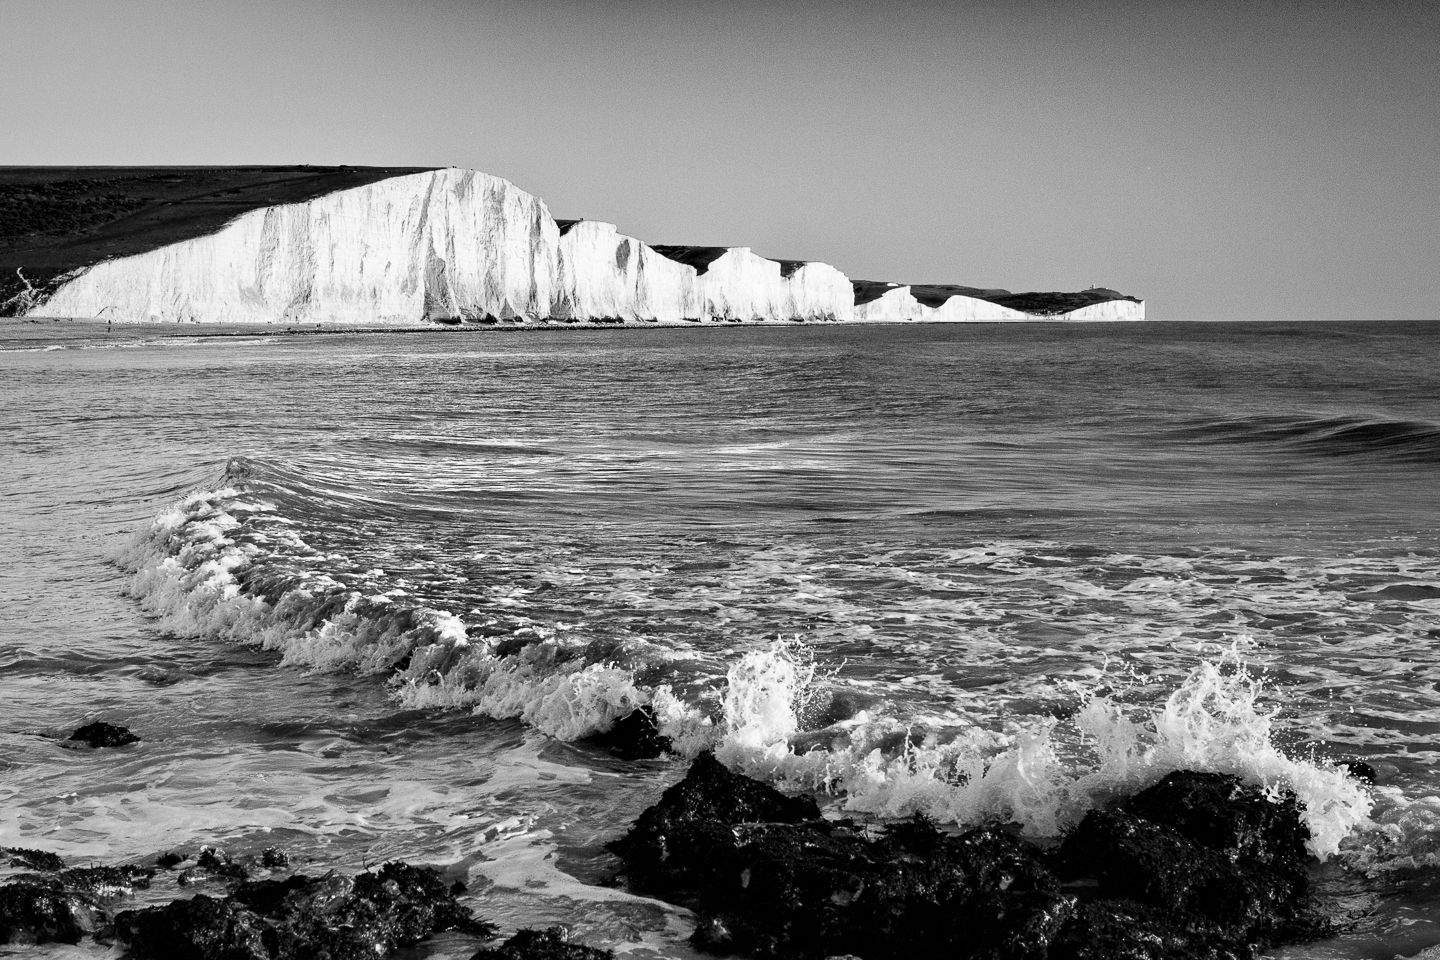
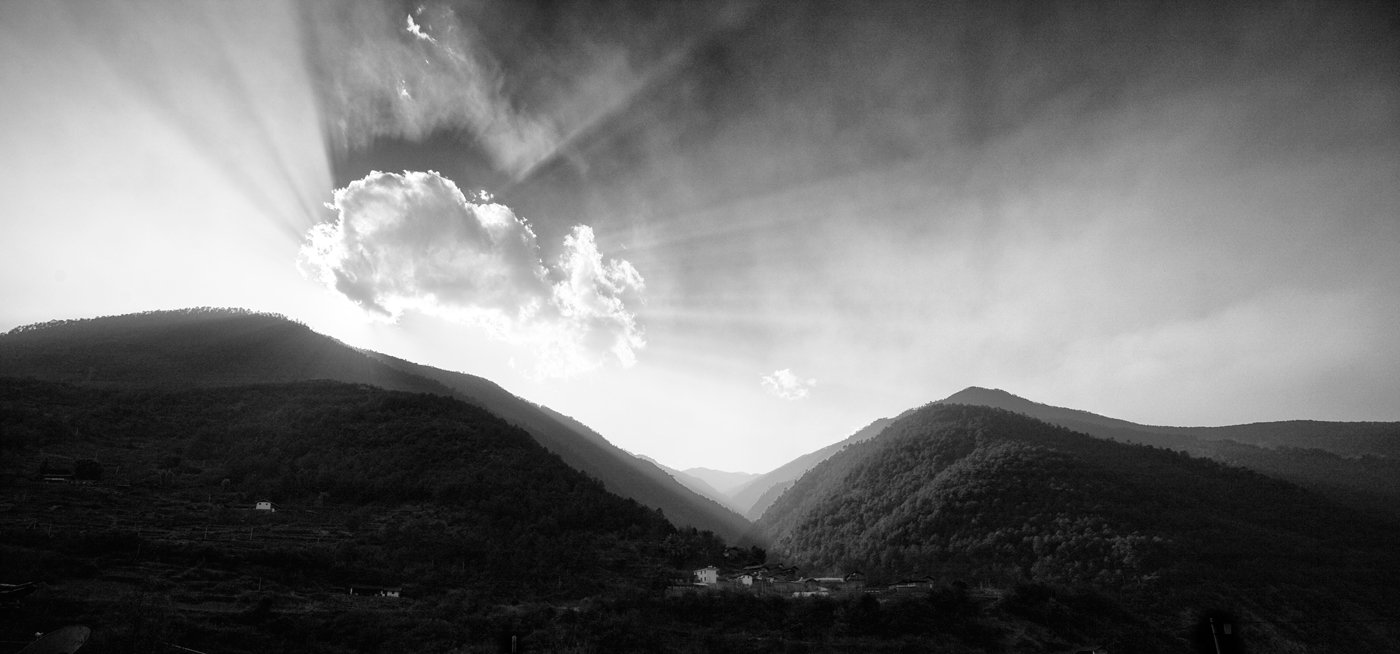
Landscape
We think of the beauty of nature as being a colourful thing. And it is. But black and white landscape photography has a timeless quality that can produce stunning images. To capture the best shots, look for scenes with strong contrast and interesting textures. Composition is key, so use leading lines, patterns, and natural framing to create a balanced image.
Filters are essential for black and white landscape photography. A graduated neutral density filter will balance the exposure between a bright sky and dark ground, while non-graduated filters can smooth out moving elements like water.
Shoot in RAW and convert to black and white in post-processing for the most control over your final image. Experiment with different apertures and shutter speeds to achieve your desired look, but keep the ISO low for the best quality. A sturdy tripod, wide-angle lens, and a backpack to carry your gear are must-haves for any black and white landscape photographer. To learn more about creating black and white landscape photography, check out our in-depth guide.
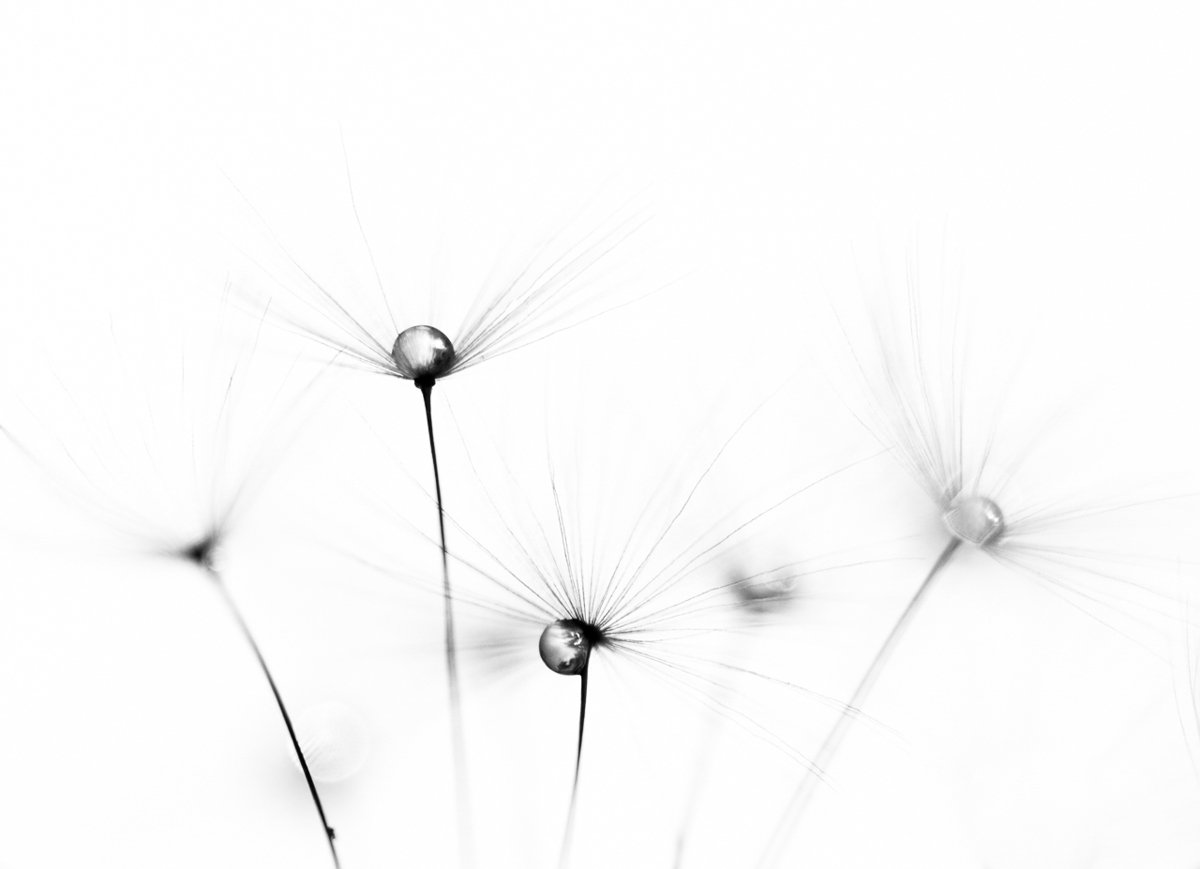
Macro Photography
Black and white macro photography is all about contrast. Look for scenes with strong backlighting during the golden hours or harsh midday sun. Shoot dark subjects against light backgrounds or vice versa to make your subject stand out.
Keep your compositions simple with uncluttered backgrounds and a single point of focus. Zoom in on small, isolated details like a flower petal or water droplet. Textures from wrinkles or patterns can add visual interest to black and white shots.
Surround your subject with empty negative space to draw the viewer’s eye. Finally, improve the contrast in post-processing by setting true black and white points. With these tips, you can capture stunning black and white macro photos. You will find more tips for black and white macro photography in our in-depth guide.
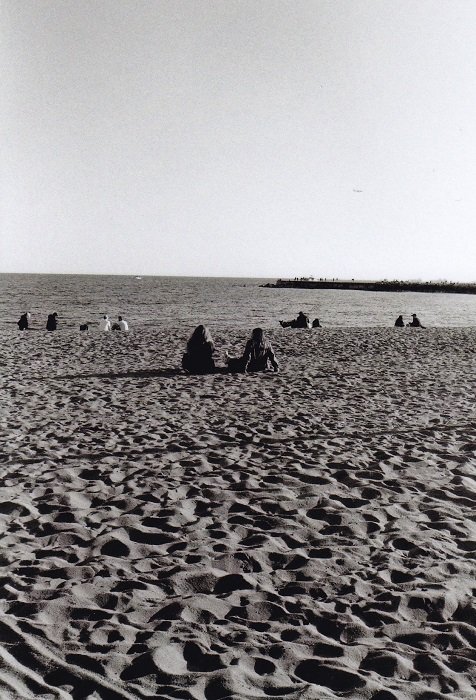
Street Photography
When it comes to black and white vs color street photography, there’s no secret rule book. The choice depends on your own experiences, culture, and background. However, certain conditions may influence your decision to shoot in black and white or color.
Black and white street photography is great for conveying emotion and personality. Without the distraction of color, facial expressions and body language translate beautifully and tell a clearer story. You can also use black and white to emphasize shapes, lines, and patterns in architecture and structures.
On the other hand, color is perfect for capturing bright sunshiny days, nature, and unexpected pops of color in clothing, vehicles, or signage. Street lights and lit shop windows are also great for showing off color in night time street photography. If you’d like to learn more about black and white street photography, we have a detailed guide that covers this topic in depth.
Wedding Photography
Black and white wedding photography can add emotion and elegance to your images. By removing color, the focus is drawn to the interaction and feeling in the photo. Distractions like busy backgrounds or clashing colors are also minimized.
High contrast shots often look great in black and white. You can use the editing process to control how colors convert to shades of gray, letting you fine-tune the contrast. This is also helpful for dealing with difficult lighting situations.
While shooting, look for scenes that play with light and shadow rather than relying on color. But you don’t have to choose between black and white and color. Shoot in RAW and you can always have both versions. Timeless black and white combined with vibrant color photos gives you the best of both worlds. Find out more about black and white wedding photography in our guide.
Travel Photography
Black and white travel photography can be a powerful way to capture the essence of a place. By eliminating color, you can focus on the light, shapes, and textures that make a scene unique.
Pay attention to contrast and tone in your black and white images. Look for strong shadows and highlights that create depth and drama. Textures can also be emphasized in black and white, so keep an eye out for interesting patterns and surfaces.
Most importantly, use black and white photography to connect with your subject and tell a story. Whether it’s a portrait of a local person or a landscape that captures the mood of a place, aim to use black and white travel photography to convey emotion and meaning in your images.
Still Life Photography
Black and white still life photography is a beautiful way to capture the simplicity of inanimate objects. By removing color, you can focus on the textures, shapes, and lines of your subjects. Low key lighting with natural light from a window or a soft sidelight works well to bring out these details.
Even the most basic objects can become works of art in black and white. Experiment with items like flowers, books, food, or antique objects to tell a story without any people or movement in the frame. Keep your composition simple to avoid distracting from the key elements.
Editing is an important final step in black and white still life photography. Use the HSL color sliders in Lightroom or Camera Raw to fine-tune the blacks, whites, and greys in your image. Adjusting these sliders can help you define textures, change the focal point, or alter the mood of your photo.

Professional Black and White Headshots
Black and white headshots are common in acting and modeling portfolios. They can be a fun way to get creative with your photography. Shooting in black and white draws attention to the form and structure of the face, letting you see details more clearly.
To take great black and white headshots, include texture in the photo. Use things like hair, clothing, and interesting backgrounds to add contrast. Carefully control the lighting to highlight texture and hide unsightly features.
Shoot in color and RAW, then convert to black and white in post-production. This gives you more options for adjusting the final image. Boost contrast and make other creative edits to get the perfect black and white headshots.
How to Edit Your Black and White Photographs
Editing digital black and white photos is so easy compared with all the skill and time needed for perfect darkroom work. So there’s no excuse for your work not to be exceptional!
Making Your Image Black and White
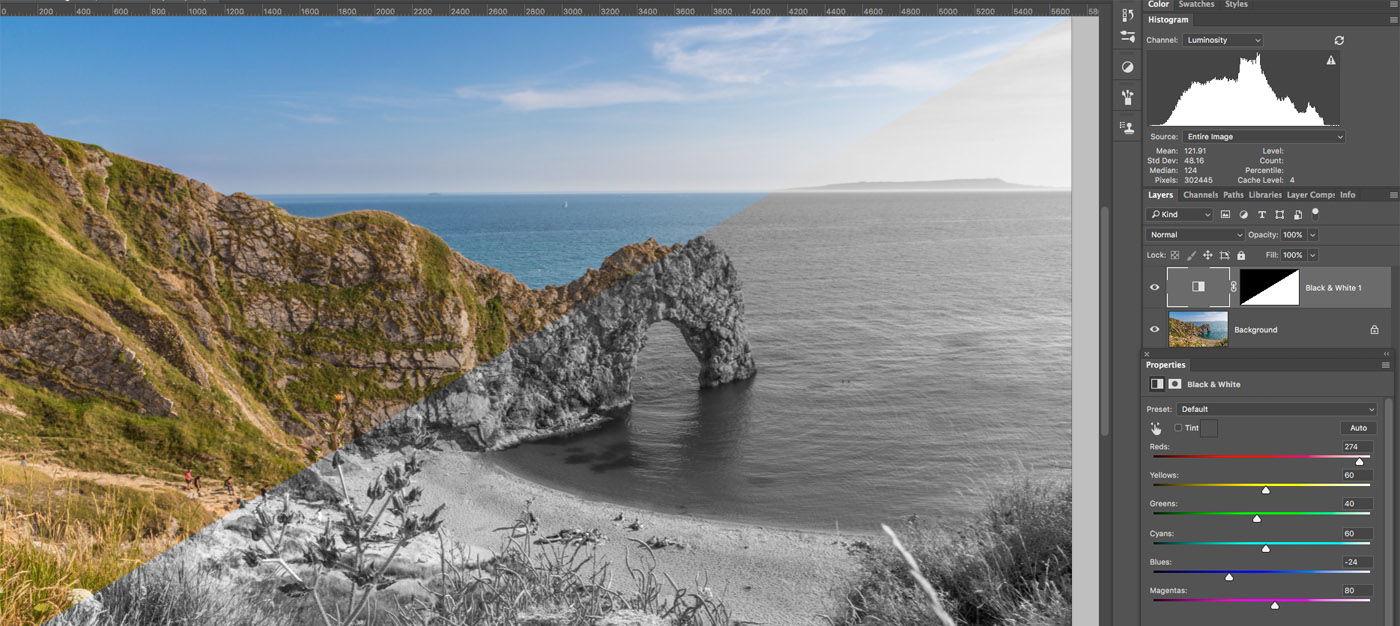
Converting an image to black and white is easy in both Photoshop and Lightroom. In Lightroom, go to Settings > Convert to Black and White or choose the Black & White treatment option in the Develop Module’s Basic panel. This switches your photo’s profile to Adobe Monochrome.
In Photoshop, you can desaturate the image by going to Image > Adjustments > Desaturate. Another option is to change the image mode to Grayscale under Image > Mode > Grayscale. Both of these methods are destructive, so it’s best to work on a copy of your image.
For more control over the black and white conversion, use the B&W panel in Lightroom or add a Black & White adjustment layer in Photoshop. These tools let you adjust individual color channels to selectively lighten or darken certain colors in your monochrome image. This adds richness and visual separation to your photo. To make an image black and white in Photoshop, the adjustment layer method is non-destructive and provides the most flexibility.
Editing in Lightroom
Editing black and white photos in Lightroom gives you a lot of control over the final look. Start by setting your camera to monochrome mode to better visualize black and white scenes. In Lightroom, click the ‘B&W’ button or hit ‘V’ to convert your color photo to black and white.
Use the color sliders in the ‘B&W’ panel to adjust how bright each color appears in the final image. Drag the Targeted Adjustment Tool over colors to quickly change their brightness. Aim for good contrast and a full range of tones from black to white.
Lightroom presets can speed up your black and white editing workflow. Try the built-in presets or create your own black and white presets in Lightroom to get a unique look with one click.
Editing in Photoshop
Photoshop provides several ways to convert a color image to black and white. The process involves calculating a single value from the red, green, and blue components of each pixel, which is then applied to all color channels to create shades of gray.
One quick method is to switch to Grayscale mode, which removes color information and stores only brightness values in a single channel. This conversion models how the human eye perceives brightness, with greater sensitivity to green, less to red, and least to blue. While destructive, it can yield good results for images with strong composition and well-differentiated colors.
For more control, use Photoshop’s Black & White adjustment layer. This non-destructive method offers sliders to adjust the contribution of specific color ranges to the final grayscale image. Experiment with the sliders while monitoring the histogram to avoid clipping, and save custom combinations as presets for future use. You can also add a tint to warm up the final print. To edit black and white photos with even greater precision, open a raw file in Adobe Camera Raw and use the HSL/Grayscale controls to target eight color ranges for your custom grayscale mix.
Editing Fine Art Photography
Here are 6 tips to get you started in editing black and white fine art photography:
Use adjustment layers to convert your image to black and white. This lets you adjust individual color values for a more precise conversion.
Work with layers and masks in Photoshop. You can add effects and healing on separate layers, masking out areas you don’t want affected.
Add depth and contrast with Levels adjustment layers. Apply these to individual layers for targeted adjustments.
Further adjust tonal balance using Curves, which correlates to the histogram. Create reference points on the curve and drag them to change tonal values.
Pay attention to how colors like blues and magentas transform when converting flowers to black and white. Focus on the shapes and tonal transitions.
Decide the emotion you want to convey in black and white portraits. Increase contrast and focus on the face, leaving the background blurry but visible. Black and white fine art photography is a powerful way to create striking, emotive images.

Some Inspiration to Help You Go Further in Your Black and White Photography
Black and White photography has at least two advantages. First of all it has been around so long, that there is an unmeasurable amount of previous work to insure you. And second, it has attracted the greatest photographers throughout the history of the art. So there is no shortage of excellence for you to draw motivation from.
Inspirational Photographers
Black and white photography is a timeless art form that continues to inspire photographers around the world. From the old masters to contemporary artists, there are many talented black and white photographers to follow for inspiration. Tim Booth’s versatile work explores shutter speed to evoke emotions, while his approach to light on the human body is stunning.
Julia Anna Gospodarou combines her skills as an architect and fine art photographer to create breathtaking images of grand buildings. Doc Ross’ photographs of people and buildings in Christchurch, New Zealand provide a unique archive of the city before and after devastating earthquakes. Adela Filip’s otherworldly landscapes and portraits celebrate textures, tones, shadows, and light in nature.
For more inspiration from talented black and white photographers, explore the works of black and white photographers like Nolan Ryan Trowe, Koen Jacobs, Carina Hedlund, Nicolas Decoopman, and Noriaki Kimura. Each artist brings a unique perspective and style to the monochrome medium, from storytelling and street photography to quiet, meditative landscapes.
Black and White Photography in Quotes
Black and white photography is a timeless art form that can create stunning images. But it takes skill and practice to master. These quotes from famous photographers provide insight and inspiration for anyone looking to improve their black and white photography.
Ansel Adams notes that visualization must be modified when shooting in black and white versus color. Mary Ellen Mark connects more with black and white images, seeing more in them and enjoying the abstraction. And Ted Grant suggests that black and white photography captures the soul of the subject, rather than just their clothes.
Black and white photography strips away distractions, allowing the photographer to focus on texture, contrast, and emotion. As you explore this classic medium, let these words of wisdom guide and inspire you. If you’d like to dive deeper into black and white photography quotes, there are even more gems to be found.
We’ll take you through all the best black and white film rolls available. And we’ll start by saying our top choice is the Ilford HP5 Plus. It’s the most versatile black and white film on the market. It has a 400 ISO and a fine grain structure. You can use it for everything from portraits to street photography.
What Is the Best Black And White Film?
Film photography is experiencing another boom period. Many photographers are putting down their digital cameras and picking up analog cameras instead.
Some young photographers avoid digital altogether. They are going straight for film cameras.
We’re far beyond questioning, “Is film dead?” We know film photography is alive and kicking. And there’s no better example of this than the black and white film market.
While color films remain limited, the black and white market is full of variety. Film photographers have plenty of stocks to choose from.
But before you buy, there are a few things to consider. First, you need to think about the size of the film. Do you need 35mm or 120mm film for your camera?
ISO is another important consideration. Every film has a set ISO. So you need to choose the one that’s right for your photography. You also have things like grain structure and flexibility.
Skip to the FAQ section to learn more about black and white film.
Here’s a full rundown of the best back and white film stocks. We’ll take a more detailed look at each film in the following section. And we’ve included examples to give you a better idea of what to expect from each roll.
- Superb contrast and fine grain
- Wide exposure latitude
- Resists fading and discoloration
- Versatile for use in any situation
- Produces sharp, grain-free images
- Wide range of tonal values
- Deep tones and contrasts
- Suitable for both amateur and professional use
- Superfine grain structure
- High sharpness and accuracy
- Wide exposure latitude
- Great tonal range and contrast
- Outstanding fine grain
- Exceptional sharpness
- Accurate detail reproduction
- High-quality, professional grade film
- Professional-grade black and white film
- Wide range of tones and sharp details
- Excellent for low-light photography
- Compatible with many camera types
- High resolution and sharp images
- Wide tonal range and fine grain
- High sensitivity and quick response times
- Versatile and great for all types of photography
- Crisp black and white photos
- ISO 400 for low-light shots
- Versatile, flexible, and forgiving
- Great for artistic photography
- High sensitivity and wide exposure latitude
- Deep blacks, rich tones and fine grain
- Excellent for capturing fast action
- Great for low-light photography
- High-quality black and white film
- Fine grain structure
- High sharpness and contrast
- Low 80 ISO gives you deep, silky blacks

- High-quality film for black and white photography
- Very fine grain for detailed images
- Wide exposure latitude for dynamic range
- Fast ISO 400 speed for indoor and outdoor shooting
- Excellent value for a low ISO film
- Extremely fine detail and clarity
- Rich tones and high contrasts
- Great for studio photography
- Visible grain for a retro look
- Wide exposure latitude
- Vibrant details and contrast
- Ideal for scanning and enlargement
- Fine grain film for sharpness
- Wide exposure latitude
- Versatile ISO 400 speed
- Consistent results from roll to roll
- High-quality, fine-grained results
- Versatile exposure latitude
- Wide tonal range
- Versatile and easy to use
- Fine grain for sharpness and clarity
- Wide exposure latitude for optimal performance
- High speed for maximum flexibility
- Ideal for low light and action photography
15 Best Black And White Film
The black and white film scene has never been more vibrant. Today’s film photographers have plenty of stocks to choose from.
You have different film rolls with a wide range of ISOs. Plus, several companies are producing reliable rolls of 35mm and 120mm film. We’ve included stocks from Ilford, Foma, and Rollei.
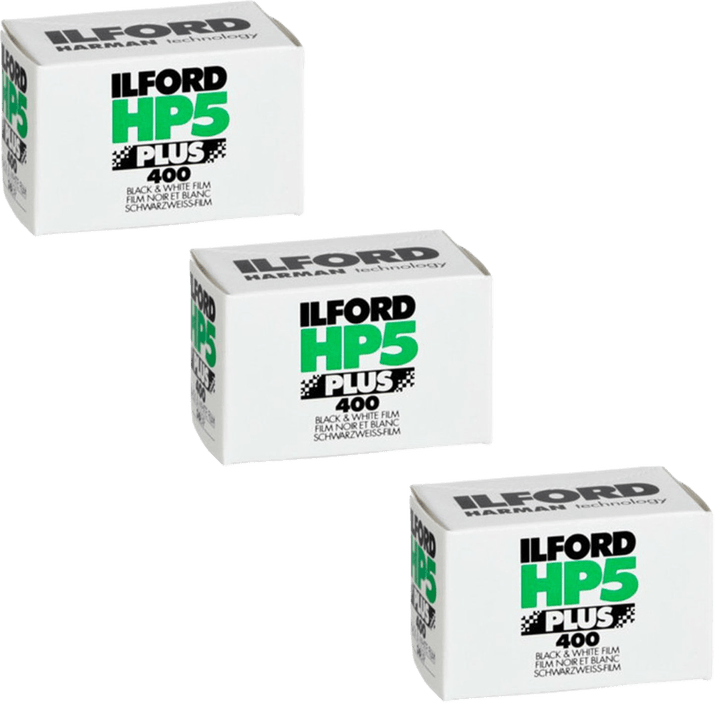
1. Ilford HP5 Plus Black and White Film
| Brand |
Brand
Ilford
|
| ISO |
ISO
400
|
| Number of Exposures |
Number of Exposures
36
|
| Available Formats |
Available Formats
35mm and 120mm, and large format
|
| Other Key Features |
Other Key Features
Fine grain structure, medium contrast, excellent sharpness
|
| Best For |
Best For
Everything from portraits to press photography
|
The Ilford HP5 Plus 400 is our top black and white film pick. Ilford is the master of black and white film. And their HP5 Plus is the most popular roll with film photographers.
The HP5 400 is the best all-around roll of film with incredible versatility. With an ISO of 400 and a fine grain structure, it works well in low-light conditions.
It gives you consistent results even when lighting conditions are inconsistent. The results outdoors are fabulous, with deep contrasts in natural light.
You can also use HP5 for indoor photography. The detail and brightness give you top results when shooting indoor events. And the higher light sensitivity allows you to shoot concert photography.
HP5 Plus 400 is the ultimate all-around black and white film stock. And you can also buy Ilford HP5 Plus in 120mm for medium-format cameras.
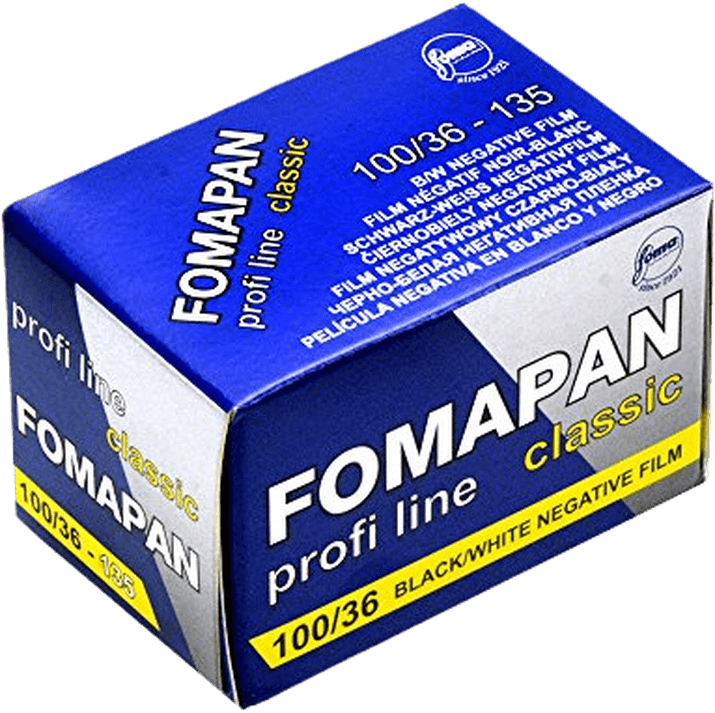
2. Fomapan 100 ISO Black & White
| Brand |
Brand
Foma
|
| ISO |
ISO
100
|
| Number of Exposures |
Number of Exposures
24 or 36
|
| Available Formats |
Available Formats
35mm and 120mm
|
| Other Key Features |
Other Key Features
Flexible, high contrast, deep shades
|
| Best For |
Best For
Portrait, landscape, and fine art photography
|
Fomapan 100 has been a revelation to me as a photographer. It’s one of the cheapest 100 ISO stocks available. And this led me to believe it was an inferior film.
How wrong I was. When I tried Fomapan 100 for the first time, I was blown away by the results. This film gives you glorious black and white images.
The 100 ISO gives you outstanding image quality with a smooth finish. The contrasts are dramatic without being overpowering. And you get a vast array of monochrome shades. The blacks are powerful, but they don’t consume your image.
You do need a decent amount of light. But it is more forgiving than other 100 ISO films.
You still get deep contrasts and rich shades. But you still get great results if the exposure isn’t exactly right. You still get details in light and dark areas.
Fomapan has kept its prices low. That means Fomapan 100 gives you excellent value for your money. It’s a brilliant film stock.
You can use it for stunning portraits and fine art photography. And it’s one of the best film stocks for landscape photography. Fomapan 100 is also available in 120 medium-format film.
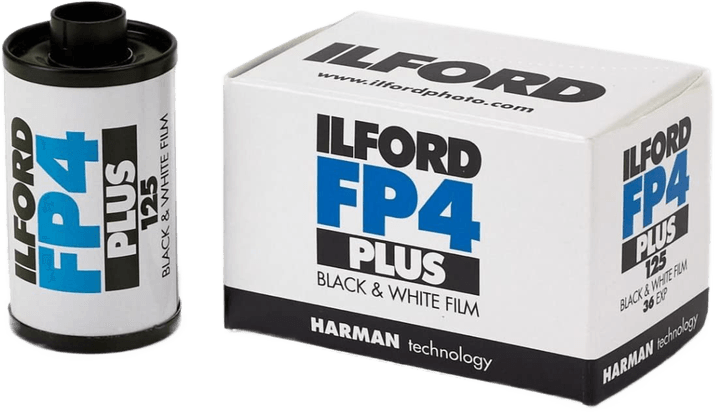
3. Ilford FP4 Plus Black & White
| Brand |
Brand
Ilford
|
| ISO |
ISO
125
|
| Number of Exposures |
Number of Exposures
36
|
| Available Formats |
Available Formats
35mm and 120mm, and large formats
|
| Other Key Features |
Other Key Features
Deep tones, wide exposure latitude
|
| Best For |
Best For
Portraits, fine art, and landscapes
|
Ilford FP4 Plus is the black and white film you need for professional results. The low ISO level gives you outstanding quality and detail.
It’s not as versatile as Ilford HP5. But it gives you beautiful results when you know how to get the best out of it.
It has a 125 ISO, which is unusual. Most film cameras don’t have a 125 ISO setting. While that might seem like a problem, it actually gives you more options.
You can set the camera to 100 ISO, and the results will be rich with a smooth finish. You can also set the camera to 200 ISO. This gives you a deeper finish with more greys and texture.
The strong contrasts make it perfect for dramatic black and white portraits. You can shoot outside on bright, sunny days. And it’s a fantastic film roll for studio photography.
Ilford also has stable prices. So you always get good value with its films. FP4 Plus is a film black and white photographers have to try. It’s also available in 120 medium-format film and large-format film.
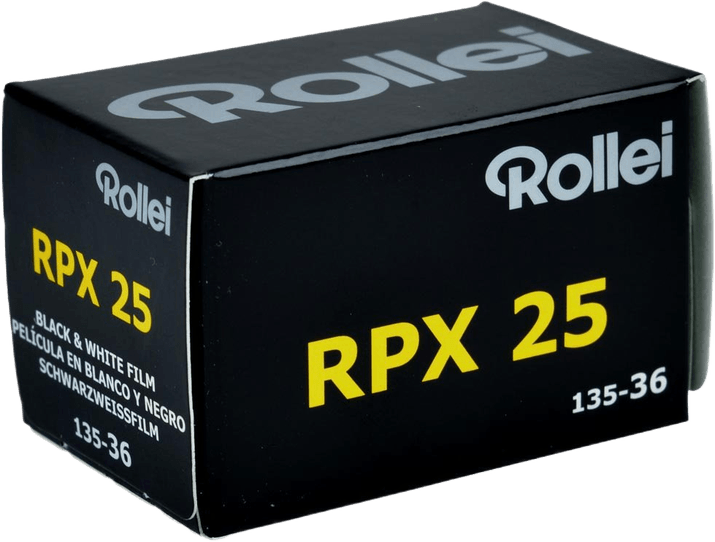
4. Rollei RPX 25
| Brand |
Brand
Rollei
|
| ISO |
ISO
25
|
| Number of Exposures |
Number of Exposures
36
|
| Available Formats |
Available Formats
35mm and 120mm
|
| Other Key Features |
Other Key Features
Pristine quality, no grain, rich tones
|
| Best For |
Best For
Portrait, landscape, product, and fine art photography
|
Rollei has been making black and white film for decades. They don’t get as much attention as Ilford or Kodak. But serious film photographers are still passionate about Rollei film stocks.
The Rollei RPX 25 is one of the best low-speed options you can buy. It’s a panchromatic film with an ISO of just 25. Give it enough light, and you will have photos of exquisite quality.
The detail is intense. The darker shades are rich and smooth. And the finish has no grain, giving you a pristine texture.
It isn’t exactly versatile. But it’s great for fine art photography, portraits, or landscapes. And you might need to use a fast lens and tripod to get the best results.
The Rollei RPX 25 is a high-quality film for serious analog enthusiasts. It is also available as 120-format film.
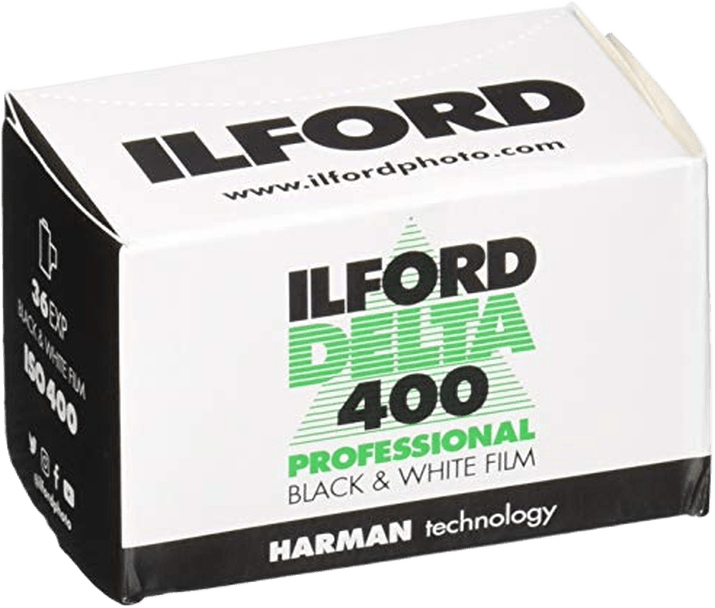
5. Ilford Delta 400
| Brand |
Brand
Ilford
|
| ISO |
ISO
400
|
| Number of Exposures |
Number of Exposures
36
|
| Available Formats |
Available Formats
35mm and 120mm
|
| Other Key Features |
Other Key Features
Wide tonal range, soft contrasts, sharp detail
|
| Best For |
Best For
Street, travel, portrait, and fashion photography
|
Delta 400 is another 400 ISO film from Ilford. It has a wider tonal range than the HP5 Plus. And it gives you a wider variety of grey tones throughout the grey scale.
There’s a lower contrast level, so the images have a softer impact. Some photographers prefer this as it allows for more detailed images.
It has a fine grain structure for a 400 ISO film. This gives you a softer texture with low levels of visible fine rain. And the fast ISO speed and detailed results make it one of the most versatile film stocks.
It’s popular with everyone from travel photographers to portrait photographers. Film shooters should always have a roll of Ilford Delta 400 in their camera backpacks. It’s also available as 120 medium-format film.
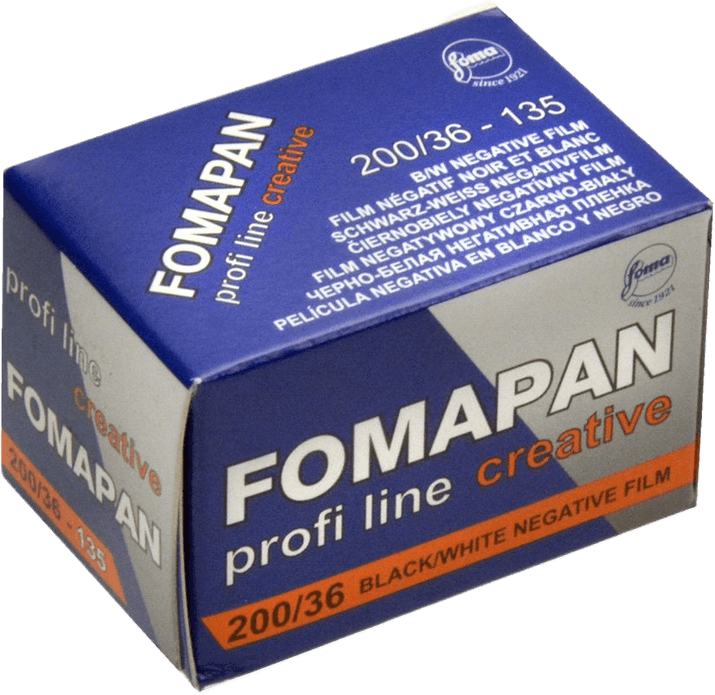
6. Fomapan 200 ISO Black & White
| Brand |
Brand
Foma
|
| ISO |
ISO
200
|
| Number of Exposures |
Number of Exposures
24 or 36
|
| Available Formats |
Available Formats
35mm and 120mm
|
| Other Key Features |
Other Key Features
Wide exposure latitude, versatile usage
|
| Best For |
Best For
Casual photographers looking for more detail
|
Fomapan 200 is a funny old film. Many have asked if the world really needs a 200 ISO black and white film. But I think it does. It is a fantastic film stock for tentative photographers looking for more detail.
Many beginners stick with 400 ISO films. And Fomapan 200 is the perfect roll for experimenting with slower films.
This film is more forgiving than most 100 ISO stocks. Details aren’t lost to blackness if you don’t get the exposure spot on.
It does tend to produce flat and monotone images. But when you get it right, the results are fantastic.
The quality is close to that of Fomapan 100. But you have more flexibility with lighting conditions. It is a versatile film you can use for travel and street photography.
We recommend you try a roll of Fomapan 200. It is also available as 120 medium-format film.
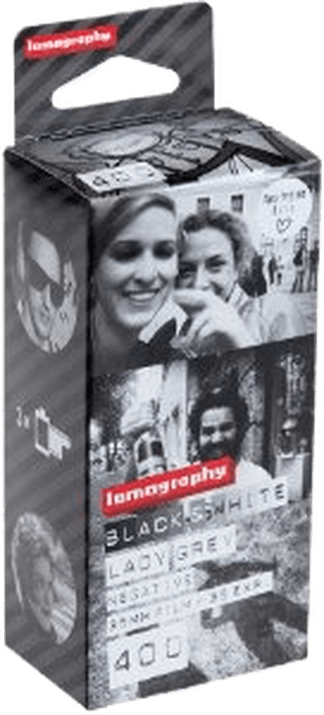
7. Lomography Lady Grey
| Brand |
Brand
Lomograhy
|
| ISO |
ISO
400
|
| Number of Exposures |
Number of Exposures
36
|
| Available Formats |
Available Formats
35mm
|
| Other Key Features |
Other Key Features
Wide tonal range, soft contrast
|
| Best For |
Best For
Casual film photography
|
Lomography is an institution dedicated to the preservation of film photography. Their passion for analog photography is infectious. And they have created an entire community around the Lomography name.
The Lady Grey B&W 400 is their most versatile film stock. It’s a great starting place if you’re new to film photography.
The quality is consistent from roll to roll. And it’s forgiving if you’re still getting used to the exposure settings.
It isn’t only a film for beginners. Professional shooters are also using it more and more. You get a wide tonal range with soft shades of grey. The detail is good. But you do get a fairly strong level of visible grain.
Some might not like the grain of Lady Grey. But other photographers want a grainy texture in their photographs.
That’s one of the reasons Lomography Lady Grey B&W is growing in popularity. And if you care about the future of film photography, you should support the Lomography project.
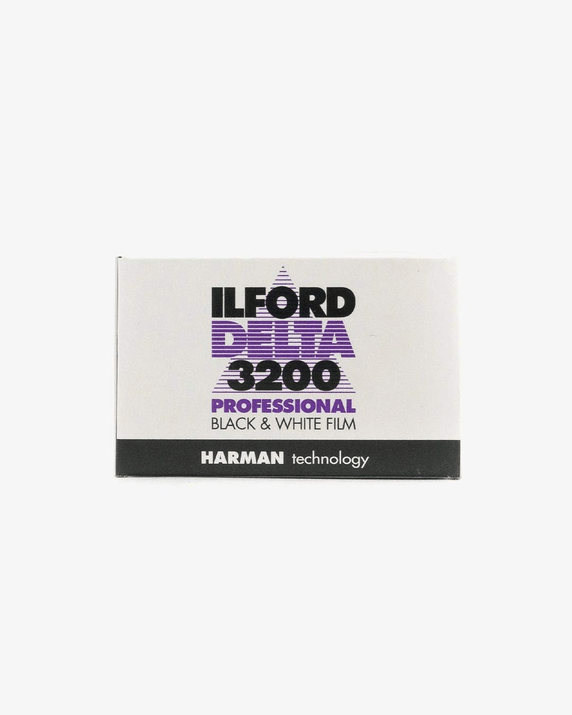
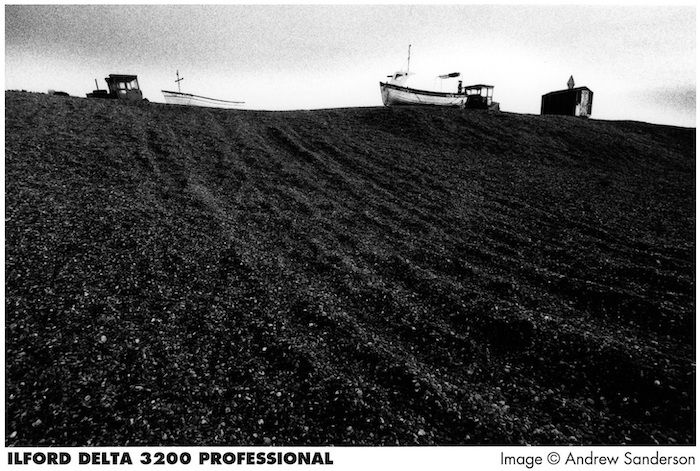
8. Ilford Delta 3200
| Brand |
Brand
Ilford
|
| ISO |
ISO
3200
|
| Number of Exposures |
Number of Exposures
36
|
| Available Formats |
Available Formats
35mm and 120mm
|
| Other Key Features |
Other Key Features
Strong grain texture, excellent low-light performance
|
| Best For |
Best For
Low-light, sports, concert, and event photography
|
Ilford Delta 3200 is a professional film for low-light photography. It has a super-fast ISO of 3200. That means the film is very sensitive to light. So you can work in darker conditions.
The photos have a strong grain texture. And the grain is visible even when the images are exposed correctly. Despite the grain, the quality is excellent. The details are sharp. And you still get rich tones of grey.
The high ISO makes it popular with many photographers. You can use it for concerts and other music events. You can shoot indoor sports photography. And it’s a useful stock for photojournalists.
Many film shooters use it because they like the grain texture. But the Ilford Delta 3200 isn’t for everyone. And yet, it’s the best black and white film for low-light photography. It’s also available as 120 medium-format film.
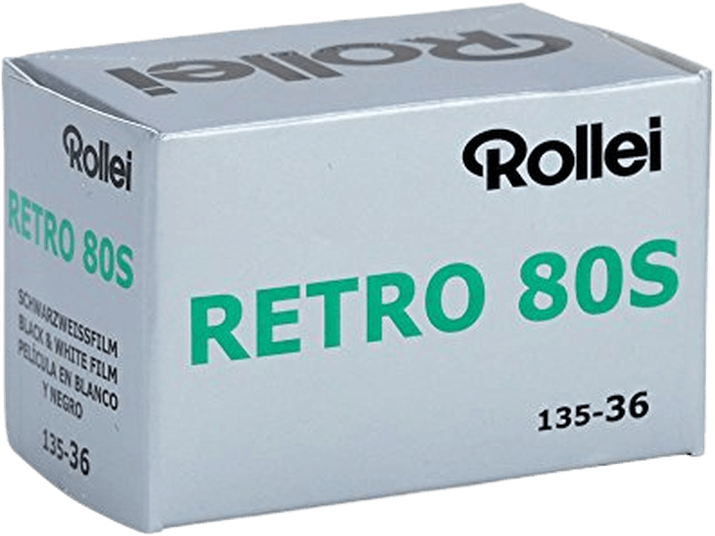
9. Rollei Retro 80s
| Brand |
Brand
Rollei
|
| ISO |
ISO
80
|
| Number of Exposures |
Number of Exposures
36
|
| Available Formats |
Available Formats
35mm and 120mm
|
| Other Key Features |
Other Key Features
Fine grain structure, deep contrasts, rich blacks
|
| Best For |
Best For
Portrait, product, and landscape photography
|
Rollei Retro 80s is an excellent low-ISO film stock you have to try. It’s the only mass-produced 80 ISO black and white film on the market. And the affordable price makes it a great introduction to low-ISO film photography.
Other Rollei films with higher ISO tend to feature many greyscale tones. They give you low-contrast results. But Retro 80s, with its deeper black tones, gives you the best of both worlds. You get rich, silky blacks. But you also get lots of grey details in the lighter areas.
Most cameras will only have settings for 100 or 50 ISO, so an 80 ISO film is a tricky one. It’s best to set your camera to 100 ISO, but understand you’ll need a little bit more light.
Rollei have kept their prices low. Rollei Retro 80s isn’t their cheapest stock. But it’s still more affordable than most films from other brands.
10. Fomapan 400
| Brand |
Brand
Foma
|
| ISO |
ISO
400
|
| Number of Exposures |
Number of Exposures
24 or 36
|
| Available Formats |
Available Formats
35mm and 120mm
|
| Other Key Features |
Other Key Features
Deep contrasts
|
| Best For |
Best For
Casual film shooting, beginner and street photographers
|
Fomapan 400 is one of the best black and white film stocks just due to its price. While film prices are skyrocketing, Foma prices are staying low. So it is the best-value film on the market.
It isn’t as reliable as the Ilford HP5 Plus. But it does give you similar results. The images have deep contrasts, especially in natural light. And you only experience visible grain when very under-exposed.
It’s also less forgiving than the other 400 films, so you must set the right exposure.
It’s a versatile roll of film. Street photographers can burn through rolls of this stock. And thanks to the low price, they don’t go bankrupt in the process.
The low price also makes it a great film for learning the ropes. You can afford to make mistakes, allowing you to improve your skills.
You can stock your fridge with a few rolls of Fomapan 400. You can also get it as 120 medium-format film.

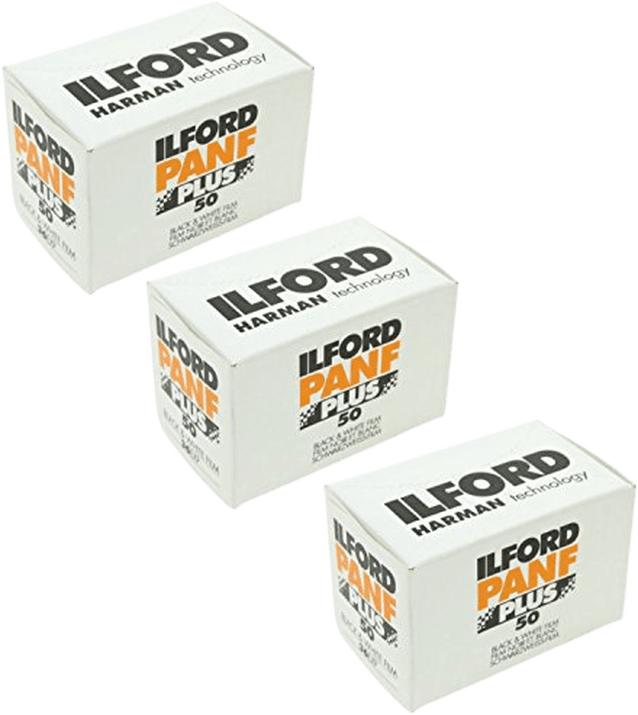
11. Ilford PANF 50
| Brand |
Brand
Ilford
|
| ISO |
ISO
50
|
| Number of Exposures |
Number of Exposures
36
|
| Available Formats |
Available Formats
35mm and 120mm, large format
|
| Other Key Features |
Other Key Features
High contrast, fine detail, rich tones
|
| Best For |
Best For
Bright sunlight or studio lighting
|
To use the Ilford PANF 50, you need time and light. The low ISO level of 50 means you need a long exposure time and about as much light as possible.
It is a specialist film. It doesn’t work well with movement. And it won’t settle for anything less than bright light. It’s not very good for street photography. But it’s brilliant for dramatic portraits and fashion shots.
But if you meet its needs, the image resolution is stunning. The PANF 50 produces intricate levels of detail and no visible grain.
It’s an excellent film for fine art photography. And you also get 120 medium-format rolls of it.
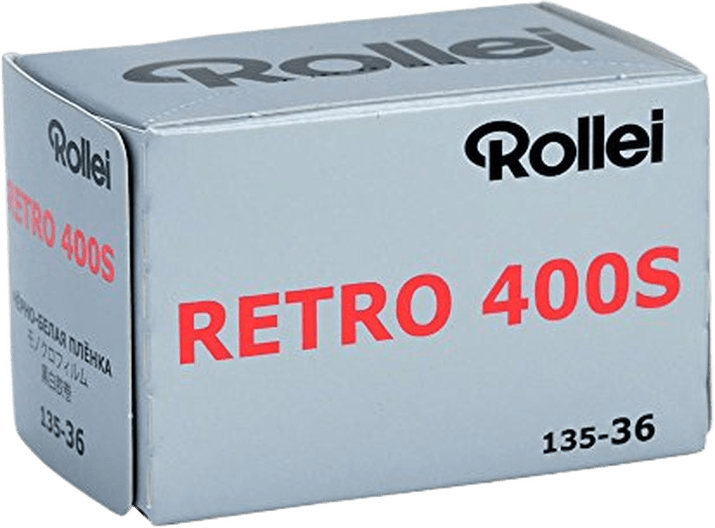
12. Rollei Retro 400S
| Brand |
Brand
Rollei
|
| ISO |
ISO
400
|
| Number of Exposures |
Number of Exposures
36
|
| Available Formats |
Available Formats
35mm and 120mm
|
| Other Key Features |
Other Key Features
Wide tonal range, grain texture
|
| Best For |
Best For
Photographers who want a film photo aesthetic
|
Rollei Retro 400S is another versatile 400 ISO black and white film. It has a visible amount of grain, especially when enlarged.
This will put some photographers off. But it’s one of the main reasons it remains so popular.
It has a wide tonal range. You get good detail from shaded areas. But you can still achieve strong contrasts in bright light.
It performs well outside in all conditions. And it can be used in a studio with minimal artificial lighting.
Retro 400S is one of the best stocks for getting a true film photo aesthetic. It has a visual quality that filters can’t quite get right.
The low price makes it a good option for beginners and prolific shooters. It’s versatile and inexpensive. And you can also buy it as 120 medium-format film.
13. Kentmere 400
| Brand |
Brand
Kentmere
|
| ISO |
ISO
400
|
| Number of Exposures |
Number of Exposures
24
|
| Available Formats |
Available Formats
35mm
|
| Other Key Features |
Other Key Features
Good sharpness, fine grain structure
|
| Best For |
Best For
Photographers looking for a new 400 ISO film
|
Kentmere 400 is another fantastic 400 ISO black and white film. It’s a consistent film. So you know what to expect from roll to roll.
It also delivers great results when learning to use an analog camera. Plus, it’s inexpensive and easy to get your hands on.
The quality sits somewhere in between the Ilford HP5 and Delta 400. There’s good sharpness and contrast. But you also get a good array of tones from the grey scale.
It’s a versatile roll of film. And it’s fast becoming one of the most popular stocks in Europe. Kentmere 400 is definitely worth a try.
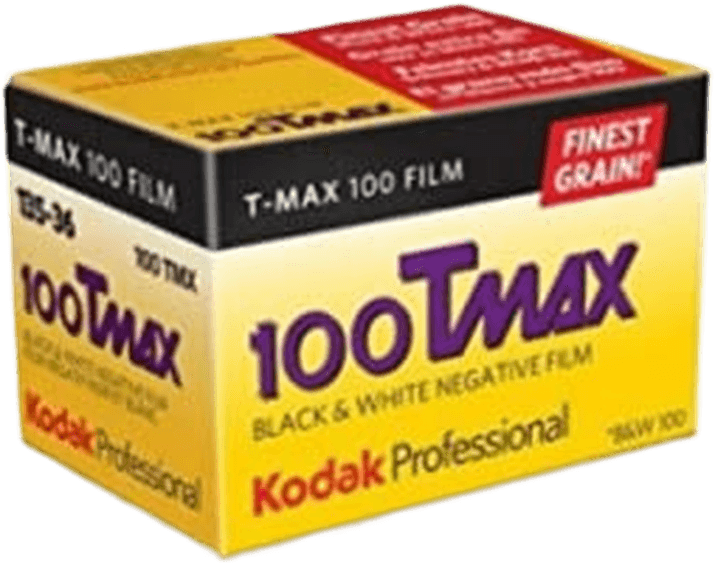
14. Kodak T-MAX 100
| Brand |
Brand
Kodak
|
| ISO |
ISO
100
|
| Number of Exposures |
Number of Exposures
36
|
| Available Formats |
Available Formats
35mm and 120mm
|
| Other Key Features |
Other Key Features
Wide exposure latitude, wide tonal range
|
| Best For |
Best For
Professional photographers
|
Many might expect Kodak T-Max 100 to be higher on our list. It is a highly popular film that produces quality results. But Kodak’s scandalous price hikes have been pretty hard to swallow.
This has mainly affected their color film stocks. But the black and white films have also gone up. They’re now the most expensive black and white films on the market.
Prices aside, Kodak T-MAX 100 is a fantastic film. It has a wide exposure latitude. This means you can get away with overexposing or underexposing the film.
There’s a wide tonal range, especially for a 100 ISO film. The detail and finish are outstanding. And you can also get it in 120-size format for your medium-format camera.
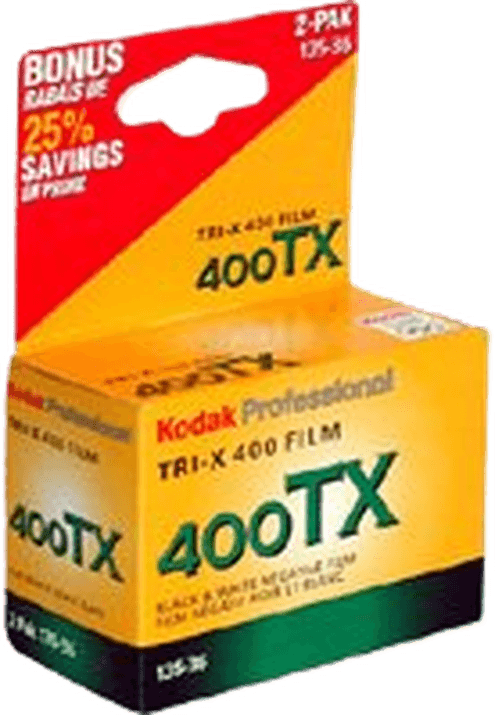
15. Kodak Tri-X Pan 400
| Brand |
Brand
Kodak
|
| ISO |
ISO
400
|
| Number of Exposures |
Number of Exposures
24
|
| Available Formats |
Available Formats
35mm and 120mm
|
| Other Key Features |
Other Key Features
Fine grain structure, medium contrast
|
| Best For |
Best For
Film photography beginners
|
Kodak Tri-X Pan 400 is a popular black and white stock with film photographers. The fine grain structure gives you a smooth texture. And you get very few blemishes or imperfections for a 400 ISO film.
The medium contrast level gives you a good dynamic range. So you can use it in all lighting conditions.
And the results are consistently good. It’s one of the most forgiving black and white films around. That means it works well in changing conditions. And you can still get good results when learning the ropes.
The higher price will deter some users. But Kodak Tri-X Pan 400 remains a sought-after black and white film. It is also available as 120 medium-format film.
FAQs for the Best Black and White Film
Shooting black and white film is a fun and thrilling experience. But it can be a confusing topic when you’re just starting.
There are lots of technical terms. You have loads of brand names to remember. And finding a film that matches your needs as a photographer can be difficult.
We’ve answered some of the most frequently asked questions to help guide you.
Why Use Black and White Film?
The timeless quality of black and white photos excites our imagination. And they have a heightened sense of mystery and romance. Before the arrival of color film, everyone had to use black and white film.
Color film was a revelation when it was first released. But black and white photography continued in the background. And now, black and white photography is once again growing in popularity.
Color gives us a more true-to-life image. It captures the vivid tones and hues of our colorful world. But black and white photography has more depth.
And using black and white film also makes you work harder as a photographer. You can’t rely on color to dazzle the viewer. It forces you to look for other elements to make the shot interesting.
You need to look for areas of contrast. You have to find shapes and textures. And your composition has to be perfect, so using black and white film makes you a better photographer.
Which Brands Make Black and White Film?
Black and white photographers are lucky. Unlike color film, many brands make good-quality black and white film. There’s Kodak, Ilford, Fomapan, Rollei, and Lomography.
Kodak is one of the biggest manufacturers. They dominate the color film scene. And they also have a couple of good black and white options. But their price hikes are turning film shooters away.
Ilford is the biggest name in black and white film photography. Their HP5 Plus and Delta 400 are two of the most popular film stocks. They also produce other films with higher and lower film speeds.
All film photographers should try Fomapan films. You can get 100, 200, or 400 ISO film rolls. They’ve kept their prices low. So they offer excellent value for money.
And Rollei is another film brand offering excellent value. They have a wide range of films available. And they’re all set at a good price.
Finally, Lomography is a name all film shooters should know. It isn’t just a film brand. They have created a community around analog photography. And they have been working for decades to revive the film photography scene.
Lomography has some excellent films available. And you can join their online community and share your images.
Why Is ISO Important in Film Photography?
You can change the ISO setting on digital cameras. But rolls of film have a set ISO that can’t be changed. Every film has a set ISO number.
The ISO number indicates how sensitive the film is to light. The higher the number, the more sensitive it is. This means a film with a low ISO needs more light to expose.
But while a low ISO needs more light, it does produce better image quality. A film with a higher ISO is more prone to having a grainy texture. Plus, you also lose detail and depth of tone.
Every film has strengths and limitations based on its ISO level. Low ISO films give you outstanding image quality. But it’s best to have bright light and long exposure times.
High-ISO films have fewer tones and more grain. But you can use them in low-light situations.
So ISO plays a large part in determining the best black and white film. If you want intense quality and a smooth finish, you need 100 ISO or lower film. Night photographers need something like a 3200 ISO film.
400 ISO sits right in the middle. They work well in different lighting conditions. And you might get the odd hint of grain. But the quality is still excellent. That’s why 400 ISO films are so popular with film shooters.
Where Can I Share My Black and White Film Photos?
The film photography scene has a thriving community. And there are many ways to share your black and white film photos with other enthusiasts.
Facebook is a great place to start. There are plenty of excellent groups where people share images, info, and tips.
Following hashtags like that also helps you find other film photographers to follow. You can also try a new app for photographers called Plates.
You can also become a member of the Lomography community. Their website allows you to share your work.
You can find other people’s film photos. You can find people using specific rolls of black and white film. And you can publish the films you like to use.
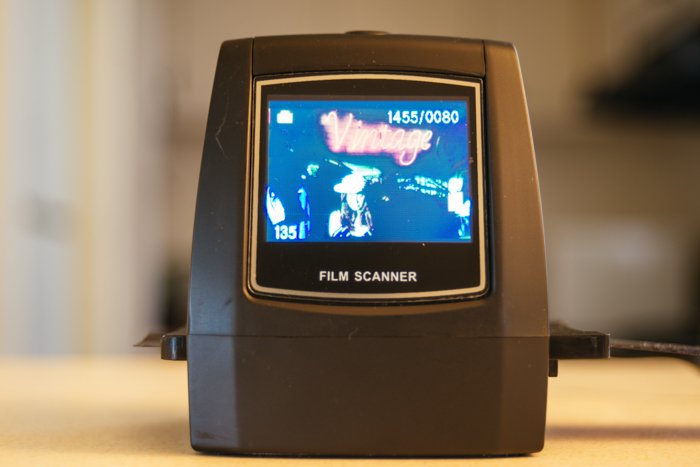
You need to digitize your photos to share them online. The best way to do this is with a photo scanner. You can get flatbed photo scanners. Or you can use dedicated film scanners for scanning negatives.
Conclusion: The Best Black And White Film
There’s a wide variety of black and white films to choose from. You have options from Ilford and Kodak. And you can also try film stocks from Foma and Rollei. You have every ISO you need to shoot any photo in black and white.
It’s hard to say which is the best black and white film. But Ilford HP5 Plus takes the top spot on our list. It’s a versatile film with 400 ISO. It gives you deep tones and sharp contrasts. And the quality is consistent from roll to roll. Ilford is the master of providing reliable black and white film!
Thankfully, you can easily get cheap photo processing materials online and develop film at home. You can get by with just the developing chemicals, a developing tank, and a few kitchen items.
In this article, we will show you exactly how to develop film at home.

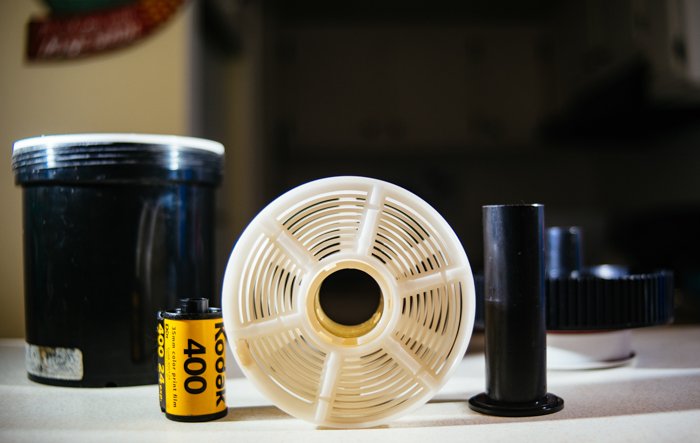
What You Need to Develop Film at Home
You will be surprised to find out how convenient it is to process your images yourself. In this tutorial, we will be using the C-41 developing process which is commonly used for widely available color film. It has a few differences from processing black and white film but once you become familiar with it, learning how to develop black and white is going to be easy.
The standard C-41 kit comes with a developer, Blix (a.k.a. Bleach fix) A and B, a stabiliser, and that’s it! Just make sure the film canister you are using is labelled C-41 as well, or you might end up ruining your photos.
You will also need four amber bottles. Label each one Developer, Blix, Stabiliser, and Hot Water. It would be best if you used dark bottles to prevent light from making the chemicals go bad. However, you can store them in regular bottles (yes, even soda bottles) as long as you keep them inside a dark storage room.
To handle the chemicals, you will need a graduated pitcher that can hold up to a gallon of liquid, a funnel, a pair of gloves, tongs, and an industrial thermometer. To develop your film reel, you will need an exposed film and a developing tank. You will also need a few extra accessories such as a scanner for digitising and viewing your photos.
Finally, you can use your smartphone to download a multi-timer app to help you stay on top of the developing times.
1. Loading The Film
The most challenging part of processing your own film is loading it into the tank in complete darkness. Make sure to practice the next few steps before actually doing it.
Ideally, loading the film into the spool should be done in a darkroom or by using a film-changing bag. But you can also do it in a dark room, such as a bathroom or closet. To make sure stray light does not ruin your film, you can do it at night with all the lights turned off. For added security, cover your door and any other gaps with towels.
Once your room’s ready, place your film, scissors, and developing tank on a flat surface. Next, unscrew the tank’s lid and take out the spool and the tube inside. Remember where you put all of them because you will need to do the following steps in a completely dark room.
Switch off the lights. Take your spool and feel for the two arrows on each side. Once you locate them, start feeding the film leader into the spool until you hear the film sprocket holes click into place. Twist the spool back and forth and keep going until you reach the end of the film. Then, grab your scissors and cut off the film clips from the canister.
Once you finish, push the tube through the hole in the middle of the spool and put it inside the developing tank. Once the spool is in, screw the lid back on, and that’s it.

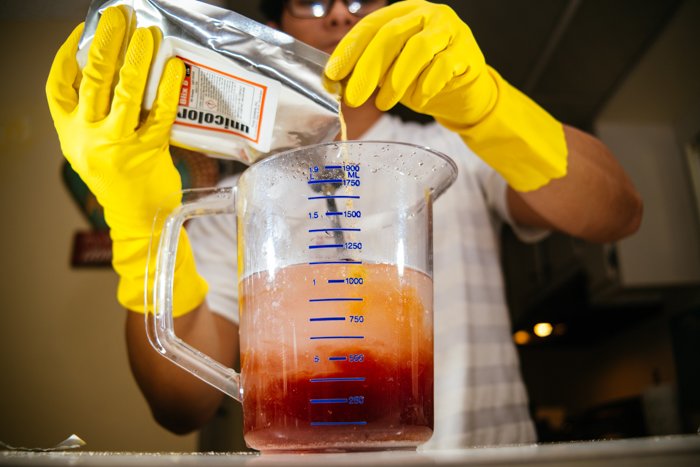
2. Mixing The Chemicals
Before mixing the chemicals, you first need to pour 1000 ml of hot water (110°F/43.5°C) into the graduated pitcher. Remember to use a thermometer to make sure you have the right temperature. Once you reach the recommended temperature, add the developer and mix it thoroughly. After mixing, pour the solution into the amber bottle labelled Developer using a funnel.
Now repeat the exact process with Blix A (also 1000 ml at 110°F/43.5°C). Once all the powder from Blix A is in the pitcher, pour Blix B and start mixing. After that, pour it into the bottle labelled Blix.
The final step is pouring the stabiliser into the pitcher filled with 1000 ml of clean tap water (average temperature). Once you finish mixing the solution, transfer it into the bottle labelled Stabiliser.
Although not required, feel free to add hot water (110°F/43.5°C) into the bottle labelled Hot Water because you will need it when ‘pre-soaking’ the film later. To maintain the temperature of the bottles, you can put them in a tub filled with hot water.
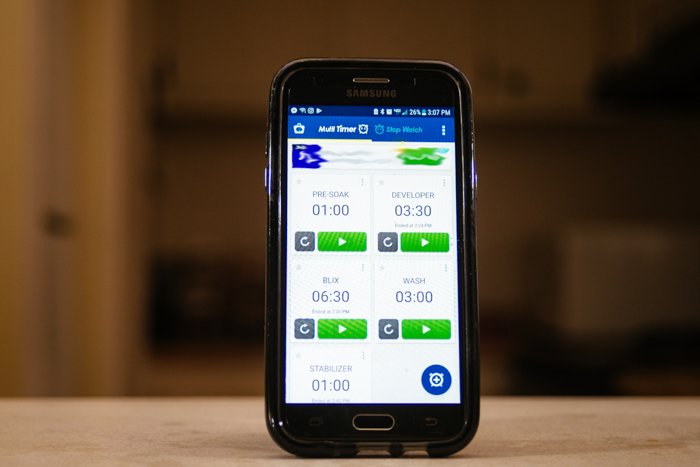
3. Developing The Film
Each step is time-sensitive, so use the multi-timer you downloaded on your smartphone. Set a timer for each step listed below. After setting your timers, you can check the temperatures of the chemicals left in the tub. If they are around 102°F (38.9°C), you are good to go!
Developing Times
- Pre-Soak: 1 minute
- Developer: 3.5 minutes
- Blix: 6.5 minutes
- Wash: 3 minutes
- Stabilizer: ½ to 1 minute
Pre-Soak
Take the lid off your developing tank, pour some hot water you saved in the amber bottle, and let it sit for one minute. When the time’s up, pour the water out and pour in the developer.
Once you fill the tank with the developer, you can start the timer and agitate the tank for the first ten seconds. Then, flip the tank every 30 seconds until the time’s up. Once the timer goes off, pour the developer out of the tank back into the amber bottle. You can use it (along with the Blix and the stabiliser) to develop seven more rolls of film before it expires.
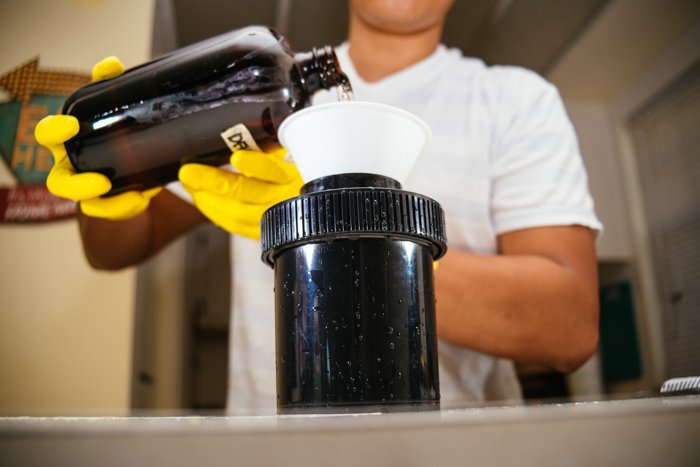
Blix
Next, do the same process with the Blix. Agitating the tank causes the chemical to go through an endothermic reaction. So open the lid every once in a while to let it vent. Otherwise, the bubbles will cause the liquid to spill.
After mixing in the Blix, pour it out of the tank and back into its bottle. Then, wash the film with running water (95°F – 105°F/35°C – 40.6°C) for three minutes.
Stabilizer
Dump all the water out of the tank. Then pour in the stabiliser to remove all the chemical residue on the film. Agitate it for the first 15 seconds, and let it sit until the time is up.
The last step is to remove the lid, take out the spool, and carefully unfurl the film. If you see images, you have successfully developed your film! All you have to do now is cut the film into smaller strips and let it dry.
4. Scanning The Film
Now that you have pictures on your negative, it’s time to digitise them with a scanner. You can use a dedicated scanner, but a regular flatbed scanner will work fine once you outfit it with a negative holder.
Apart from traditional scanners, you can download negative scanner apps on your phone. Just take a photo of a frame in your negative, and the app will turn the negatives into regular color photos. They are not as good as the real scanners, but they will do the trick if you want to see the results right away.
Conclusion
Working with film cameras and develop film at home may be more difficult than using digital options. But seeing your own photos appear on the negative is still pretty magical especially if it involves beautiful mistakes that digital cameras cannot replicate.
If you follow the above steps, you will learn how to develop film at home in no time.
Learn more complex concepts made simple with our Quick Capture Cheat Sheets!
]]>Most are color filters, but this does not mean they will not affect your black and white images. As contrast plays a considerable role in enhancing the subject of a black and white image, this is precisely what a black and white filter will affect.
In this article, we look at which filters will help with your black and white photography.
The Best Black And White Filters for Photography
Filters come in two different shapes; circle and square. They do the same job, but they attach to your lens in different ways. Circle filters twist onto the front of your lens via a threaded mount. They need to be the same diameter as your lens front. Square filters are attached to your lens by a holder. You can use a square filter with any lens, as the adapter can vary depending on the size of the thread.
With advantages and disadvantages to both, there is no consensus on which shape is better. You have to decide which one you prefer.
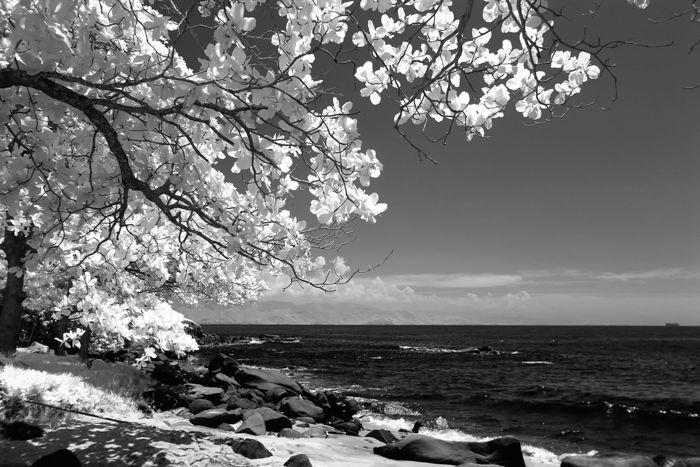
InfraRed
Infrared is an intense red. Its wavelengths are not visible to the naked eye. Infrared filters, or IR filters, reflect visible light. They do this while allowing infrared wavelengths of light to enter your lens.
The result of these filters differs across color or black and white photography. With color photography, they turn green areas into pink. This makes an exciting landscape scene.
The idea is similar for black and white photography, except you do not see the color shift. Green colors reflect a lot of visible light. They also reflect more infrared light. This makes them lighter in black and white images when using an Infrared filter.
Regarding your images, it means that you are going to get high contrast. With dark sky and water or light clouds and leaves, your images will be less plane.
You can buy these filters for your front lens, but you can even modify your gear to have an infrared camera. You can do it with a cheaper camera body, or you can buy already-modified ones. This way, your camera will only process infrared wavelengths.
When you have an IR filter on your front lens, none of the visible light reaches your camera sensor. Due to this, you can only shoot with a much longer exposure time. Also, because the filter is dark, you have to focus before attaching it.
By shooting with a modified camera, you can be more creative. You will not be limited by shutter speed or the darkness of the filter. The disadvantage is that you cannot just remove the filter.
Color Filters
So we know that color filters can affect color images. But what about black and white photos? Why would you use a red filter with black and white photography? You’d think it would add a red color cast over the entire image.
For color photography, you would be correct. It would make the scene warmer as it concentrates on the reds and pinks in your scene. But, as black and white are devoid of color, it still affects them.
In black and white film photography, films (and sensors) are sensitive to all wavelengths of visible light. Color filters let through their color and reflect their complementary color. This way, they emphasised their color. In black and white images, this is going to be visible in the tones.
Sometimes the subjects of different colors appear the same in B&W images. These filters help to separate different parts of the image from each other. A red filter will lighten the reds. At the same time, it will darken the colors on the opposite side of the spectrum.
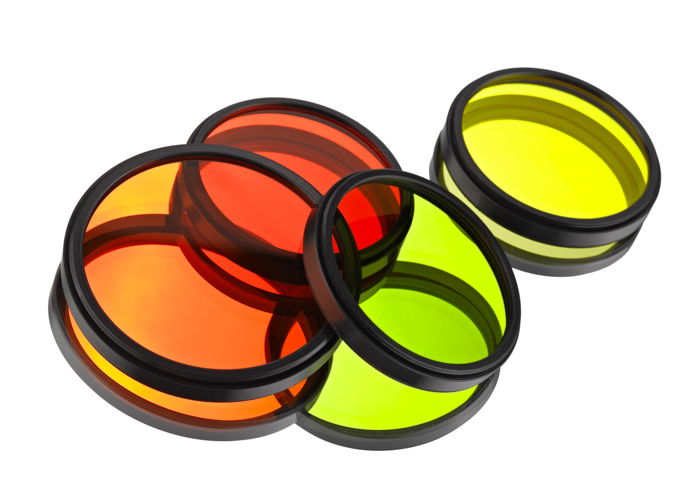
Which Colors Work Best for Black and White Photography?
To answer this question, we have to look at what type or field of photography you are shooting in. You might want to have a whole color filter kit for different purposes. Your scene can have many colors, and you’ll decide on the field which ones you want to derive or emphasise.
- Red: Lightens reds and pinks, darkens greens and blues. These are great for landscape scenes where you are looking for a moody tone in foliage.
- Orange: Adds contrast. In turn, separating the objects, adding depth and texture. They also reduce the impact of blemishes and freckles and give the face a healthier look.
- Yellow: Bring out the sky and clouds by darkening the blue areas of the sky.
- Yellow-Green: An all-around filter and a must-have for any black and white film photographer. Being yellow and green, you get the benefits of both separate yellow and green filters. It darkens tones found in blue skies, making clouds pop. It does so while keeping the green areas lighter. This is a definite for landscape photographers.
- Green: These filter out green wavelengths of color. It makes foliage lighter and more pleasing. The contrast is also affected. If you are looking to capture rolling green hills, this is the one for you.
General Filters That Can Be Used for Black and White Photography
Skylight/UV Filters
UV filters reduce hazing caused by the atmosphere and sun. This helps to maintain sharpness. By cutting down on the ultraviolet light, you will have more contrast.
There is another use, and that is to protect your camera. Having a UV filter on the front element of your lens means, they get damaged first. Although it cannot protect your whole camera, it’s excellent against more minor issues. This could be said about all filters but you can always leave your UV filter on your lens. They don’t have a visibly strong effect on your images. This can’t be said, for example, about the color or IR filters.
Some photographers do not recommend using UV filters because of image quality loss. If you buy a more expensive one, you can avoid it. But anything in front of your lens can indeed decrease image quality.
Neutral-Density Filters
Neutral Density filters reduce the amount of light that enters your lens. You might ask why we would do that? Most of the time, photographers are looking for more light.
These are very handy for long exposures in very sunny conditions. On a bright sunny day, ISO 100, f/22 can only get you so far. Perhaps it gives you a 1/30th of a second exposure before the image is completely overexposed.
Neutral Density filters block the light in degrees of stops. You can get up to ten stops of play, turning that 1/30th of a second into 30 seconds.
You can find both in circular and square formats.
These filters come in two types; Neutral Density and Graduated Neutral Density filters.
The graduated ND offers a varying degree of strength across the entire filter. They are darkest on one end and lightest on the other. These are mostly screw-on filters, and with a circular motion, you can change their stopping power.
These have specific uses, for example, landscape photography, especially sunsets. The idea is the darker area goes at the top and fades as it goes lower. This is because the sky has more stops of light.
Using this filter allows the sky and clouds details to come without compromising the exposure of the landscape.
Polarising Filters
A polarising filter is a convenient filter to use for black and white photography. It also works with color photography in the same way.
These filters reduce and remove glare and reflections from reflective surfaces. If you encounter a lot of windows or water, this is your best friend.
They also darken skies. These filters help to capture more dramatic images. For example, in landscape photography, polarising filters emphasise the tonal differences and the texture of clouds.
Circular polarising filters have degrees of strength. Having this filter threaded onto your lens allows you to turn it. This helps pick out specific areas of your scene. The intensity grows too.
Some photographers prefer the square slot-in version, which offers an evenly polarising effect. They are cheaper and easier to use.
Conclusion: Black And White Filter
Lens filters can be used for color and black and white photography as well. Each will have different effects, depending on the colors (or the lack thereof).
They are pretty cheap solutions for strengthening your images. Most of them have effects, which can’t be reached during the post-process. This is because they directly modify the light that gets into your lens.
You can experiment with them and find the ones you like the most. They can help to make your style more unique and sophisticated.
Grab your filter and your camera and take stunning images by using our Photography for Beginners course!
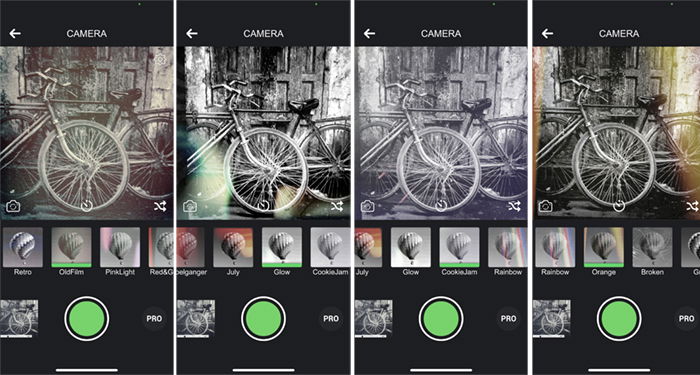
In this article, we went looking for the best black and white app for photography. Some apps turn your phone into a black and white camera. Others let you convert color images to monochrome. Let’s start with the apps that let you see the world in black and white.
The Best In-Camera Apps for Black and White Photos
First, we look at some apps that create black and white photos. Each of these apps creates a black and white aesthetic in camera.
1. IOS & Android Native Cameras
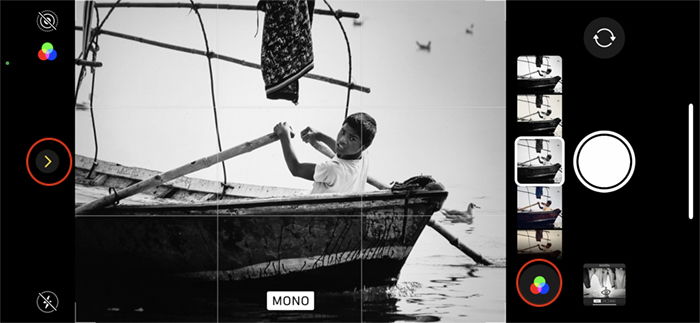
The native cameras on both IOS and Android phones allow you to make black and white photos. Click the filter icon. It looks like three connected circles. Depending on your phone, you will have one or more monochrome filters. The iPhone has three filters—Mono, Silvertone, and Noir. The newer iPhones have two more black and white options in the Portrait mode—Stage Light Mono and High-Key Light Mono. These options work best when taking portraits.
The native camera on your phone may not be the best black and white app, but it is available without a download. Let’s take a look at some better black and white photo apps.
2. Camera1
IOS
Camera1 is our favorite black and white photography app. With this app, your phone becomes a manual black and white camera. You can change exposure and manually adjust focus. Whenever you change exposure settings, a histogram pops up to guide your choice. Red zebra stripes appear if you are overexposing. A magnifying glass helps you focus. You can lock in the settings to take a series of black and white images.
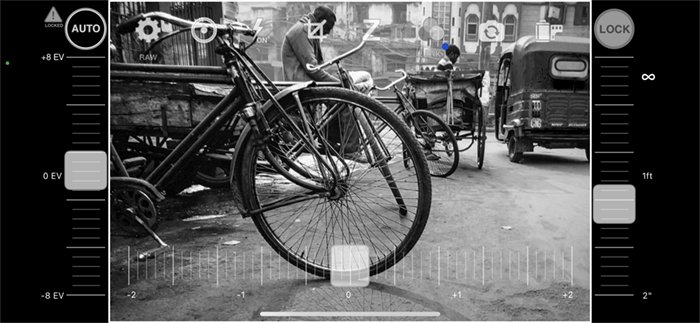
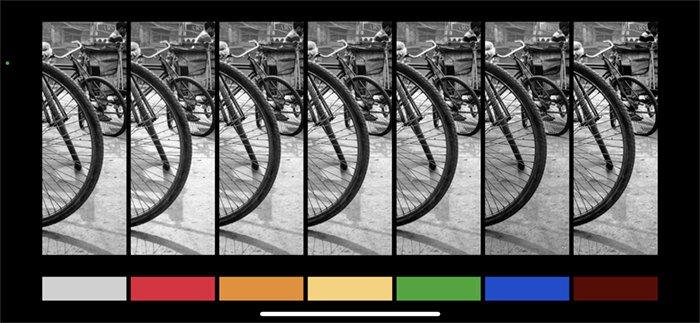
You can shoot in various RAW formats. These keep color information as well as monochrome JPEG. When you apply color filters to your photos, you can see the effect in real time. This shows you exactly how each filter affects the colors. The Zen mode (Z) hides all the controls to let you focus on composition.
Vistax is by the same developer as Camera1. The app includes many presets, including both color and black and white. With Vistax, select the preset, and you decide how much of the effect you want. The app goes beyond the presets. It allows you to control your camera’s exposure settings manually. The price of these apps is high in comparison to the others on this list, but you get much more with your purchase.
3. Hypocam
IOS | Android
Hypocam is a free black and white app that comes with five black and white filters and textures. You can buy more in the app. On top of the basic filters, you can add a color filter to emphasize or minimize certain colors in the scene. Once you have taken the photos, you can apply texture, grain, vignette, and fade to get the look you want.
Hypocam also works as a black and white filter app. You can apply the filters to photos in your camera roll and edit the effect in the app. This app is an easy and flexible tool. You can expand your filter collection, and the editing functions are simple yet powerful.
4. Black and White Camera
IOS | Android
Black and White Camera lets you take photos with film effects. Some filters simulate the look of damaged film with flares, discolorations, and scratches on negatives. If you are going for an old film vintage look, this is your app.
There are many filters included, and you can buy more in-app. The app works with your phone’s camera. But you can also apply the filters to images on your camera roll. The free version of this app watermarks your images and popup ads can distract from your image-making. If you like this app, you will want to upgrade to the paid version.
5. Argentum Camera
IOS
Argentum Camera simulates the look of famous black and white photographers. These include Ansel Adams and Henri Cartier-Bresson. The app is free to download and comes with the Ansel Adams filter. You can buy others in-app. Read the introductions for each of the filters. There is a lot of information about the photographer and how they achieved their specific black and white aesthetic.
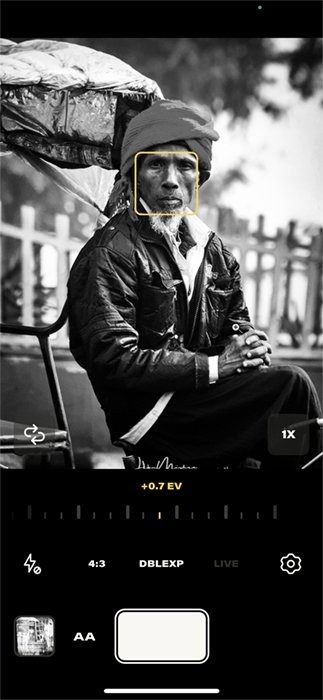
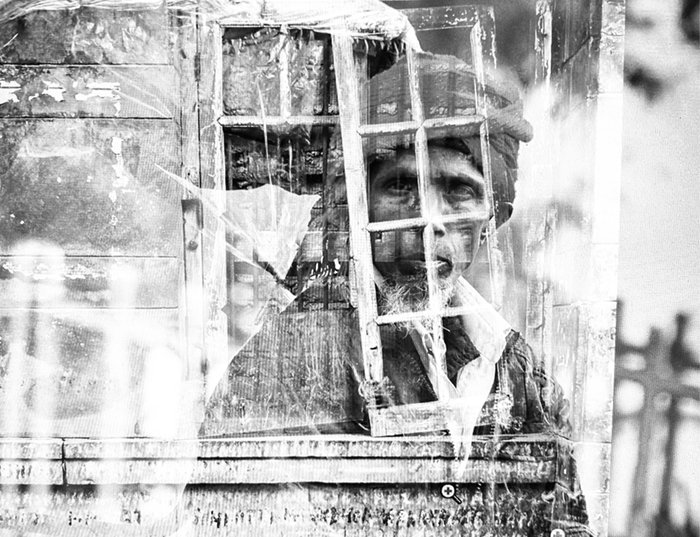
There are many adjustments hidden within the app. You can adjust the exposure, shoot in Live mode, use a flash or constant light, change orientation and aspect ratio, and choose to shoot in JPEG or RAW. In a nice twist, the DBLEXP setting captures allows you to layer photos in a double exposure.
6. BlackCam & BlackCam Pro
IOS | Android
BlackCam by developer Pierre Gougelet lets you make a black and white photo by using adjustable filters. The filters simulate classic black and white looks, including color filter effects. There are a few pro filters, but most come free in the app. Click the plus button, and you have even more control over your photos. Use sliders to change exposure, vignette, fade, and the amount of desaturation.
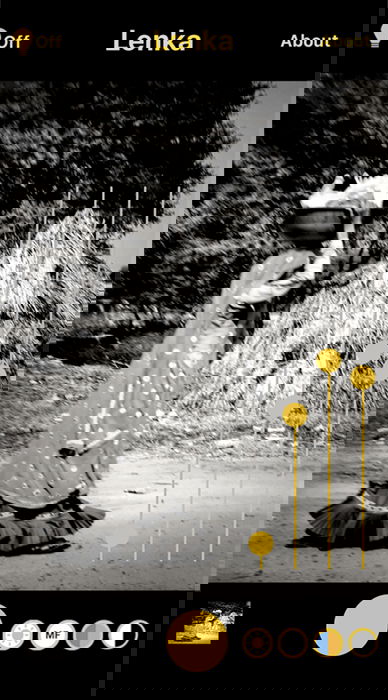
7. Lenka
IOS | Android
Lenka is a free black and white app that turns your phone into a black and white camera. Using sliders, you can control exposure, white balance, and contrast. You can also manually adjust focus. Flash photography is disabled, as are the phone’s many lenses. On the list of apps for black and white photos, this one is a simple, no-fuss option.
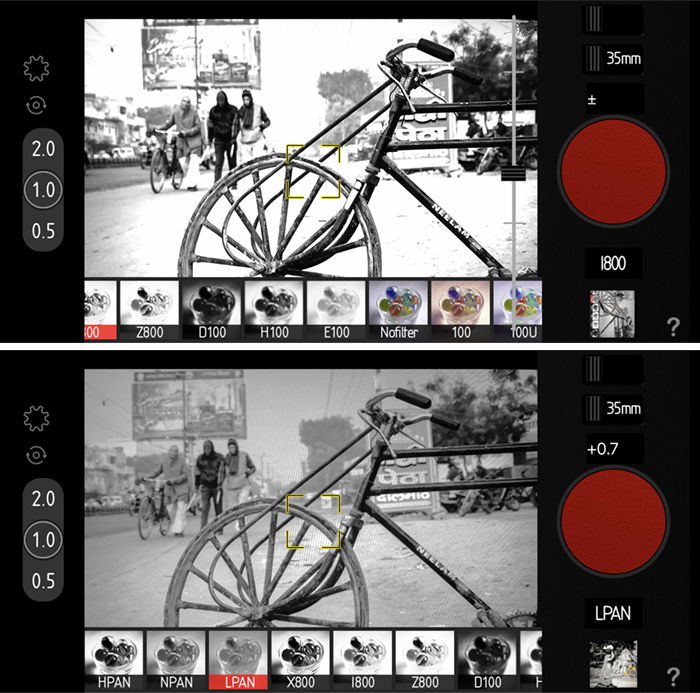
8. Provoke Camera
IOS
Provoke Camera is a popular film simulator app that includes about a dozen ’60s-style film effects. These are based on the styles of famous Japanese photographers like Daido Moriyama. Their names are not very descriptive. On the developer’s website, you can get the description of each simulation. This would be very helpful to include in the app. For instance, HPAN is High Contrast. H100 is High Contrast with Blur.
You can change the exposure of your photo. With a double-tap on the screen, you can change the focus point. With this app, you can make photos, and you can apply the film effects to photos already in your camera roll.
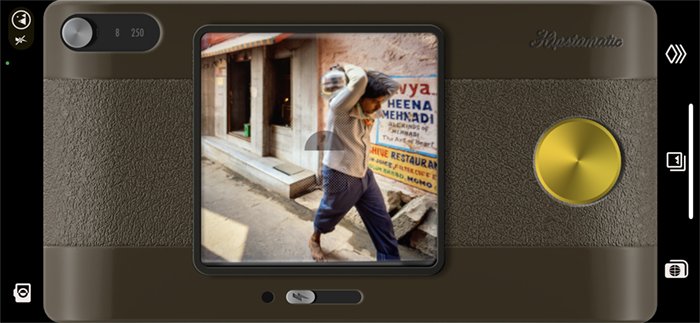
9. Hipstamatic X & Classic — Vintage Camera
IOS X | IOS Classic
Hipstamatic X is the free version of this vintage camera app. The developers also make a TinType app and Hipstamatic Classic.
The entire app experience is retro. The graphics look come straight out of the ’60s. You can select a look or choose an analog camera simulation. You can also build your own vintage camera simulation with different lenses and film options.
After you take a photo, you can apply various filters. There are only a few free options in the app. Most options are only available to club members who pay a subscription. Hipstamatic is not only a black and white app. But if you like a vintage look to your images, Hipstamatic will help you get it.
Apps for Converting Color to Black and White
Editing apps convert images you have taken in color to black and white. With these apps, you do not have to think about composing in black and white when you take the photo. You can use a familiar camera app and decide on the monochrome style later.
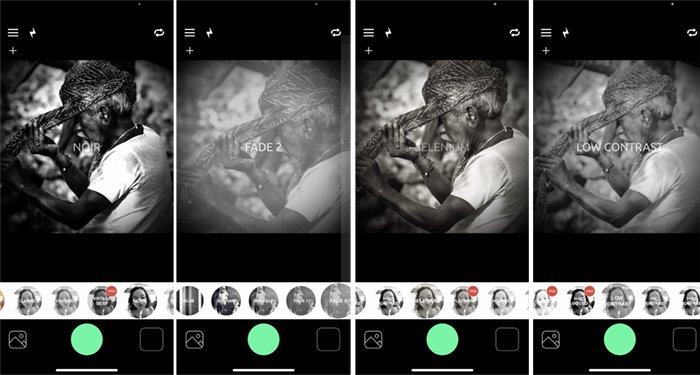
10. Snapseed
IOS | Android [Free]
Snapseed is a popular photo editing app. It is one of the best choices when converting color images to black and white. The app walks you through the process of editing your photo starting with a filter, then a look.
The number of editing tools is almost overwhelming. You can change nearly any aspect of your image. Tools like Vintage, Retrolux, and Noir, and Grainy Film will give your image an old-fashioned look. You can add text, frames, and even a second image as a double exposure. There is a lot of editing power in Snapseed and the app is free.
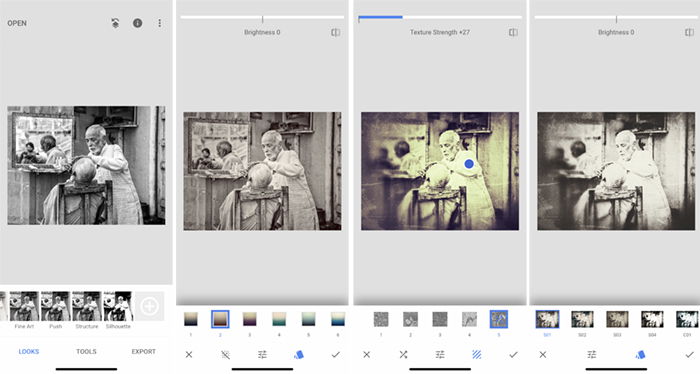
11. Dramatic Black & White
IOS | Android
Dramatic Black & White is a powerful photo editing app by JixPix Software. Select an image from your phone to start applying filters. The purchased app comes with dozens of black and white filters, including many infrared filters.
A randomize button lets you try out different ones to see what works best. You can also customize the filters. You can change color tone, softness, brightness, and contrast. You can also add color filters and grain. What makes this app unique is the ability to add spotlights. These are extra areas of light and shadow that you can resize, tilt, and strengthen as you like. You can layer several spotlights for a more complex effect.
12. Carbon – B&W Filters & Effects
IOS
Carbon by Livintis W.L.L. is an elegant black and white app. You can edit your own photos or demo portraits. The app focuses on portraits, but you can use editing tools on any style of photograph.
Start with the included monochromatic filters. You can adjust how much of the filter shows through. The app has a full editing suite. You can adjust exposure, sharpness, vignettes and many other settings. You can even add a tilt-shift effect to your image. You can also add grain, dust, light leak, and lens flare textures and a border.
Some of the effects are free. Others are available to buy through the app. The filter packs can be pricy. But this is one of the best apps for black and white photos. You can only export your own images, but the demo portraits will help you edit like a pro.
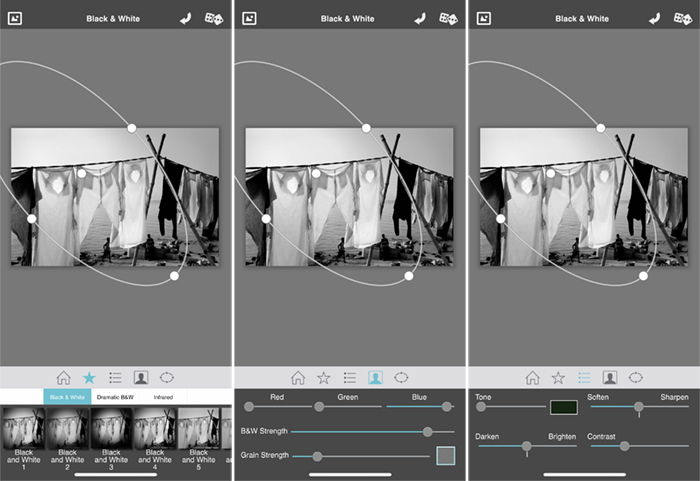
13. Monokrom B&W Photo Editor
IOS
In this black and white app, you move colored circles (or pucks) around the image. The pucks adjust brightness, contrast, tint, grain, and vignette. It takes a little getting used to. But once you do, editing your image becomes interactive.
Import photos from your camera roll and start moving the circles around. These increase or decrease the effect. You will immediately see changes in the preview. Editing this way removes the technical details. You will see the changes, but your brain stays on the creative elements of the image. If you like an effect, switch to the Memory tab and save the “recipe.”
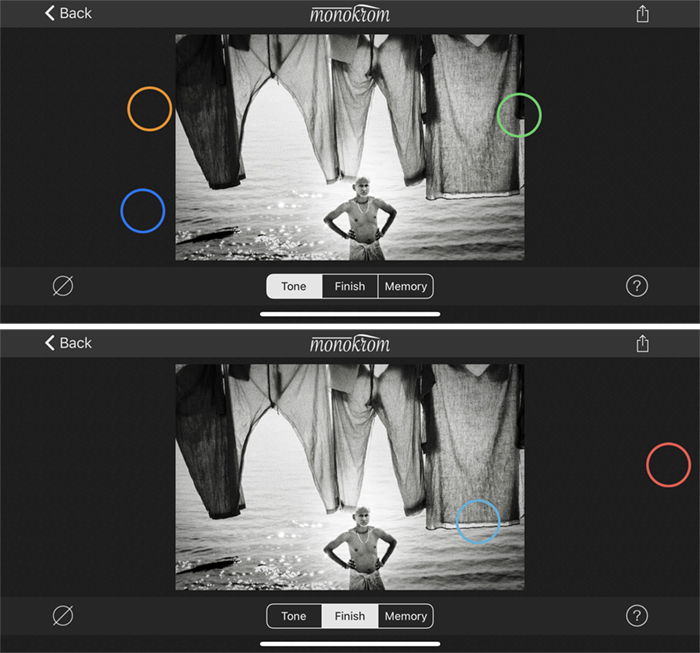
Conclusion
We went in search of the best black and white camera app and the best black and white photo editor. The best included many presets and let you explore your own black and white aesthetic. Our favourite black and white app was Camera1 because of its functionality. If you want a simpler filter app, then Hypocam is your best bet. Snapseed tops our black and white photo editing apps. Especially if you already use the program to edit your color images. But Dramatic Black and White is not as overwhelming and is highly flexible.
Black and white is one way to be creative with your photographs. If you want to learn even more, read our Creative Photography Cookbook.
There’s no formula for deciding which photos work better in monochrome or color. However, removing color is easy. I’ll show you how to convert an image to black and white in Lightroom and Photoshop. In both programs, there is a simple method and a different method that gives you more artistic flexibility.
How to Make an Image Black and White in Photoshop and Lightroom
Simple Black and White Conversion
Lightroom makes it easy to remove color from a photo. Go to the Settings drop-down menu and select Settings > Convert to Black and White (hotkey “V”). You can also do this in the Develop Module by choosing the Black & White treatment option in the Basic panel. This will switch your photo’s profile to Adobe Monochrome.
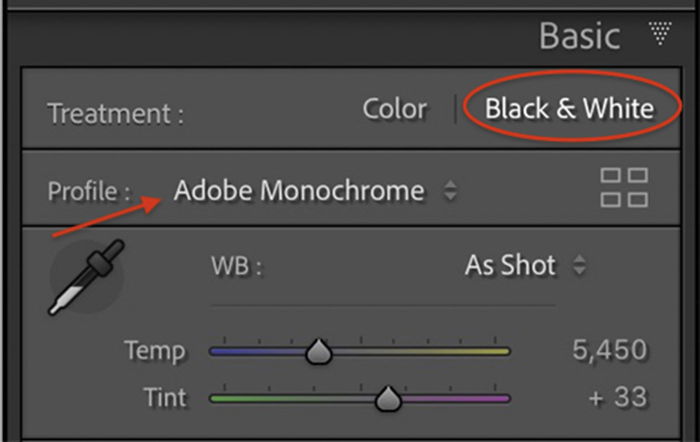
Selecting this option will quickly change any picture to black and white. Let’s look at a photo where color is not as important as the composition. We’ll use this photo, which is about a line extending out into the water and the light from the rising sun. Converting the image to black and white emphasises these elements.

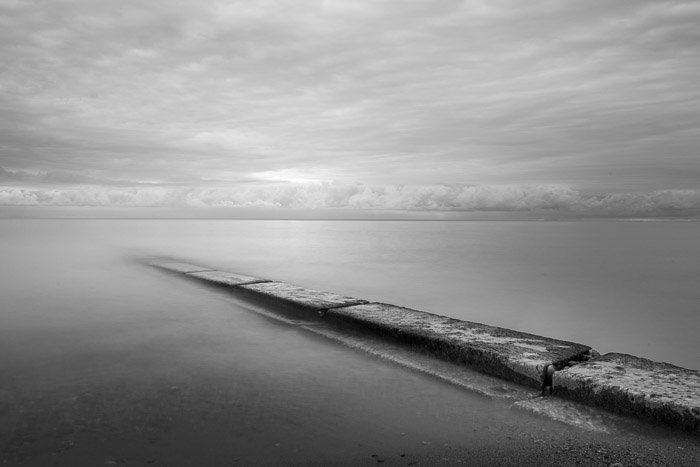
Many photographers stop with this simple black and white conversion. But Lightroom has more to offer.
Color Adjustment in Black and White
After you convert your image to monochrome, the HSL/Color panel becomes the B&W panel. Lightroom still recognizes the colors in your photo even though you cannot see them. In this panel, there are eight color channels with sliders. By default, the sliders are at zero. You can selectively lighten and darken the colors in your image. This adds richness and visual separation to your photo. You can emphasise and deemphasise certain colors.
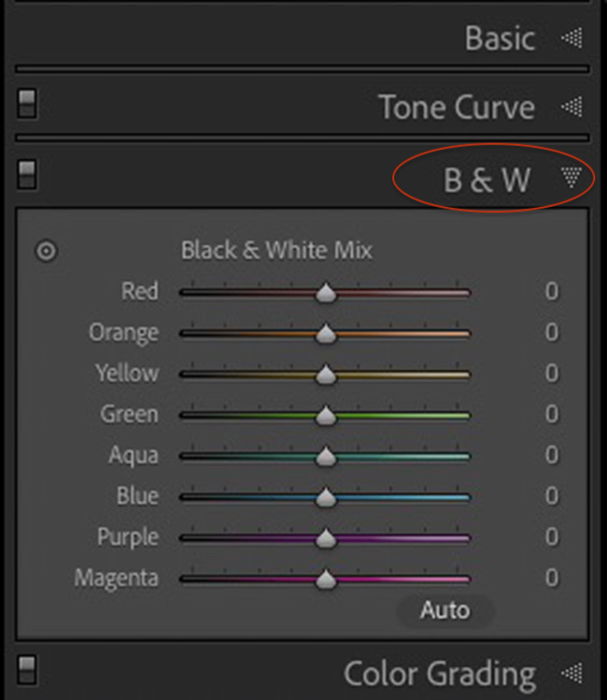
Be cautious when using sliders. Pushing sliders to the extreme ends might create a halo (a light around the subject). Or color gradations pixelate and become uneven.
In this image of a local garden center, there is almost too much color. It isn’t easy to make sense of the scene. The bright colors pull your eyes all over the frame.
Converting the image to black and white simplifies the scene, but the colors are equally weighted. Most show up in shades of grey. For instance, there is little distinction between the green plants and the red bench.
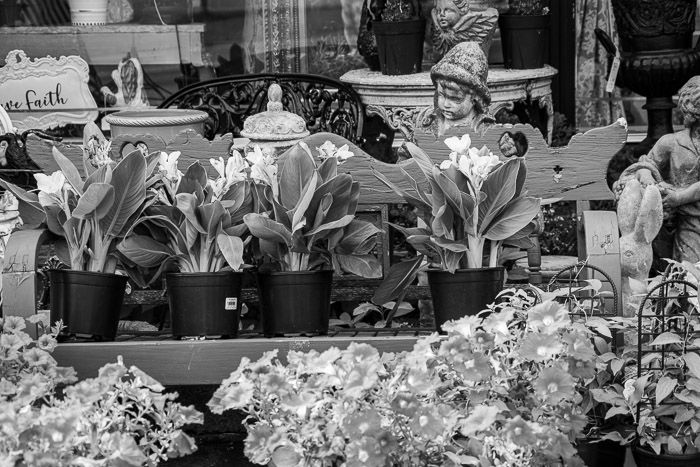
Using the B&W panel, you can adjust color exposure. In this image, I brightened the reds and darkened the greens. There is now a visual distinction between the bench and the leaves. I also darkened the blues, which darkened many elements in the background. This made the red bench lighter in comparison.

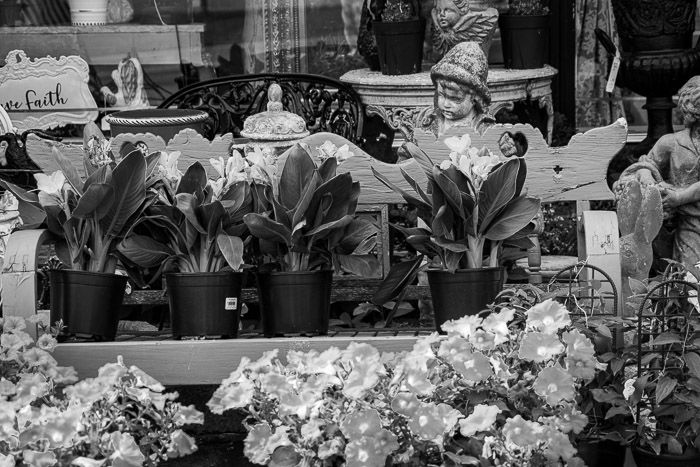
I had to be careful with the flowers in the foreground. A halo appeared when I pushed the purple and magenta sliders too far to the left. In this comparison, I darkened the purples and magentas to -50. Notice that the front flowers on the right side now have a white border or halo.
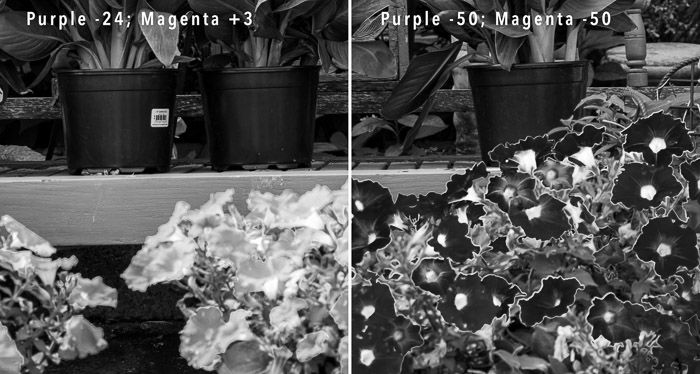
Lightroom includes a simple black and white conversion tool. The program also allows you to adjust each color channel individually. Photoshop has similar tools for black and white conversion.
How to Make an Image Black and White in Photoshop
Photoshop has a couple of simple black and white conversion tools.
Desaturate the Image
Desaturation is the simplest way to make an image black and white in Photoshop. This method is quick, but it is destructive. It changes your original file. It’s always a good idea to work on a copy of your image in case you make a mistake or want to try something different. There are a few ways to do this:
- Right-click on the background layer and select Duplicate Layer.
- Drag your background layer to the + sign in the Layers panel.
- Use the keyboard shortcut Ctrl or ⌘J.
To convert your layer to black and white, go to the Image drop-down menu. Select Image > Adjustments > Desaturate (Shift-Ctrl or ⌘U). Photoshop quickly strips your image of color.
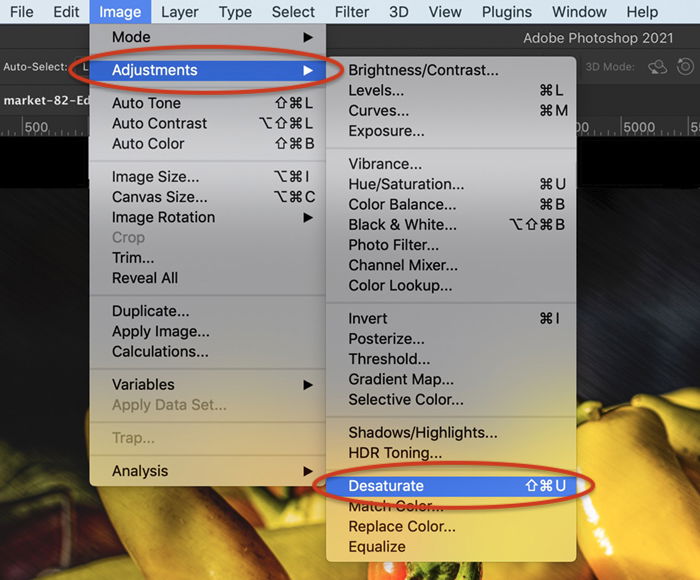
In the desaturated image, the yellows and reds of the peppers are very similar in tone. You might not realize that there were two colors of peppers in the basket.

Grayscale Mode
Another way to remove the color from your photos is by creating a grayscale image.
- Go to the Image drop-down menu.
- Select Image > Mode > Grayscale.
I find that this method retains more tonal range than the Desaturate tool, but it is also destructive. All color information is lost.
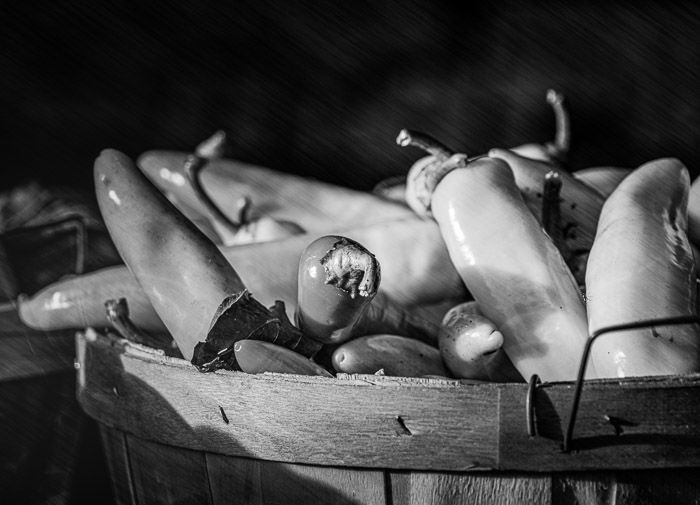
Converting your images to grayscale or using the Desaturate command are both easy. But these tools don’t allow you to control the monochrome conversion. Photoshop has another tool for that.
Black and White Adjustment Layer
Adding a Black and White adjustment layer is a nondestructive way to convert your photo to monochrome.
- Go to the Layer drop-down menu.
- Select Layer > New Adjustment Layer > Black and White.
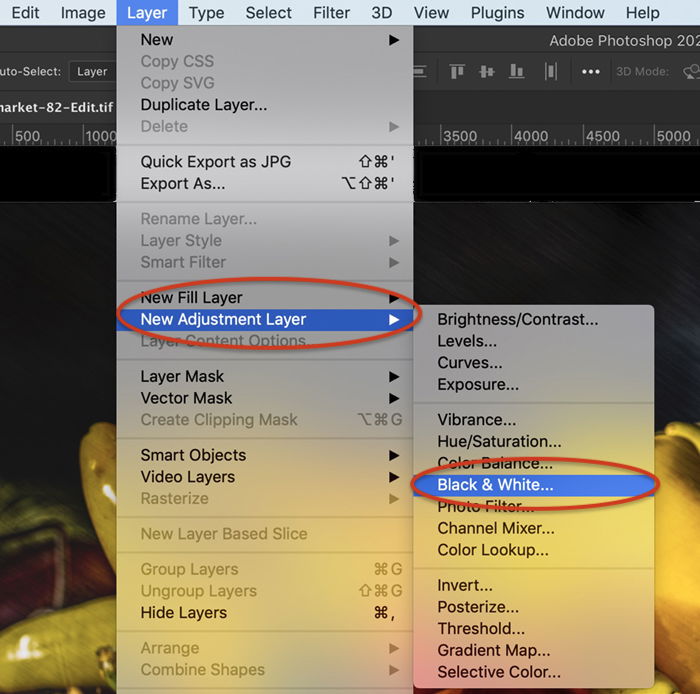
Photoshop does a basic monochromatic conversion. From there, you can selectively adjust each color channel in the Properties panel. For instance, I can lighten the yellows and darken the reds. Or I can reverse this and make the red pepper light and the yellow peppers dark.
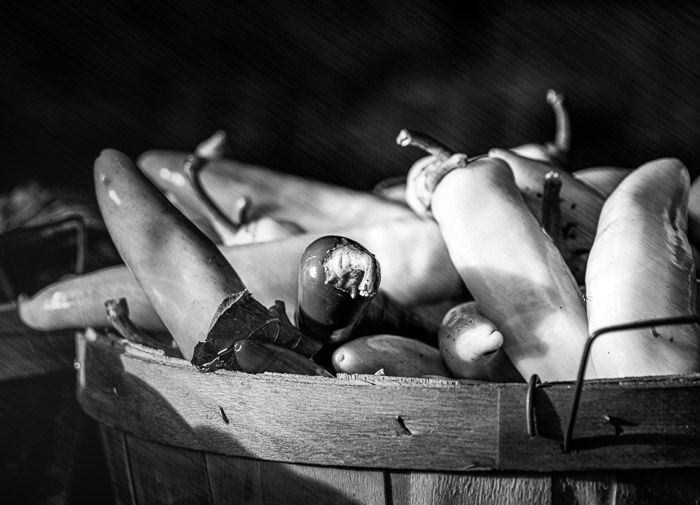
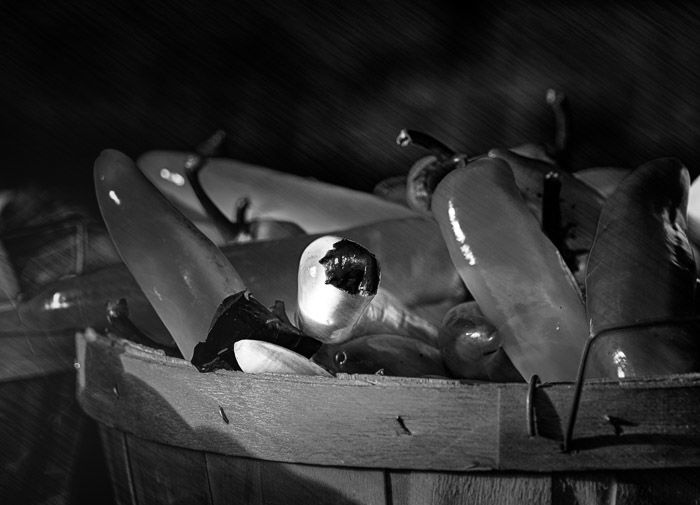
The way you adjust the individual sliders makes a big difference to your final image.
Notice that the Black & White adjustment layer has a mask. If you paint black on this mask, the color reappears. This is an easy way of making partial black and white images. Depending on which area you mask, you can convert the background to black and white using Photoshop. Or for a more unique result, you can even try creating a color splash effect!
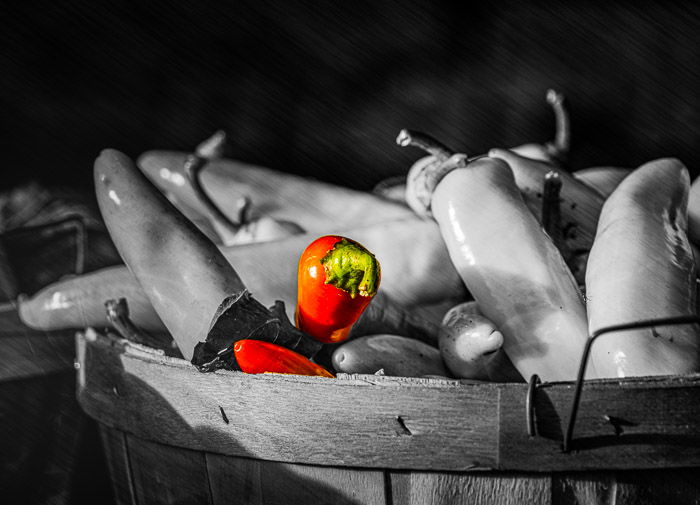
Summary
It’s easy to make a black and white image in Photoshop and Lightroom. Some methods only require one click.
For a simple conversion, use the Desaturate command in Photoshop or select the Convert to Black and White tool in Lightroom. For a more artistic control, add a Black & White adjustment layer in Photoshop or the B&W panel in Lightroom.
Check out our Effortless Editing with Lightroom course to become a master at editing your photos!
But creating great black and white photos isn’t easy – it takes skill, talent, and a lot of practice. That’s why it’s important to learn from the masters of this art form. Check out these 20 best black and white photography quotes for inspiration!


1. Black And White Photography Quotes By Jason Peterson On The Timelessness Of B&W
“Black and white photography erases time from the equation.” – Jason Peterson
Jason M. Peterson is one of the biggest photographers on Instagram today. He is not only a photographer but also a creative director and has his own advertising agency.
He has 1 million Insta followers and his feed provides exceptional inspiration for black and white photography.
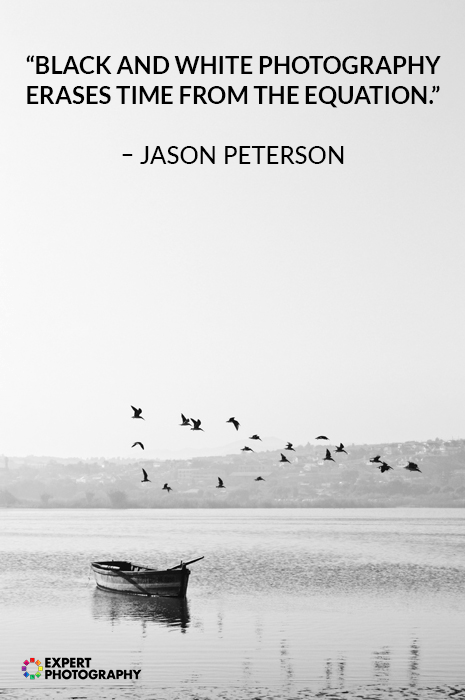
2. Rob Sheppard on What Black and White Photography is NOT
“Good black and white photography is not about the removal of color!” – Rob Sheppard
Rob Sheppard is a nature photographer and videographer who also worked as the editor of the prestigious Outdoor Photographer magazine.
Moreover, he also wrote and photographed for more than 40 books. Being in nature is essential for Rob’s life and he encourages other people to do the same.
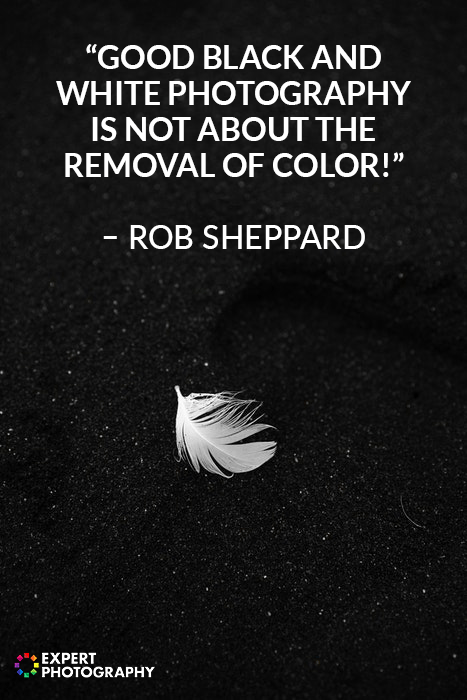
3. Annie Leibovitz on The Positive Limitations of B&W Photography
“My experience of learning in the darkroom with black-and-white film had limitations that were helpful. There were fewer choices. When digital came along, I didn’t jump into it. But it was obvious that this is what was going to be. If you do this for a long time, everything changes.” – Annie Leibovitz
Annie Leibovitz is one of the greatest photographers of our age. She is known for her portrait photographs and often captures celebrities.
Her polaroid of John Lennon and Yoko Ono was taken only five hours before Lennon was shot. The Library of Congress declared Leibovitz as a Living Legend.
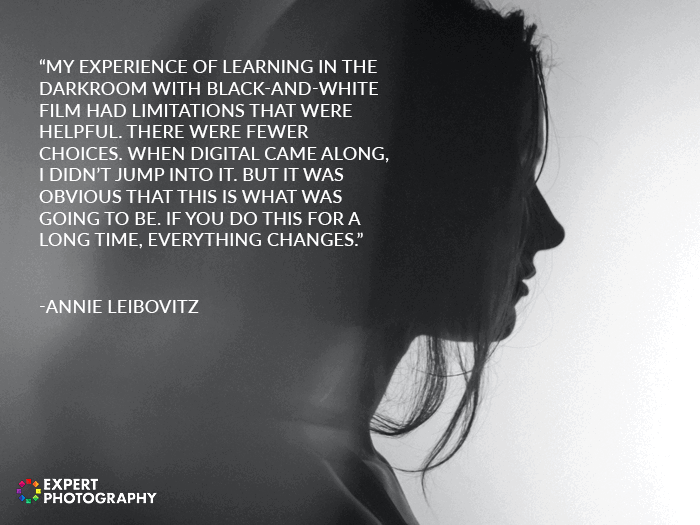
4. John Beardsworth on Textures and B&W
“It’s an obvious opportunity for black and white when a scene contains little color but lots of texture.” – John Beardsworth
John Beardsworth is an American photographer and author who started with commercial assignments. Later, he discovered how he could combine two of his passions: painting and photography.
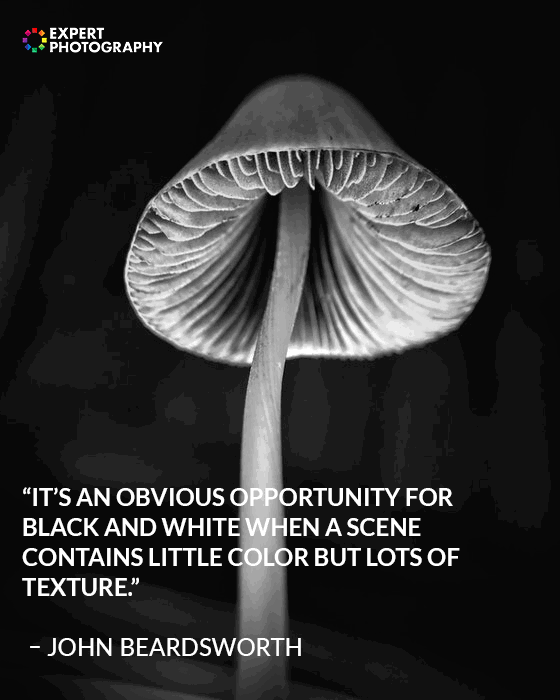
5. Dean Sherwood on B&W Music Photographs
“Music photographs in black and white are timeless. I can definitely recount more black and white music photographs I love than I can color ones.” – Dean Sherwood
Dean Sherwood is a London-based photographer and videographer. His work often focuses on the music industry.
His Instagram feed offers behind-the-scene insights and inspiration for anyone interested in music or black and white photography.
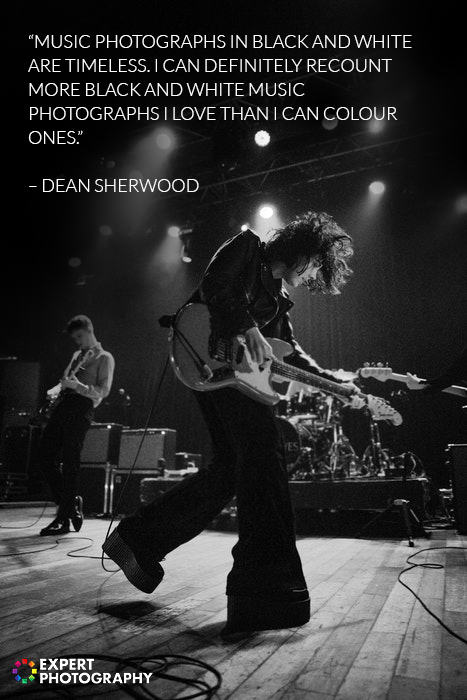
6. Antonia Deutsch On Black and White Portraits
“When shooting a portrait in black and white you are not distracted by the colors and it is much less confused; this allows me to capture the character of my sitter. My portraits are very calm and, I hope, timeless. I strive to make each portrait a true reflection of the individual.” – Antonia Deutsch
Antonia Deutsch is a photographer from the UK who began her career with advertising clients in London. Later, she started to specialize in black and white photography. She received many awards and had several exhibitions throughout her career.
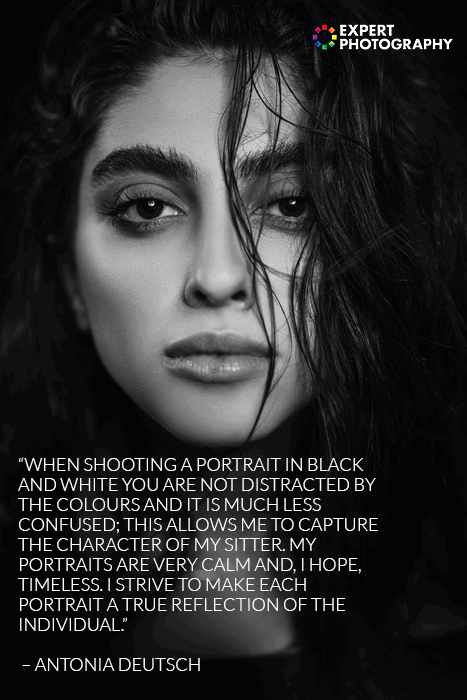
7. Martin Parr on Why B&W Was Popular in the ’70s
“In the ’70s, in Britain, if you were going to do serious photography, you were obliged to work in black-and-white. Color was the palette of commercial photography and snapshot photography.” – Martin Parr
Martin Parr is a British photojournalist, documentary photographer and photobook collector. He is known for his photography projects that document the social classes of England and the wealth of the Western world. He has been a member of Magnum Photos since 1994.
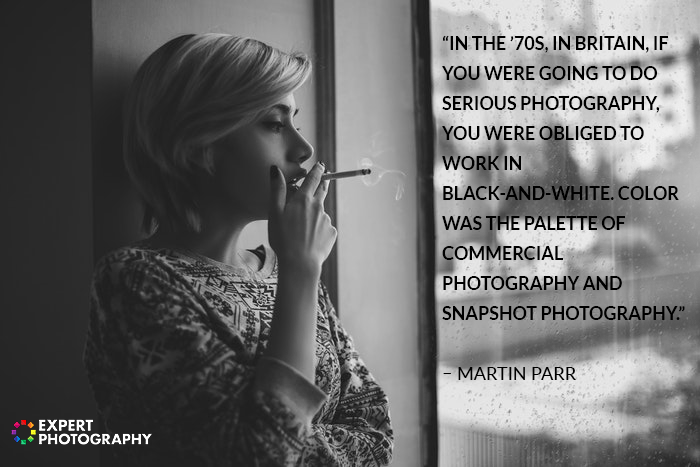
8. Philip Jones Griffiths on B&W vs Color
“Let’s assume that all the cassettes of monochrome film Cartier-Bresson ever exposed had somehow been surreptitiously loaded with color film. I’d venture to say that about two-thirds of his pictures would be ruined and the remainder unaffected, neither spoiled nor improved. And perhaps one in a thousand enhanced.” – Philip Jones Griffiths
Philip Jones Griffiths was a Welsh photojournalist. He’s best known for his coverage of the Vietnam war. He was president of Magnum, between 1980-85.
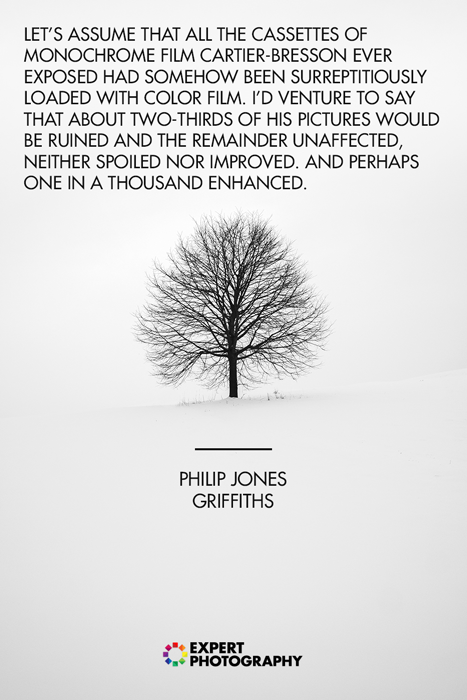
9. Fay Godwin on Black and White Landscape Photography
“Maybe black and white is the best medium for landscapes, I don’t know.” – Fay Godwin“
Fay Godwin was a British photographer who became famous for her black and white landscape photography. She was a self-taught photographer who started with portraits and found her true calling in photographing the British countryside and coast.
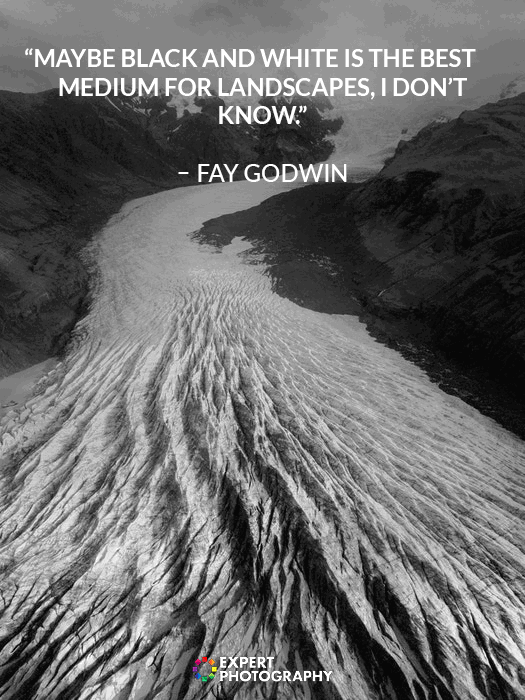
10. Mary Ellen Mark Explaining What She Loves About B&W Photography
“I work in color sometimes, but I guess the images I most connect to, historically speaking, are in black and white. I see more in black and white – I like the abstraction of it.” – Mary Ellen Mark
Mary Ellen Mark was a famous photographer from the US who was known for her documentary photos, portraits, advertising photography and photojournalism.
Between 1977 and 1981 she was a member of Magnus Photos. She received several awards for her artwork.

11. Andri Cauldwell on Black and White
“To see in color is a delight for the eye but to see in black and white is a delight for the soul” – Andri Cauldwell
Andri Magdelena Cauldwell is a contemporary American photographer. Her work has appeared in many famous magazines and as part of national marketing campaigns. Her black and white quotes pinpoint exactly how powerful monochrome photography can be.
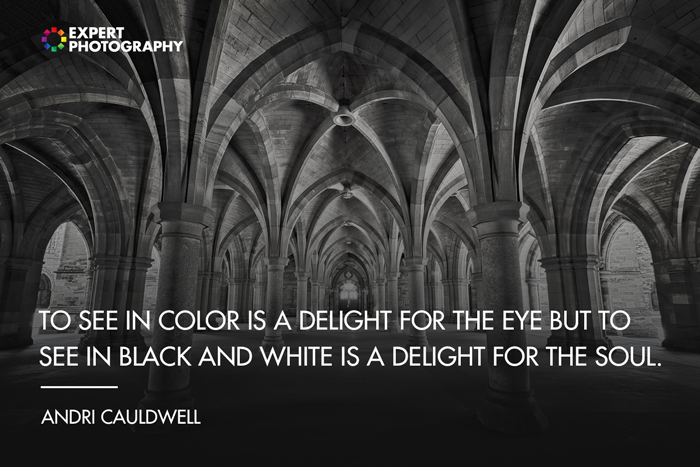
12. Henri Mattise on the Queen of All Colors
“I’ve been forty years discovering that the queen of all colors is black.” – Henri Mattise
Henri Matisse was a French Fauvist painter. He said, even after 40 years of painting and discovering, black is the most powerful color.
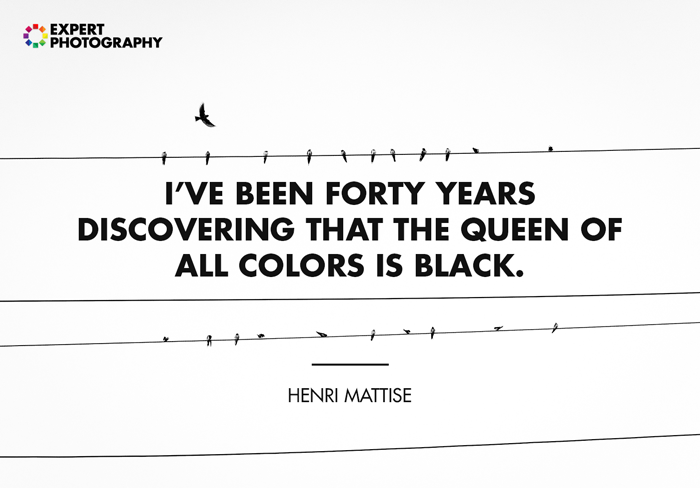
13. Paul Outerbridge on the Difference Between Color and Monochrome
“One very important difference between color and monochromatic photography is this: in black and white you suggest; in color you state. Much can be implied by suggestion, but statement demands certainty… absolute certainty.” – Paul Outerbridge
Paul Outerbridge, Jr. was an American photographer. He’s known for his early use of and experiments with color photography and for his fashion and commercial photography. Paul also created erotic nude photos that were not exhibited while he was alive.
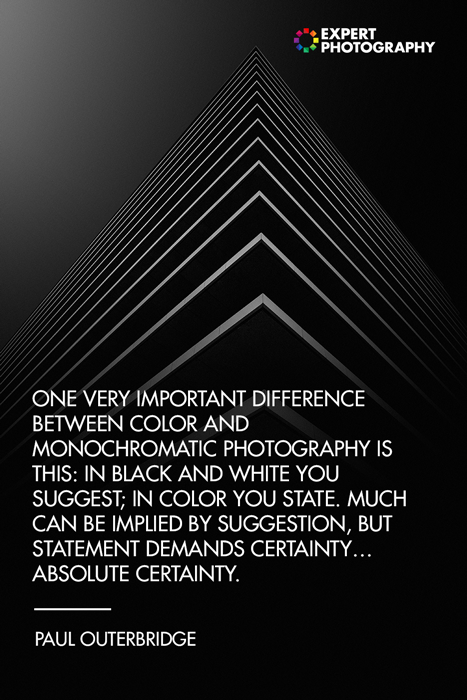
14. Anders Petersen on Black and White
“In black and white there are more colors than color photography, because you are not blocked by any colors so you can use your experiences, your knowledge, and your fantasy, to put colors into black and white.” – Anders Petersen
Anders Petersen (born 3 May 1944) is a Swedish photographer, who works in Stockholm. His work features intimate and personal black and white documentary-style photographs.
15. Ansel Adams on Seeing in Black and White Photography
“One sees differently with color photography than black-and-white… in short, visualization must be modified by the specific nature of the equipment and materials being used.” – Ansel Adams
Ansel Easton Adams was an American landscape photographer. His black-and-white landscape images showcased the American West, especially National Parks. They appear in calendars, posters, books, and all over the internet.
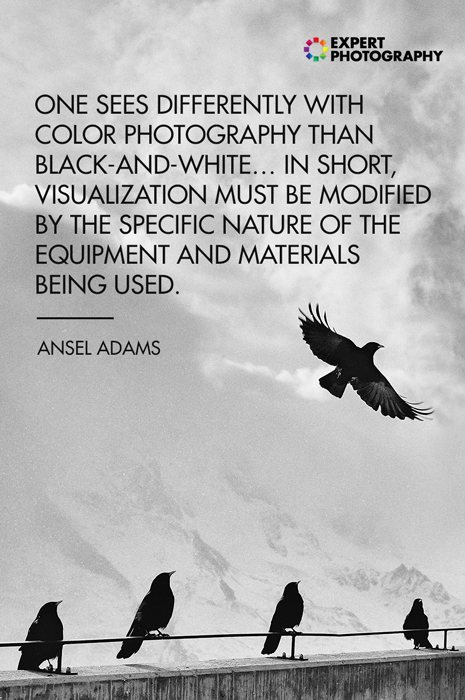
16. Walker Evans on How Color Corrupts Photography
“Color tends to corrupt photography and absolute color corrupts it absolutely. Consider the way color film usually renders blue sky, green foliage, lipstick red, and the kiddies’ playsuit. These are four simple words which must be whispered: color photography is vulgar.” – Walker Evans
Walker Evans was an American photojournalist and photographer. He’s best known for his work for the FSA (Farm Security Administration) documenting the effects of the Great Depression.
17. Eliott Erwitt on Black and White
“Color is descriptive. Black and white is interpretive.” – Eliott Erwitt
Eliott Erwitt is an American photographer, best known for his street photography. He also used black and white candid shots of ironic and absurd situations within everyday settings.
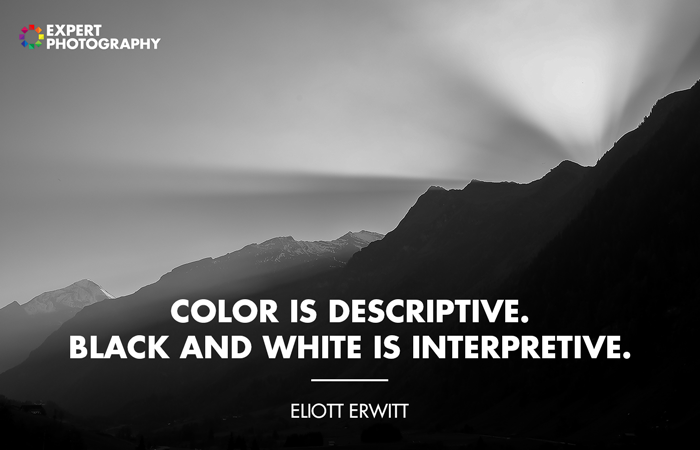
18. Dominic Rouse on B&W
“Color is everything, black and white is more.” – Dominic Rouse
Dominic Rouse is an English photographer whose work includes photojournalism, commercial, fine art and advertising photography. America’s Black and White magazine described him as the ‘master of digital manipulation’.

19. Rober Frank on Black and White Symbolism
“Black and white are the colors of photography. To me they symbolize the alternatives of hope and despair to which mankind is forever subjected” – Robert Frank
Robert Frank was a Swiss-American photographer and documentary filmmaker. His most notable work, the 1958 book titled The Americans, presented his outsider’s view of American society.

20. Ted Grant on B&W vs. Color Photography
“When you photograph people in color, you photograph their clothes. But when you photograph people in Black and white, you photograph their souls!”― Ted Grant
Ted Grant is Canada’s most prolific living photographer. He has a career spanning 60 years as a photojournalist.
His latest book, published in 2009, came with the title “Real Photographers Shoot Black and White. Sometimes Colour”.
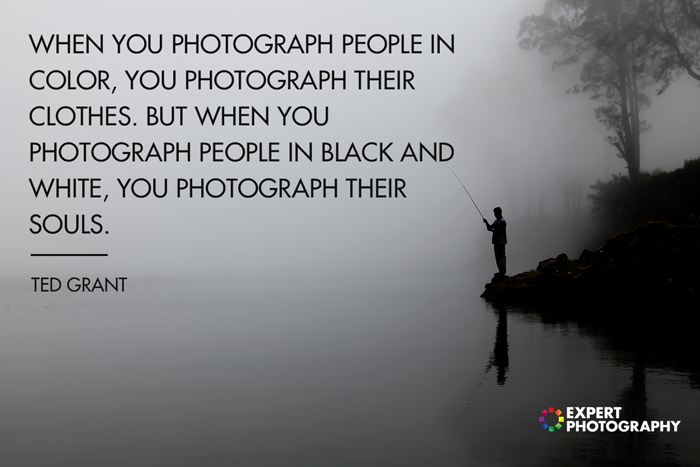
Conclusion
Every photographer needs inspiration from others. You can find this by looking at other artists’ work or read their words.
We hope these quotes help you get a better understanding of the uses of black and white photography.
]]>Read on for my top 5 tips to get the most out of your black and white still life photography.


1. Learn to Create Black and White Still Life Photography
Planning and researching a black and white still life photo shoot is essential. The process requires a bit of brain re-wiring. That way, you’ll ‘think’ in black and white and choose the right objects, lighting, and story for your photo.
Check out work by famous still life photographers to help with this. Grand masters such as Edward Weston and Karl Blossfeldt were pioneers of photography. They created unique works of art in black and white from everyday objects.
Give yourself time and space. Create a rough sketch about the way you want your photo to look.
What are the first features of the object that catch your eye? Make notes of the lines, textures, or tones you want to emphasise.
2. Enhance Textures and Shapes With Lighting
Without color getting in the way, you can play to the great strengths of black and white – texture and shape. Look to see where lines intersect and how light accentuates different textures.
Think about this throughout the black and white still life photography process. From selecting your subject matter and photographing it, to post-production and presentation.
I prefer to use low key lighting with either natural light from a window (on a cloudy day), or a soft sidelight. I often experiment with and without a reflector. Then I review the photographs in post-production. That way, I can see which version works best for texture and shape.
Move your subject around and see how it catches the light from different angles. Sometimes a subtle move of half a centimetre can make a big difference.
Black and white still life photography can often feel quite physical. You’re moving back and forth from the camera to the subject matter!
3. Turn Simple Objects Into Art With B&W Photography
You’re making a photo without people or movement. But that doesn’t mean that you can’t tell a story. Consider shapes of leaves at different stages of their life cycle. And how grey tones can convey emotion into the photograph.
Black and white photos of flowers reveal the true beauty of their lines and shapes. Black and white flower photography is a great starting point for monochromatic still life photography.
The style and texture of a weathered shoe in black and white tell us about their owner. Even without a human in the photograph.
Antique objects look beautiful in black and white photographs. And you can enhance their story by using warm or sepia monochrome tones.
Look around your home or garden. See what subjects you can find that tell a personal story. Even the most mundane object can become a work of art. All it needs is the right texture and shape with careful lighting and post-production.
Have a go at some of these black and white still life photography ideas:
- Jewellery from an elderly relative;
- Your favourite children’s books;
- Coffee;
- The beautiful but slippery flowers that drop on your garden path;
- An old (or new!) camera;
- Bunches of herbs or weeds;
- Your favourite food;
- Shells and driftwood from your last beach walk.
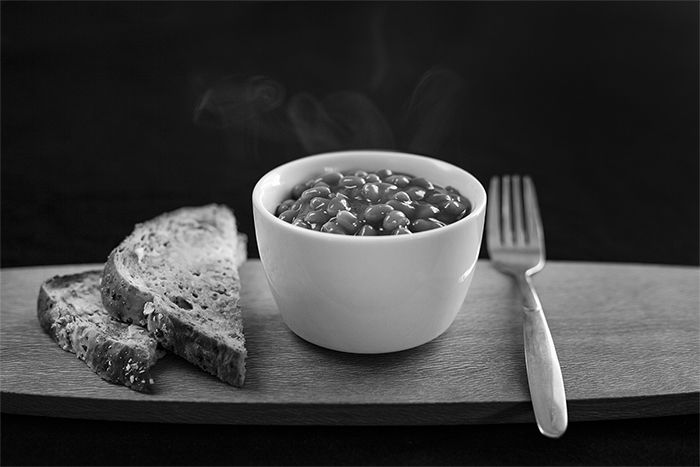
4. Use Simple Compositions to Make B&W Still Life Photos Stand Out
Black and white photography is all about shapes, lines, and textures. It’s important to use a very clear and simple composition that doesn’t distract from these elements.
With still life photography, I tend to be a stickler for the rules of thirds and odds. And the golden triangle and ratio.
If you’re uncertain of your composition, remove something from the frame. Or take a step back to include more negative space.
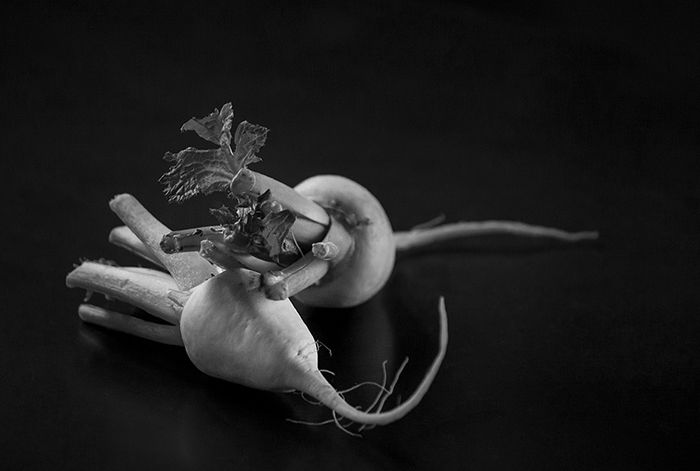
5. Use the Color Sliders to Enhance Black and White Still Life Photos
When it comes to black and white still life photography, clicking the shutter is only part of the process. Fine-tuning images in post-production is the important final step.
Clarity adjustment, dodging and burning, and spot removal are standard techniques to tidy up your photo in Lightroom or Camera Raw. But the tool I use most with my black and white still life photographs is the HSL (hue, saturation, luminance) color slider.
Moving individual sliders up or down gives you great control of light and shadows. It can transform your photograph by defining textures and shapes and even changing the focal point.

Adjust Blacks, Whites, and all the Greys In-Between
Like most black and white photography, it’s important to include ‘true black’ and ‘true white’. Plus a full range of greys.
Adjusting the HSL sliders is an easy way to lighten or darken parts of a photo. And you’re doing this without over-using the dodge and burn tools.
Still life photographs can be quite complex. Get familiar with zooming in and out of your image (ctrl, +/- or cmd, +/-) to check the black, white, and grey tones. Make sure they work together in harmony.
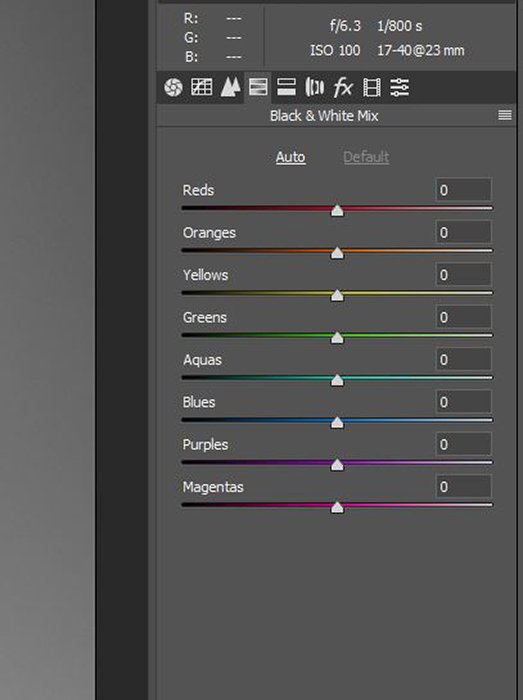
Adjust Color Sliders to Change the Mood
Moving the HSL color sliders can change the mood of a photo. Do you want to tell a story about the strength, clarity, and bold qualities of a flower in black and white? Try adjusting the sliders to show contrast and definition.
For a more subtle approach that portrays a flower’s fragility, try softer greys and less contrast.
There’s no ‘right’ or ‘wrong’ with this method, and it can be quite a subjective approach. Try different versions and review them with fresh eyes the next day.
If in doubt, less is always more!
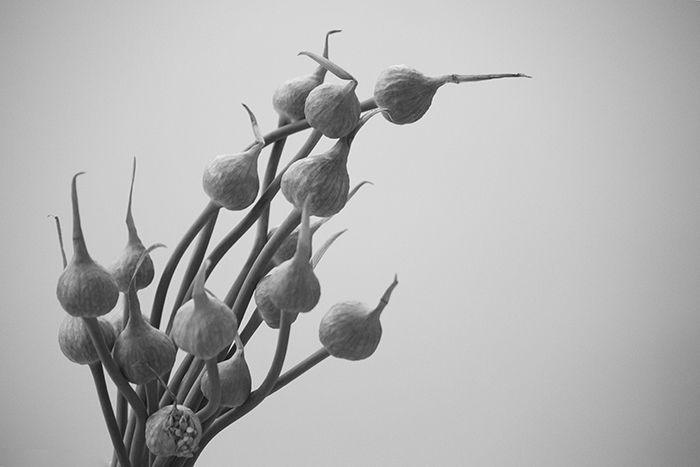
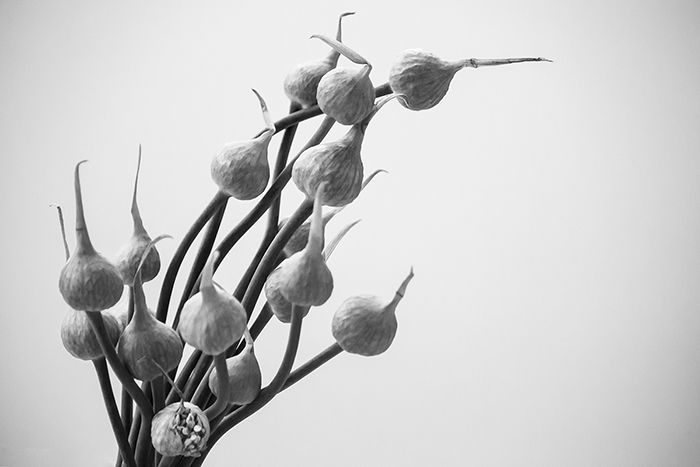
Conclusion
Photographing still life in black and white provides great creative opportunities. I’m always surprised at the beauty of a still life scene when the color is removed.
Keep it simple; start with objects you’re familiar with. Experiment with whatever light and equipment you have on-hand.
Push the boundaries with your black and white still life photography, and don’t be afraid to get a bit arty!
Next, why not check out this great article on black and white landscape photography!
Don’t miss out on our Creative Photography Cookbook for awesome still life ideas!
They’re not exactly the same, though. There is a distinction which can be helpful to know.
In this article, you will learn the difference between monochrome vs. black and white photography.
What is Monochrome Photography?
Monochrome photos contain variations of only one color and nothing else. This could be different shades of blue, green, or grey, for example.
If you wanted a green monochrome photo using only your camera, you would seek out a scene where the only colors in the frame are variants of green.
You can also decide to post-process a photo as monochrome. This involves taking an image and limiting it to a single color range. These days this is most commonly done using Lightroom or Photoshop, although it is not a new practice.
You may have seen vintage sepia or cyanotype photographs. These are the most common examples of monochrome photography. In such photos, the warm and cool tones were the results of specific toning chemicals used in the developing process.
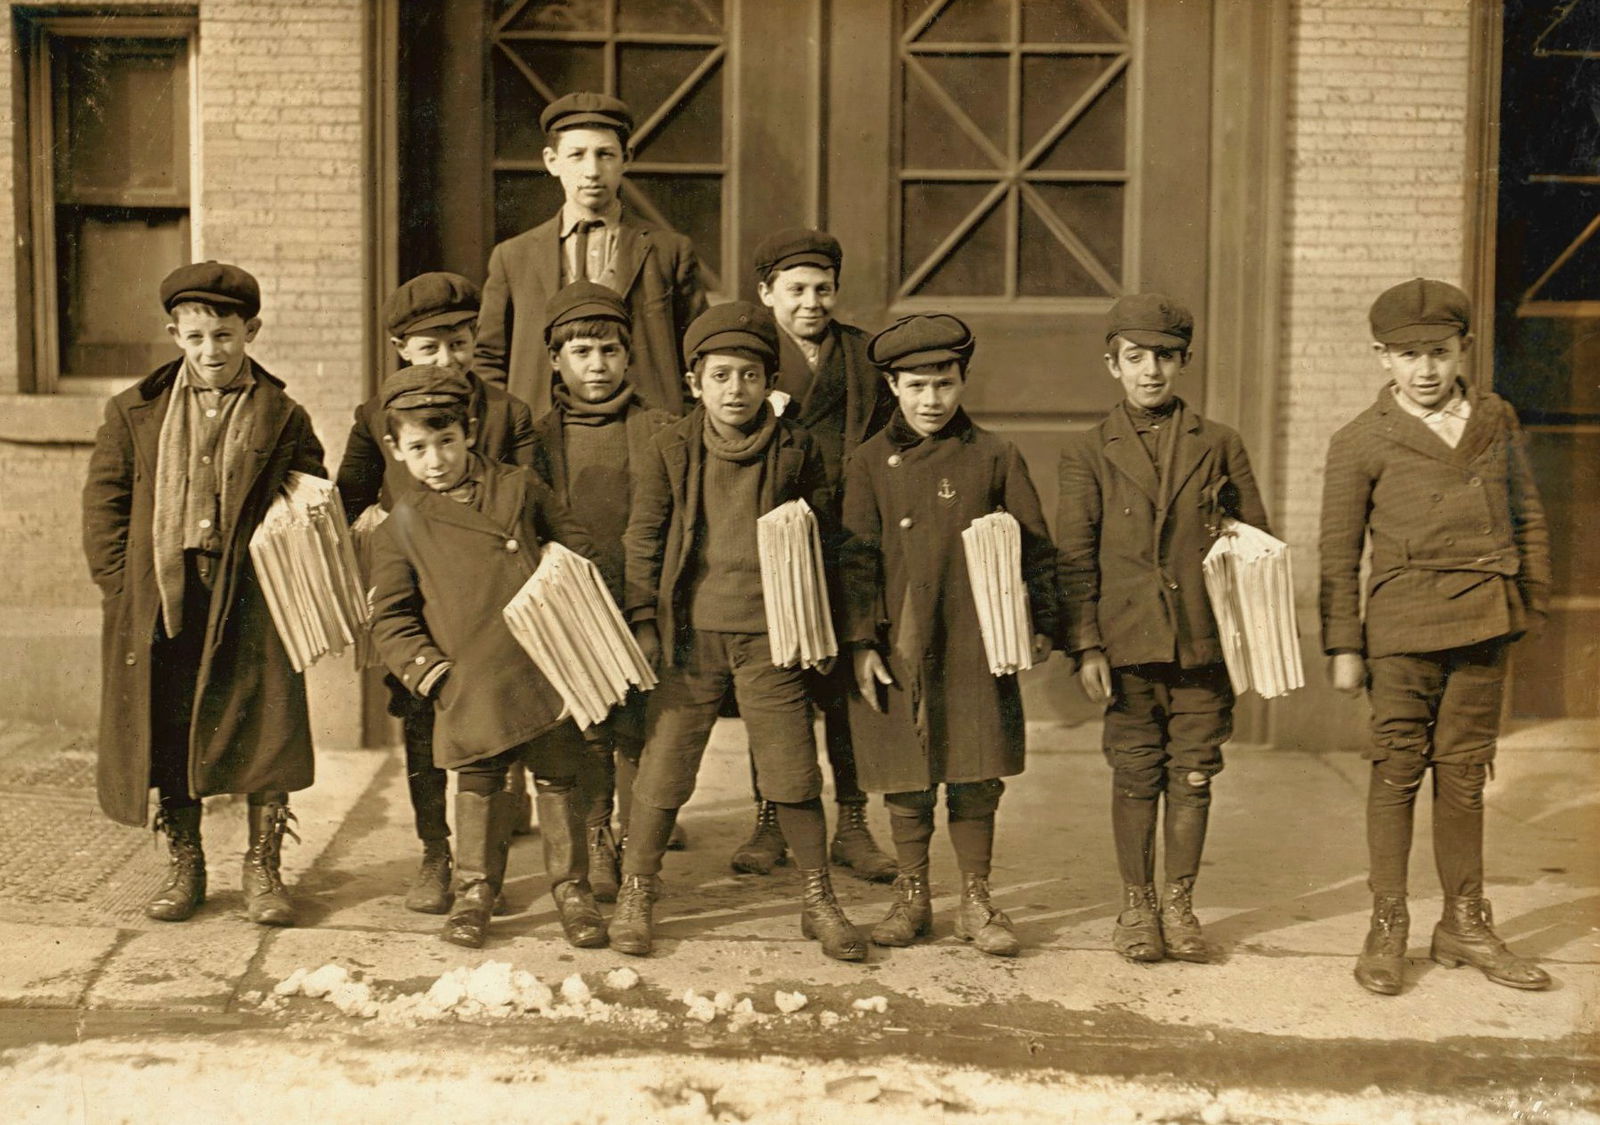
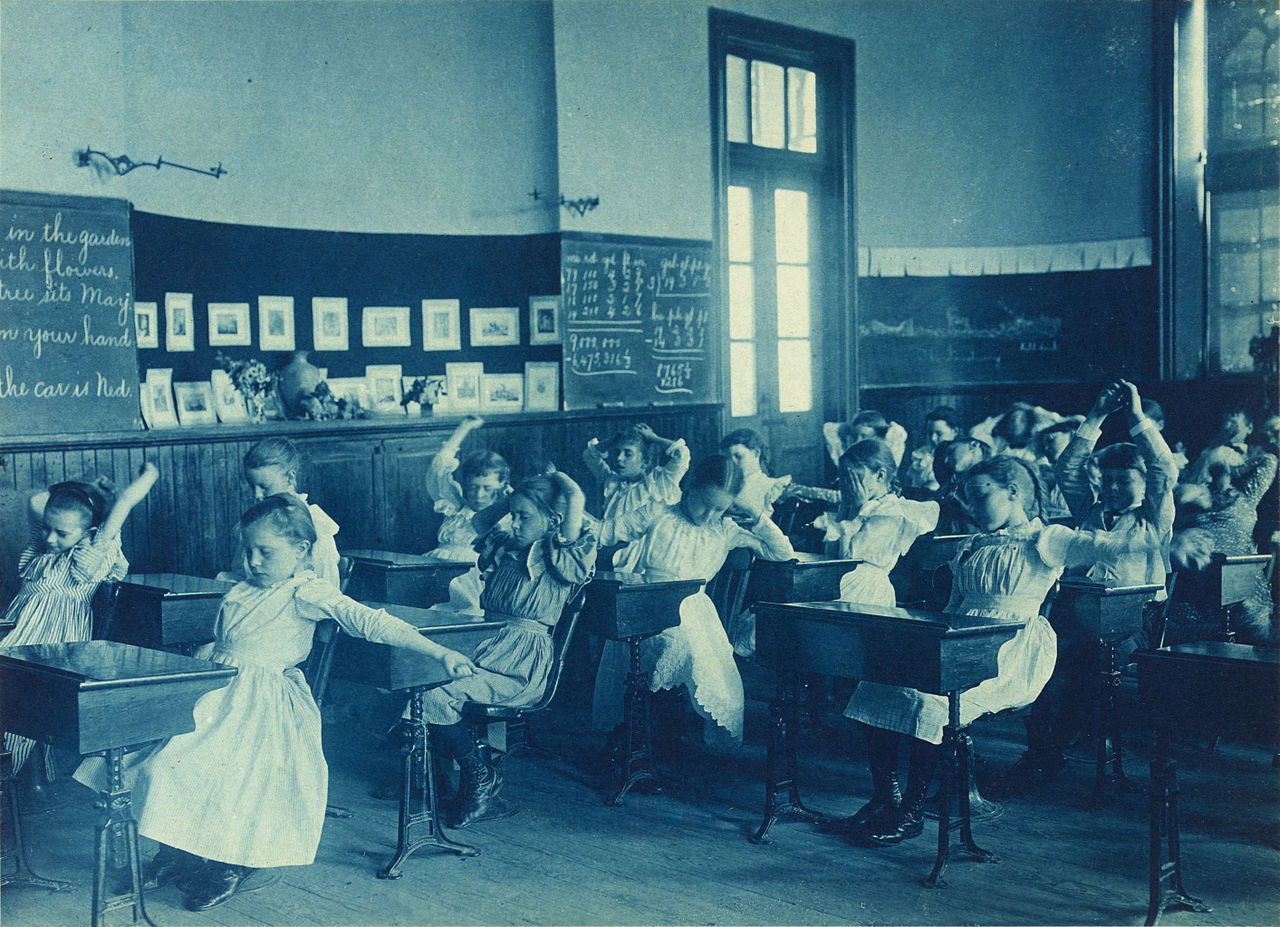
Capturing a Slice of the Color Wheel
Take a look at the color wheel below. You can see that each color is divided into smaller pieces. These show you a rough illustration of variants within a single color.
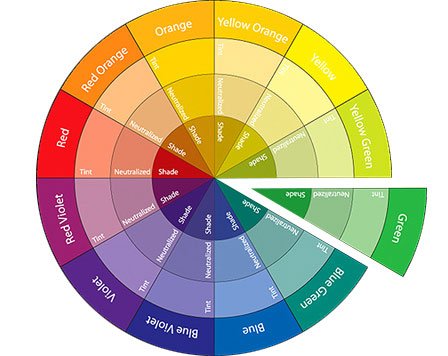
Let’s take the example of green and variants of green. On the outside ring, you have the pure color (sometimes referred to as the ‘hue’), labelled with its name.
Going towards the middle of the color wheel, we next have the ‘tint’, which refers to the green highlights.
Next up you will find the neutral green variants, which is the same as green mid-tones.
Closest to the center of the color wheel, you will find the ‘shades’ or shadow tones of green.
In-Camera Monochrome Photography
To capture a natural monochrome image in-camera, get the brightest and the darkest variants of the color into the frame. This will create more contrast in the photo.
A close-up photo of leaves would be a good example of a natural green monochromatic picture.
Another example is the photo of the underside of a mushroom below. This only contains variants of yellow-brown colors.
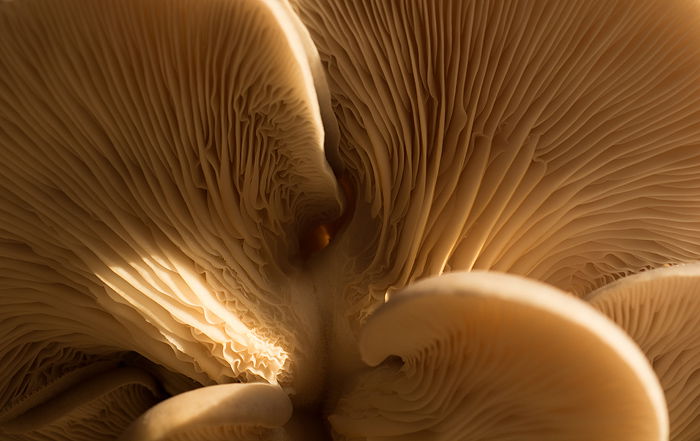
The photo below is not perfect monochrome photography, but it’s close. It was captured in-camera with a long shutter speed.
Because of the time of day, the colors in the water and the sky matched quite well with the bathhouse.
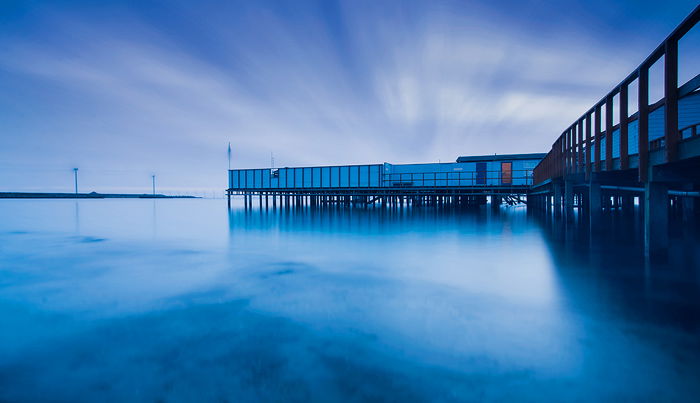
This photo appeared on the Google Nik Collections website with the following comment:
‘This image caught our eye with its cool blue hues and simple composure. This type of colorful image is a great twist on a monochromatic image.’
If you’d like to learn more about the Google Nik Collection, check out our in-depth tutorial.
Using Lightroom to Post-Process a Photo as Monochrome
As mentioned above, you can also post-process a photo to be monochromatic.
To do this in Lightroom, go to the Develop module (press D). Locate the Split Tone panel on the right-hand side of the screen.
In the Split Tone panel, you can set different tones for the highlights and the shadows.
To create a monotone photo, you can set both the shadow tone and the highlight tone to the same color value setting.
You can use this technique for creative purposes. I have rarely found a photo that benefits from being made monochromatic in post-processing.
You’ll get the best photos and results by looking for naturally monochromatic scenes.
What is Black and White Photography?
Black and white photography contains variants of the color grey ranging from absolute black to absolute white.
This means that all black and white photos are monochrome photos, but not the other way around.
A more accurate (but decidedly less popular) term for this type of image is ‘grayscale’. This is because the image typically comprises grey tones, not just the color black and the color white.
Black and white images as you probably know them are images like the one immediately below. In these images, no color information has been captured or it has been removed. Note the wide variety of grey tones.
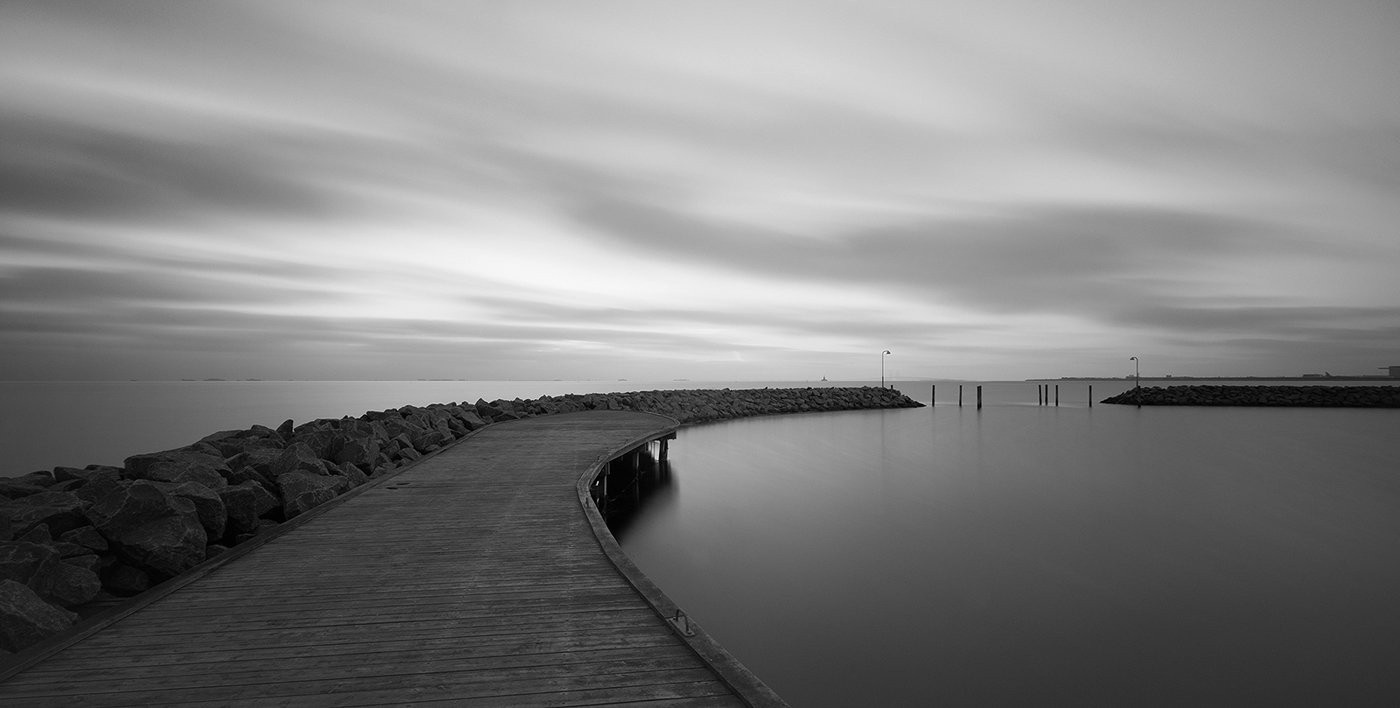 While it’s uncommon, you can also find scenes that only contain strong black and white colors.
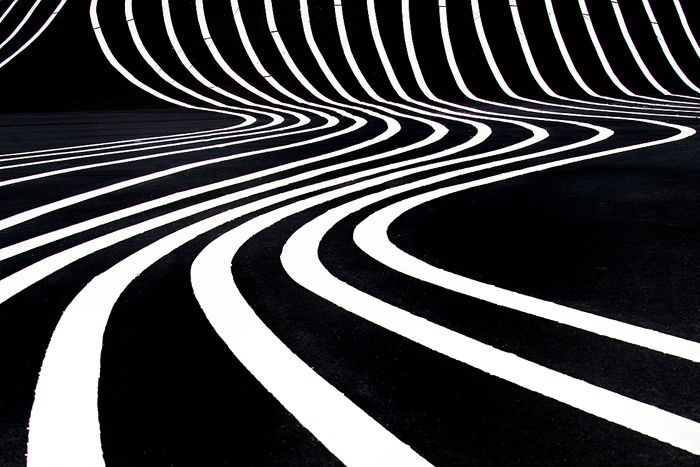
This photo is a high-contrast black and white photo lacking mid-tones. Grey is barely present, if at all.
While the tonal profile of each of these photos differ, both count as black and white photography.
Should You Capture Black and White Images in Camera, or Convert Them in Post?
If you want to set your camera to capture in black and white, be aware that both Canon and Nikon call this Monochrome. Confusing, right?
I suggest that you always shoot your images in color and then convert them to black and white in post-processing. If you force your camera to capture black and white, it will often do so in JPEG format. This doesn’t contain the same amount of data.
If you capture in RAW format, you will capture a color photo and get more image data. This is useful for post-processing.
If you still want to capture your images in black and white you can set this on a Nikon DSLR by using the menu:
Shooting Menu > Set Picture Control > Monochrome.
However, it is better to learn how to identify what makes a good black and white image but still capture it in color, to be converted later.
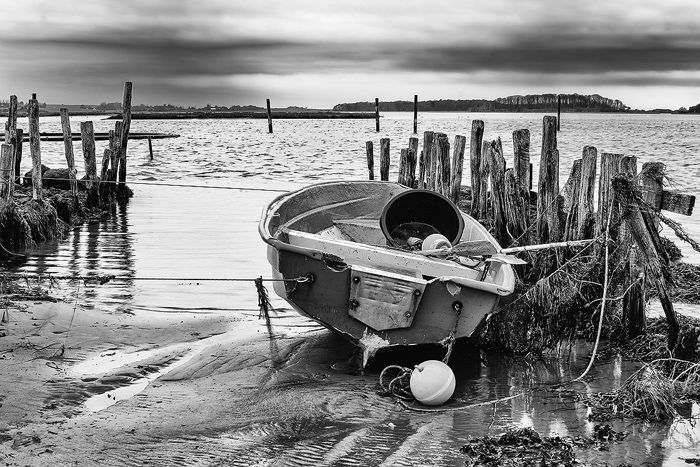
What Does Grayscale Mean?
Often you’ll hear the term ‘grayscale’ instead of calling a photo black and white. As mentioned above, these two terms are one and the same thing. However, ‘grayscale’ can also have another meaning.
To a photo editing software, grayscale is also a way of storing information about how a photo is presented, just like RGB or CMYK.
In Photoshop, these methods of storing the information are ‘color modes’. RGB and CMYK are color modes which store color information and display it in a certain way. Grayscale, however, does not store color information at all.
If you want to discard color information in Photoshop, you can opt to convert it to grayscale mode. Be aware that this is a destructive way of converting a photo to black and white. This means that once you convert it, you lose the color information in the image forever.
We often use grayscale conversion when we want to print our B&W images without any unwanted color deformation.
Converting photos from color to black and white in Photoshop is a whole topic in itself. There are a lot of different ways to do it.
Conclusion
Now that you’re clear on the difference between monochrome and black and white photography go and experiment with both. You can try taking some black and white portraits or landscape photography.
Look for natural monochromatic scenes to capture or scenes that will look great when converted to black and white.
Explore your camera settings and photo editing software too. This way you’ll learn the options you have when you want to create and work with black and white images.
Looking for some photography inspiration? Why not try a photo walk, photomontage or check our article on great photography quotes!
A lack of color opens up a new world where light, expressions, and stories are intensified.
What I love most about a black and white portrait is its soulfulness. If you compare two versions of the same portrait—the original and its B&W copy—you would feel more drawn to the emotions in the second one. A B&W portrait will prioritize your subject’s expressions, movements, and other subtleties.
This article will equip you with the skills to achieve those visually appealing black-and-white portraits.
Why Shoot Black and White Portrait Photography?
A lot of cameras have a B&W shooting option. It’s a fun feature worth experimenting with. But it should not be your main tool for taking black and white photos. There are a couple of reasons for this:
- If you shoot in color first, you’ll have more control during the editing process. You can adjust certain colors using tools like sliders in Lightroom or Selective Color in Photoshop.
- Not every image looks appealing in black and white. Learning how to shoot for B&W as opposed to in B&W will help you strengthen your ability to think creatively. You’ll get to challenge yourself and take better photos.
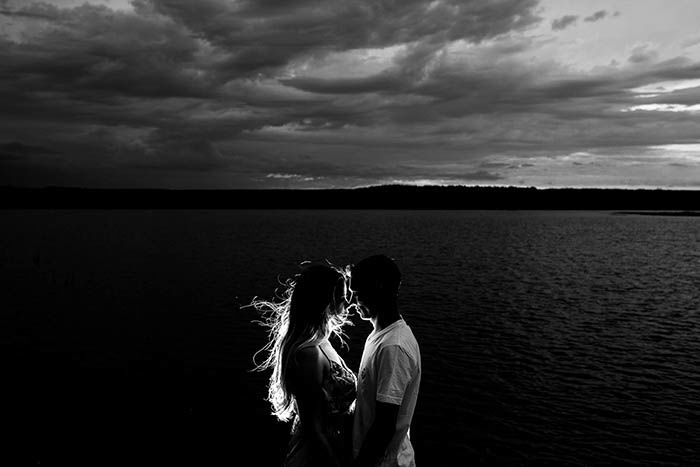
Setting up a Black and White Photo Shoot
Camera settings, lighting, location, and your model’s posing all have to be planned carefully before your photo shoot.
As you read the following points, think about the stories you want to tell and what you want your viewers to feel when they look at your work. This information will help you before, during, and after your photo shoot.
Camera Settings
When I take photos of people, I like to separate them from their backgrounds. To do this, I use an aperture of f/1.8 – f/2.5. This range makes my subjects stand out and creates gorgeous bokeh. A soft background will complement your model’s features. It will also eliminate any potential distractions, and look amazing in B&W.
However, this is just my way of working with aperture. If you have a different method, don’t feel left out. But try to remain open to experimenting with new settings.
When I take portrait photography at night (or in a place with limited light), I like to experiment with high ISO numbers. I know this might sound intimidating, but it’s ideal for shooting black and white portraits. The grain in your image will create a rough, film-like look. The lack of light, which may look unappealing in color, will look dramatic in B&W.
Lighting
The type of lighting you should work with depends on the kind of story you want your photos to tell. You don’t even have to come up with a complicated idea. All you have to do is ask yourself three simple questions:
- How do I want people to feel when they look at my portraits?
If you want people to feel touched when they look at your work, experiment with fewer light sources and more shadows. If you’re aiming for a brighter atmosphere, take photos in a well-lit location. - How do I want my model to feel when I take these photos?
Once you choose an emotion that appeals to you, consider the instructions you’ll give to your model. If you know how to give clear instructions, you won’t have to deal with any confusion later on. - What is my favorite B&W portrait?
There’s nothing wrong with using other people’s work for inspiration. Research B&W portraits, analyze what stands out to you, and find out why you like those portraits.

Posing for Black and White Portraits
Without any distracting colors and details, your subject will stand out. Every curve, movement, and texture will be emphasized. It’s important to know what looks most natural.
Posing relies heavily on communication and practice. Don’t be afraid to make mistakes during this process. Also, get to know your models before you work with them. Befriending your subjects will help you understand what makes them who they are. This information will allow you to tell your story through their unique personality.
Many photographers recommend focusing on the eyes when shooting black and white portrait photography. When you ask your models to pose a certain way, make sure their eyes look bright and sparkly. This will make your photos eye-catching and impactful. Combine that with a great pose and you’ll have the perfect black and white portrait.
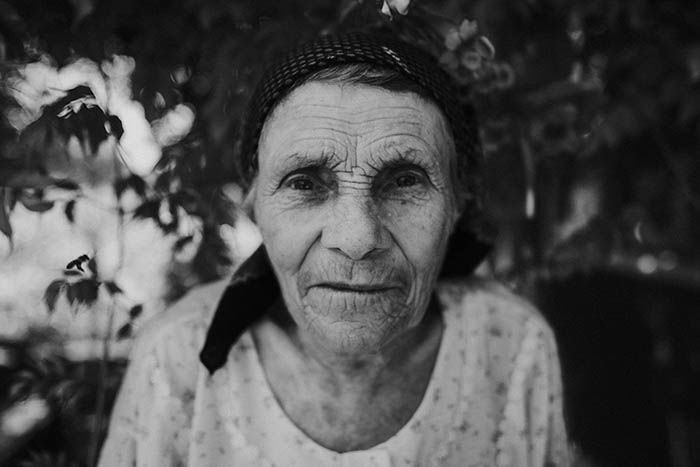
Watch out for Striking Elements
A lack of color gives other elements a chance to be seen and appreciated. These include textures, expressions, and negative space. Wrinkles, freckles, and fabric will all tell a story of their own in black and white.
Expressions will add depth to every other part of your photograph. Negative space, like an empty sky or a black background, will give your portrait a minimalistic yet striking look.
Keep an eye out for these things when you take photographs. They’ll compliment your subject’s poses and enhance your compositions. When you look for objects to include in your portraits, don’t forget to think in black and white. What may look appealing to you in color may not look that great in black and white, and vice versa.
Focus on the things you usually overlook or leave out. If there are any vibrant colors you’d usually avoid, take a photo of them and convert the results to B&W.

Black and White Photography Editing Tips
The real magic of black-and-white photography happens when you start editing. Your photography editing style may be different from mine. But there are some tricks that every artist can benefit from.
Don’t get discouraged if your photo looks dull when you convert it to black and white. The first thing you should do is work with the options that your editing program offers.
In Photoshop, you can choose various filters. What works best for most portraits is the Green filter. It enhances every skin color, darkens textures, and adds more contrast to the entire photo.
In Lightroom, the same tools are available under the Tone Curve. Drag the Orange slider to the right and the Red slider to the left. (To perfect your skills, try out our Effortless Editing course!)
You should make the most of the Curve and Clarity tools in your editing program. They’re usually all I need when I convert my portraits to B&W. These tools will help you deepen shadows and brighten highlights. It’s easy to get carried away with clarity and add too much depth to your photo. Be careful when you adjust it.
You can also add grain to your photos for a film camera effect. Subtle grain or dust textures look stunning in black and white photographs. I often use free scratch textures or make my own. These effects tend to look better in my B&W portraits than in colored versions.
If you want to save time and experiment with someone else’s style, use B&W Lightroom presets or Photoshop actions. These resources will convert your photography to stylistic black-and-white portraits.
Familiarizing yourself with other people’s editing preferences is a great way to learn. It can even help you to get out of a creative rut.
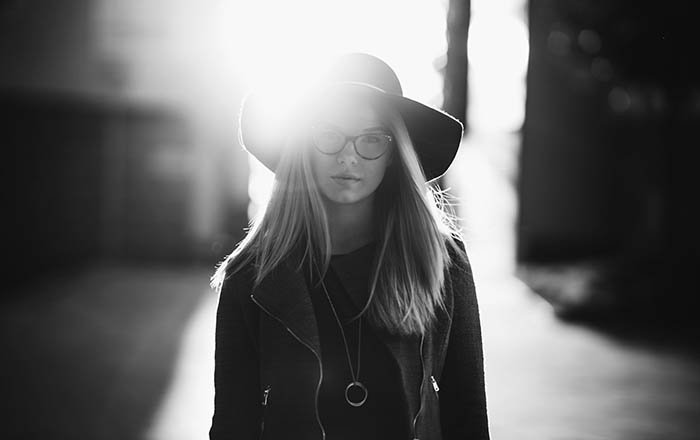
Conclusion
I remember how skeptical I felt when I took my first B&W self-portraits. As a beginner with little experience, I didn’t think I had much to contribute.
Filled with doubts, I still persevered. I discovered a world that completely changed the way I looked at portrait photography. What first started out as a skeptical experiment turned into a personal creative journey. Through self-portraiture, I found a way to express my deepest feelings.
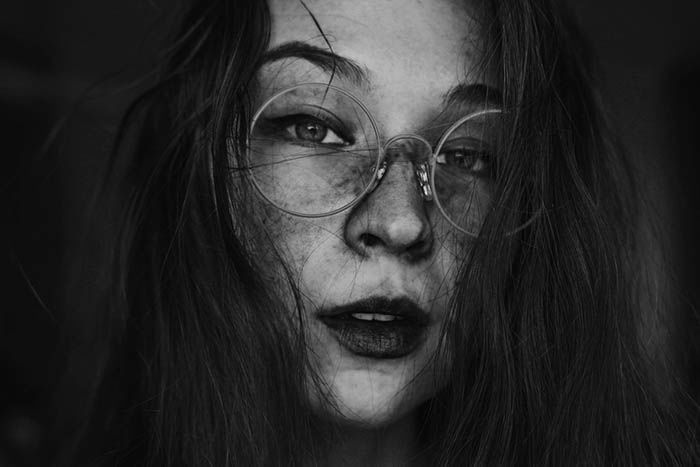
Figure out what kind of stories you want to tell. Learn how to give clear instructions to your models. Appreciate unique elements like textures. And don’t be afraid to fail once in a while.
Eventually, you’ll feel confident in this sub-genre. You can easily learn how to edit your black and white portrait photography and turn into a master of monochrome thinking.